When I first started making homemade soaps, I did what most beginners probably do: I searched online, found a few recipes that looked good, and started experimenting.
Some of those recipes worked. Others definitely did not.
I ended up with soaps that felt too harsh on my skin, while other batches were so soft that they felt more like conditioner bars than soap. And that was when I realized one of the problems with simply following random soap recipes online: you really don't know if a recipe will give you the kind of bar you actually want.
A recipe might technically "work," but that doesn't necessarily mean it will have the hardness, lather, cleansing power, or conditioning properties you're looking for.
So instead of continuing to copy recipes, I decided to learn how soap making actually works.
And surprisingly, it isn't as complicated as I originally thought.
You just need to understand a few basics: the different oils you can use, how each oil affects the finished soap, how to safely handle lye, what SAP values mean, and how to use a lye calculator to formulate or double-check your recipes.
Once I learned those things, making soap became much more fun because I wasn't just hoping that a recipe would turn out well. I could actually understand why it worked.
But if you're not interested in learning all the science behind soap making just yet, don't worry. You don't have to become a soap-formulating expert before making your first bar.
This luxurious shampoo bar is a wonderful recipe to start with.
Why I Started Making Shampoo Bars
I originally made this shampoo bar for a very practical reason: travel.
We regularly take trips to a beach in the province, and every time we went, I found myself packing bottles of shampoo, body wash, facial cleansers, and other toiletries.
That's a lot of bottles for a simple beach trip.
I wanted something easier.
Ideally, I wanted to bring one small solid bar that my husband, my son, and I could use while we're there instead of packing several plastic bottles or buying another bottle of shampoo every time we arrive.
Solid bars take up very little space, there's nothing to spill inside your luggage, and they make it much easier for us to keep our waste to a minimum while we're away.
And so this little shampoo bar was at the top of my homemade projects.
Why Make a Solid Shampoo Bar?
There are plenty of reasons I love making solid bars, especially for travel.
For one, they're compact. Instead of taking a full bottle of shampoo with you, you only need a small bar tucked into a soap container.
They're also incredibly convenient when you're trying to pack light.
And because you're making the bar yourself, you get to choose the oils that go into it instead of simply grabbing whatever shampoo happens to be available at the store.
A few other reasons you might enjoy them include:
- Less bulky packaging to bring on trips
- No shampoo bottles leaking inside your bag
- Easy to portion into smaller travel-size bars
- Long-lasting when allowed to dry properly between uses
- An enjoyable way to experiment with different soap-making oils
- Less dependence on single-use or frequently replaced plastic bottles
Just remember that this is a soap-based shampoo bar. Soap is naturally alkaline, and everyone's hair responds differently to it. Hair type, water hardness, hair treatments, and personal preference can all affect how a soap-based shampoo bar feels on your hair.
What Makes a Good Shampoo Bar?
This was one of the biggest lessons I learned when I started making my own soap.
You can't simply throw a bunch of "good" oils together and expect the perfect soap.
Every oil contributes something different to the finished bar.
Some oils help create hardness. Others contribute to bubbly lather or a creamier texture. Some are more conditioning, while certain oils can make a soap more cleansing.
This is exactly why learning about oils was such a turning point for me.
For example, coconut oil is popular in soap making because it contributes hardness and plenty of bubbles. Castor oil is commonly used in smaller amounts because it can help support lather. Oils and butters such as olive oil, shea butter, or cocoa butter contribute their own characteristics as well.
The trick is finding the right balance.
Use too much of one oil and you might end up with a bar that's more cleansing than you want. Change the balance too far in the other direction and the bar might be softer or have a completely different lather.
That's also why I don't recommend randomly changing the oils in a cold-process soap recipe without recalculating the lye. The good thing is that recalculating the lye is just easy using online lye calculators.
A Quick Note About Lye
If you've never made cold-process soap before, the word lye can sound intimidating.
Lye, or sodium hydroxide, is a necessary ingredient in traditional bar soap making. It reacts with the fats and oils through a process called saponification, which creates soap.
The important part is learning how to handle it correctly.
Always wear appropriate gloves and eye protection while working with lye, work in a well-ventilated space, and keep children and pets away from your soap-making area.
And remember this very important rule:
Always add lye to water—never pour water onto lye.
Use heat-safe, lye-compatible equipment, measure ingredients by weight rather than volume, and follow your recipe carefully.
Soap making is not the time to estimate measurements.
Why SAP Values Matter
This sounds complicated, but SAP values were one of the things that finally helped soap making make sense to me.
SAP stands for saponification value.
Different oils require different amounts of lye to turn them into soap. That means you can't simply replace one oil with another and use exactly the same amount of lye.
For example, if you decide to change one of the oils in a recipe, the total amount of sodium hydroxide required may also change.
That's where a soap or lye calculator becomes incredibly useful.
You enter the types and amounts of oils you're using, choose the appropriate settings for your recipe, and the calculator helps determine the correct amount of lye.
Even now, I like checking a cold-process recipe through a reputable lye calculator before making it. It only takes a few minutes, and it's a good habit to develop.
Why I Chose These Oils for My Shampoo Bars
One of the things I've learned about soap making is that every oil brings something different to a recipe. For this shampoo bar, I wanted a combination of oils that would give me a hard, long-lasting bar with good lather while still feeling conditioning on the hair and scalp.
The four main ingredients I use are castor oil, olive oil, coconut oil, and shea butter. Each one serves a different purpose in the recipe.
One thing worth mentioning is that this is a cold-process soap-based shampoo bar. During soap making, the oils react with lye and are transformed into soap through saponification. So the finished bar isn't exactly the same as putting these raw oils directly on your hair. However, the fatty-acid profile of each oil still plays an important role in determining how hard, bubbly, creamy, cleansing, or conditioning the finished bar will be.
Castor Oil
Castor oil is one of my favorite oils to include in shampoo bars because it helps create a rich, stable lather.
Castor oil contains a high percentage of ricinoleic acid, a fatty acid that behaves differently from many of the fatty acids found in other common soap-making oils. In soap recipes, even a relatively small amount of castor oil can help boost and stabilize the bubbles produced by the other oils.
That's especially nice in a shampoo bar because you want a bar that lathers easily when you're working it through wet hair.
Castor oil is also a thick, emollient oil, which is one reason it's often included in hair and scalp products. It can help hair feel softer and more conditioned.
You'll sometimes hear claims that castor oil makes hair grow faster. I wouldn't make that promise. I primarily use it in this recipe because of what it contributes to the lather and overall conditioning feel of the bar.
Olive Oil
Olive oil is a classic soap-making ingredient and one I like using when I want a gentler, more conditioning bar.
It is particularly rich in oleic acid, a fatty acid that contributes a mild, creamy quality to soap rather than lots of big bubbles.
Olive oil is also widely used in hair-care products as an emollient. Oils like this can coat the hair and help it feel smoother, softer, and less rough.
In a shampoo bar recipe, olive oil helps balance some of the stronger cleansing properties of coconut oil.
There's a tradeoff, though. Soap made with a lot of olive oil can initially be softer and may need a longer curing time. That's another reason I like combining it with harder oils and butters rather than relying on olive oil alone.
Coconut Oil
Coconut oil is probably one of the most useful ingredients in this recipe because it contributes several things at once.
In cold-process soap, coconut oil helps make the finished bar:
- Harder
- Longer lasting
- More cleansing
- Much more bubbly
Coconut oil is rich in lauric acid, which is one of the reasons it creates such excellent lather in soap.
Coconut oil is also interesting from a hair-care perspective because it has an affinity for the hair shaft. Unlike many oils that mainly sit on the surface of hair, coconut oil can penetrate into the hair to some degree and has been studied for its ability to help reduce protein loss when used as a hair oil.
That doesn't mean a coconut-oil soap bar has exactly the same effect as applying plain coconut oil to your hair, but its fatty-acid composition still makes coconut oil an extremely useful ingredient when formulating shampoo bars.
The important thing is not using too much.
A high percentage of coconut oil can create a soap that is very cleansing, which may leave some people's hair or scalp feeling dry. That's why I balance it with more conditioning oils such as olive oil, castor oil, and shea butter.
Shea Butter
Shea butter is what gives this recipe a little extra luxury.
It contains a combination of fatty acids, including oleic and stearic acids, and is commonly used in skin and hair products because of its rich, emollient feel.
In soap making, shea butter helps contribute to a firmer bar and a creamy, luxurious lather.
I also like it in shampoo bars because it helps balance the recipe. Coconut oil gives me hardness, cleansing power, and bubbles, while shea butter contributes more richness and conditioning.
Shea butter is especially appealing in products designed for hair that tends to feel dry because emollient ingredients can help smooth the surface of the hair and reduce that rough, stripped feeling.
That said, everyone's hair is different. Someone with very fine or easily weighed-down hair may prefer a different formulation than someone with thick or dry hair.
Why These Four Oils Work Well Together
The reason I like this combination is that I'm not relying on one oil to do everything.
Coconut oil gives the bar hardness, cleansing power, and bubbles.
Olive oil adds mildness and conditioning.
Castor oil helps produce and stabilize a richer lather.
And shea butter adds hardness, creaminess, and a more luxurious feel.
Together, they create a much more balanced bar than I would get by using one or two oils alone.
That's one of the most useful things I've learned about formulating soap: it's all about balance.
You aren't necessarily looking for the "best" oil. You're looking for a combination of oils whose properties complement one another.
And that's exactly what I wanted for this shampoo bar—a compact little bar that cleans well, lathers nicely, lasts through our trips, and doesn't feel like I'm washing my hair with an overly harsh soap.
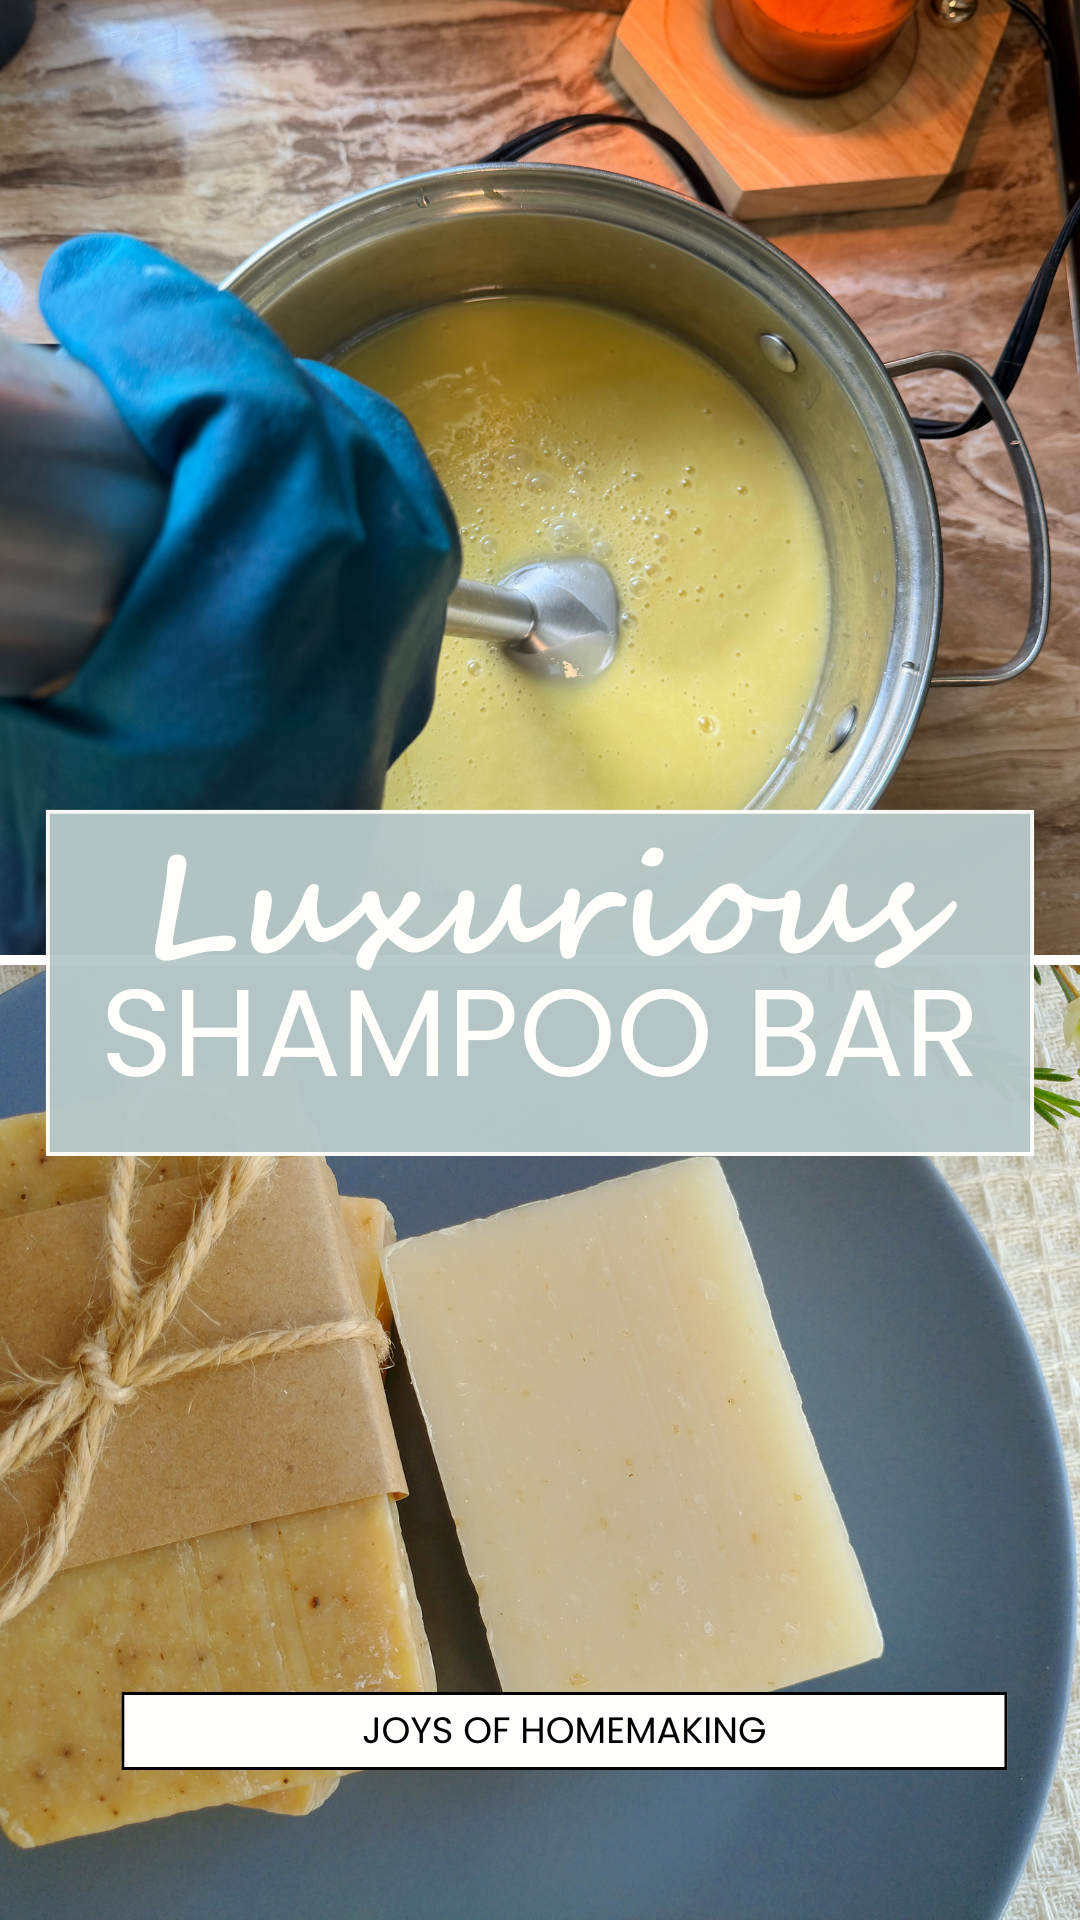
Luxurious Shampoo Bar Recipe
Important: Use the exact oil, water, sodium hydroxide, fragrance, and additive quantities from your tested formula here. Because lye amounts depend on the precise oils and weights used, they should never be guessed or copied from a different formulation.
Ingredients
Add your final tested recipe here:
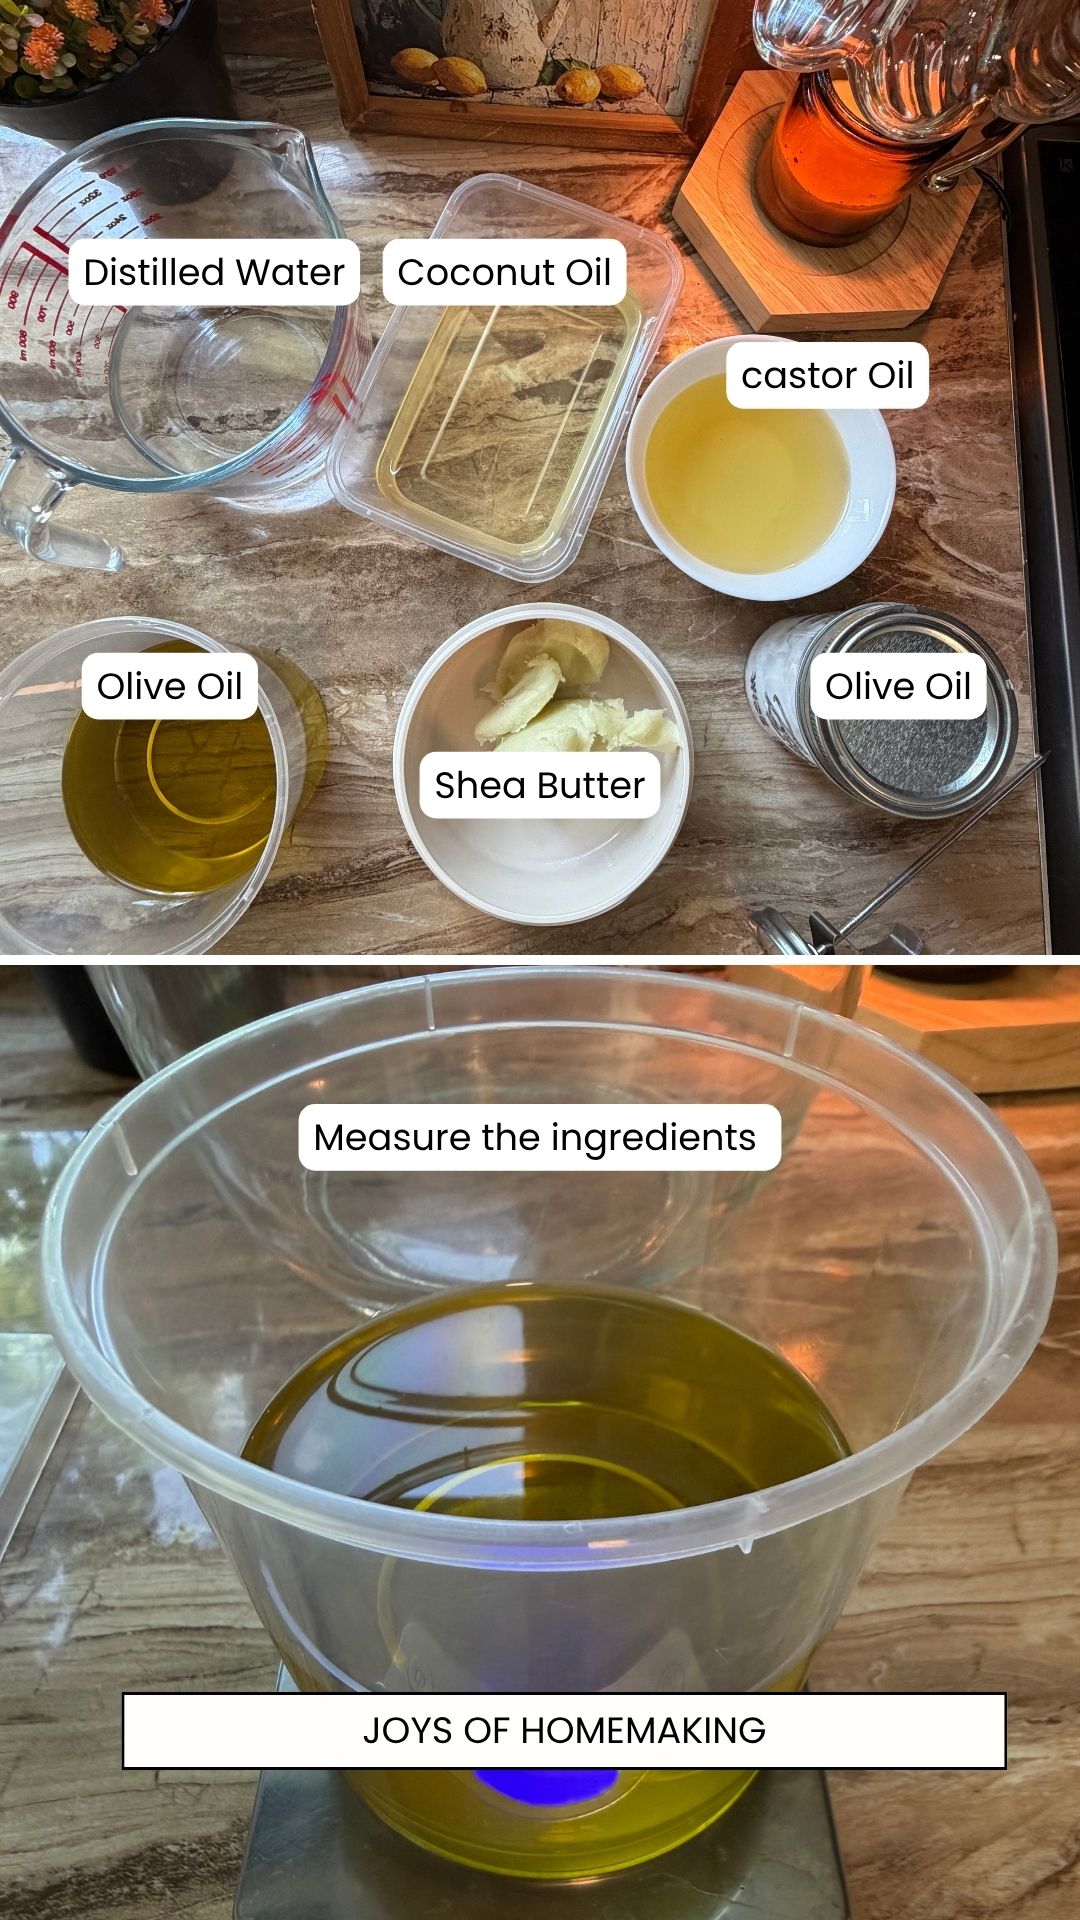
- Olive Oil - 9.50 oz / 269.35 g
- Refined Coconut Oil - 8.00 oz / 226.77 g
- Shea Butter - 2 oz / 56.70 g
- Castor - 3.50 oz / 99.19 g
- Distilled Water - 7.81 oz / 221.47 g
- Sodium hydroxide (lye) - 3.35 oz / 94.92 g
- Essential oil or soap-safe fragrance- 0.28 oz / 0.45 g (optional)
Equipment
You'll also need:
- Digital kitchen scale
- Heat-resistant containers suitable for soap making (stainless steel or plastic)
- Silicone spatula / stainless steel spoon for stirring
- Immersion blender
- Soap mold - I got mine here.
- Gloves
- Protective eyewear
- Thermometer - I use this kind.
Avoid using aluminum equipment because sodium hydroxide reacts with aluminum.
How to Make Shampoo Bars
1. Prepare Your Work Area
Before you start, measure everything and have your equipment ready.
Soap making moves much more smoothly when you're not searching for a spatula while your oils and lye solution are already sitting on the counter.
Put on your gloves and protective eyewear before handling sodium hydroxide.
2. Prepare the Lye Solution
Make the lye solution by mixing lye and water.
Slowly add the lye to the water, stirring carefully until it dissolves.
The mixture will become very hot, which is normal.
Set it somewhere secure and well ventilated to cool.
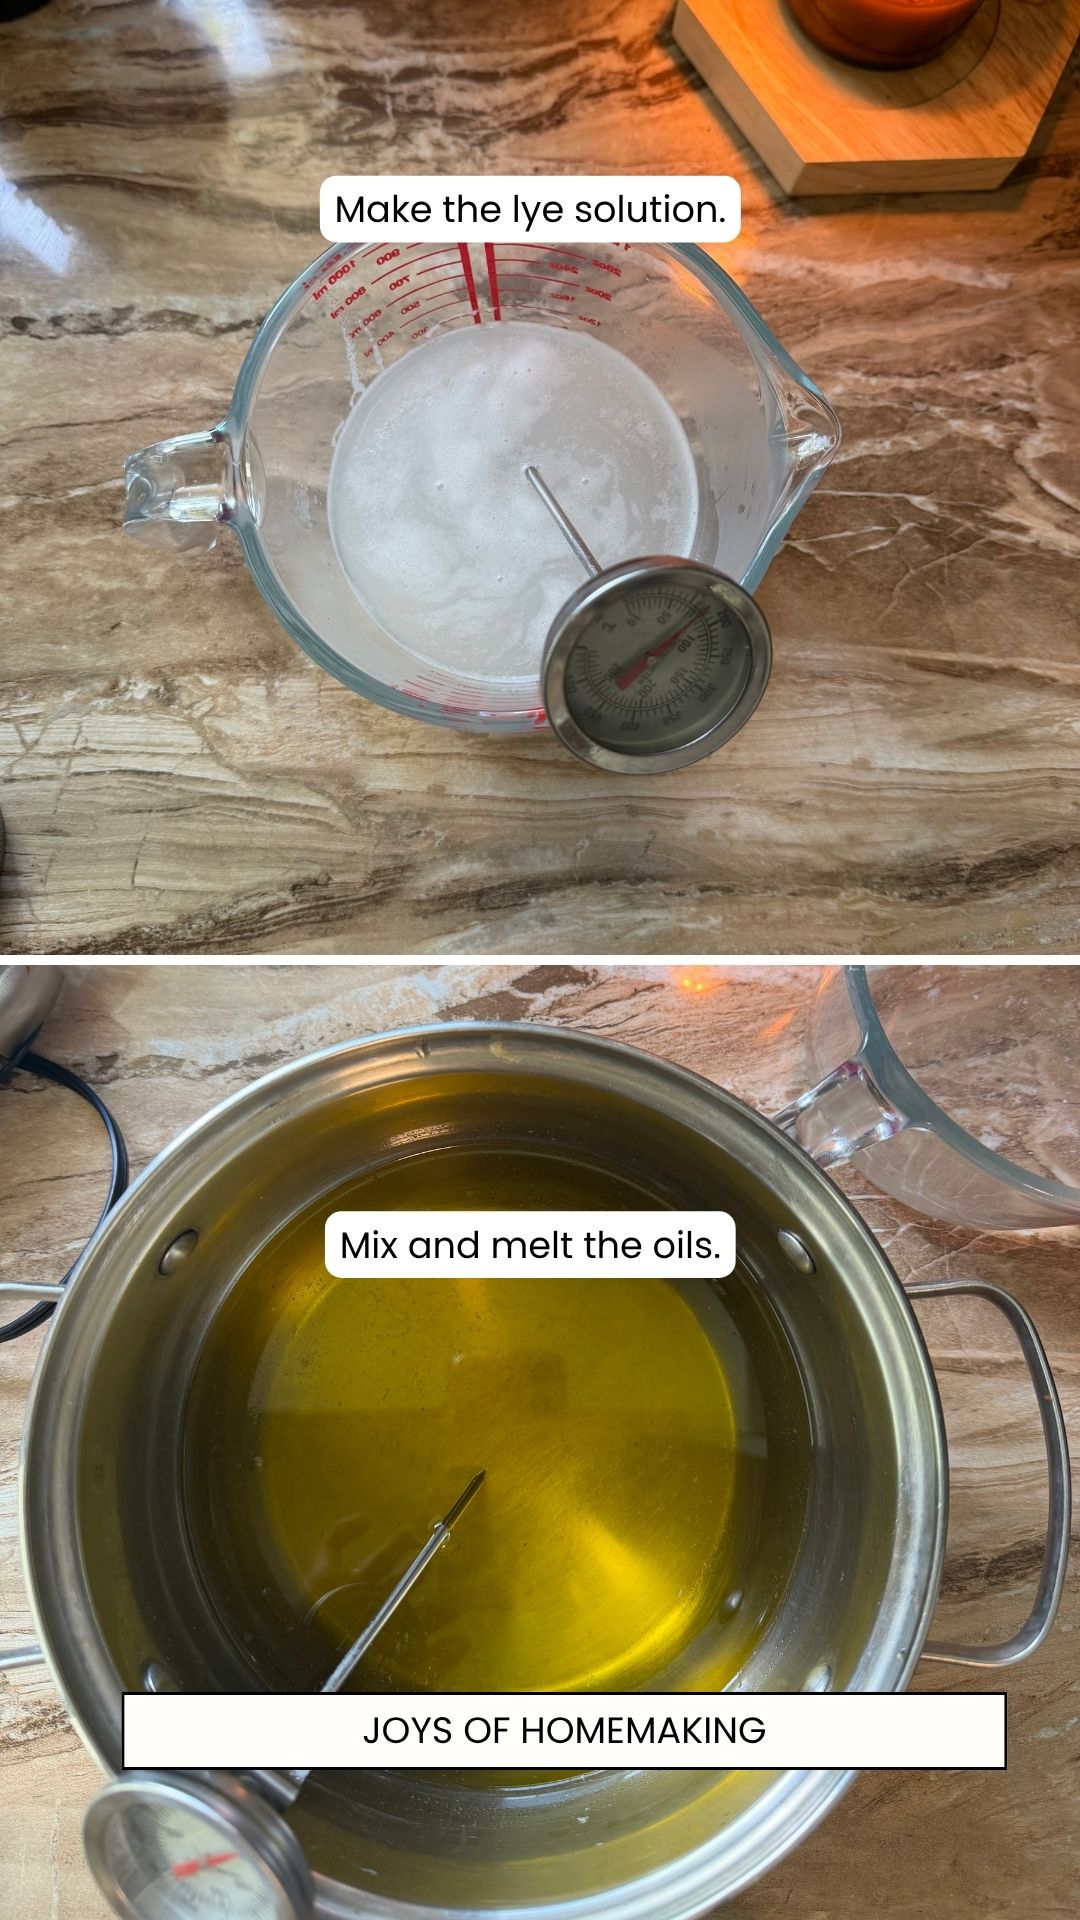
3. Heat the Oils
Gently melt the solid oil or butter, such as shea butter, then combine it with the liquid oils. Warm the mixture just until everything is completely melted and well combined.
Your freshly mixed lye solution will become very hot on its own. You do not need to heat the oils to match the lye solution at its hottest temperature. Instead, set both mixtures aside and allow them to cool.
For this recipe, while the lye solution is cooling, I heat the oils to 130-150 F.
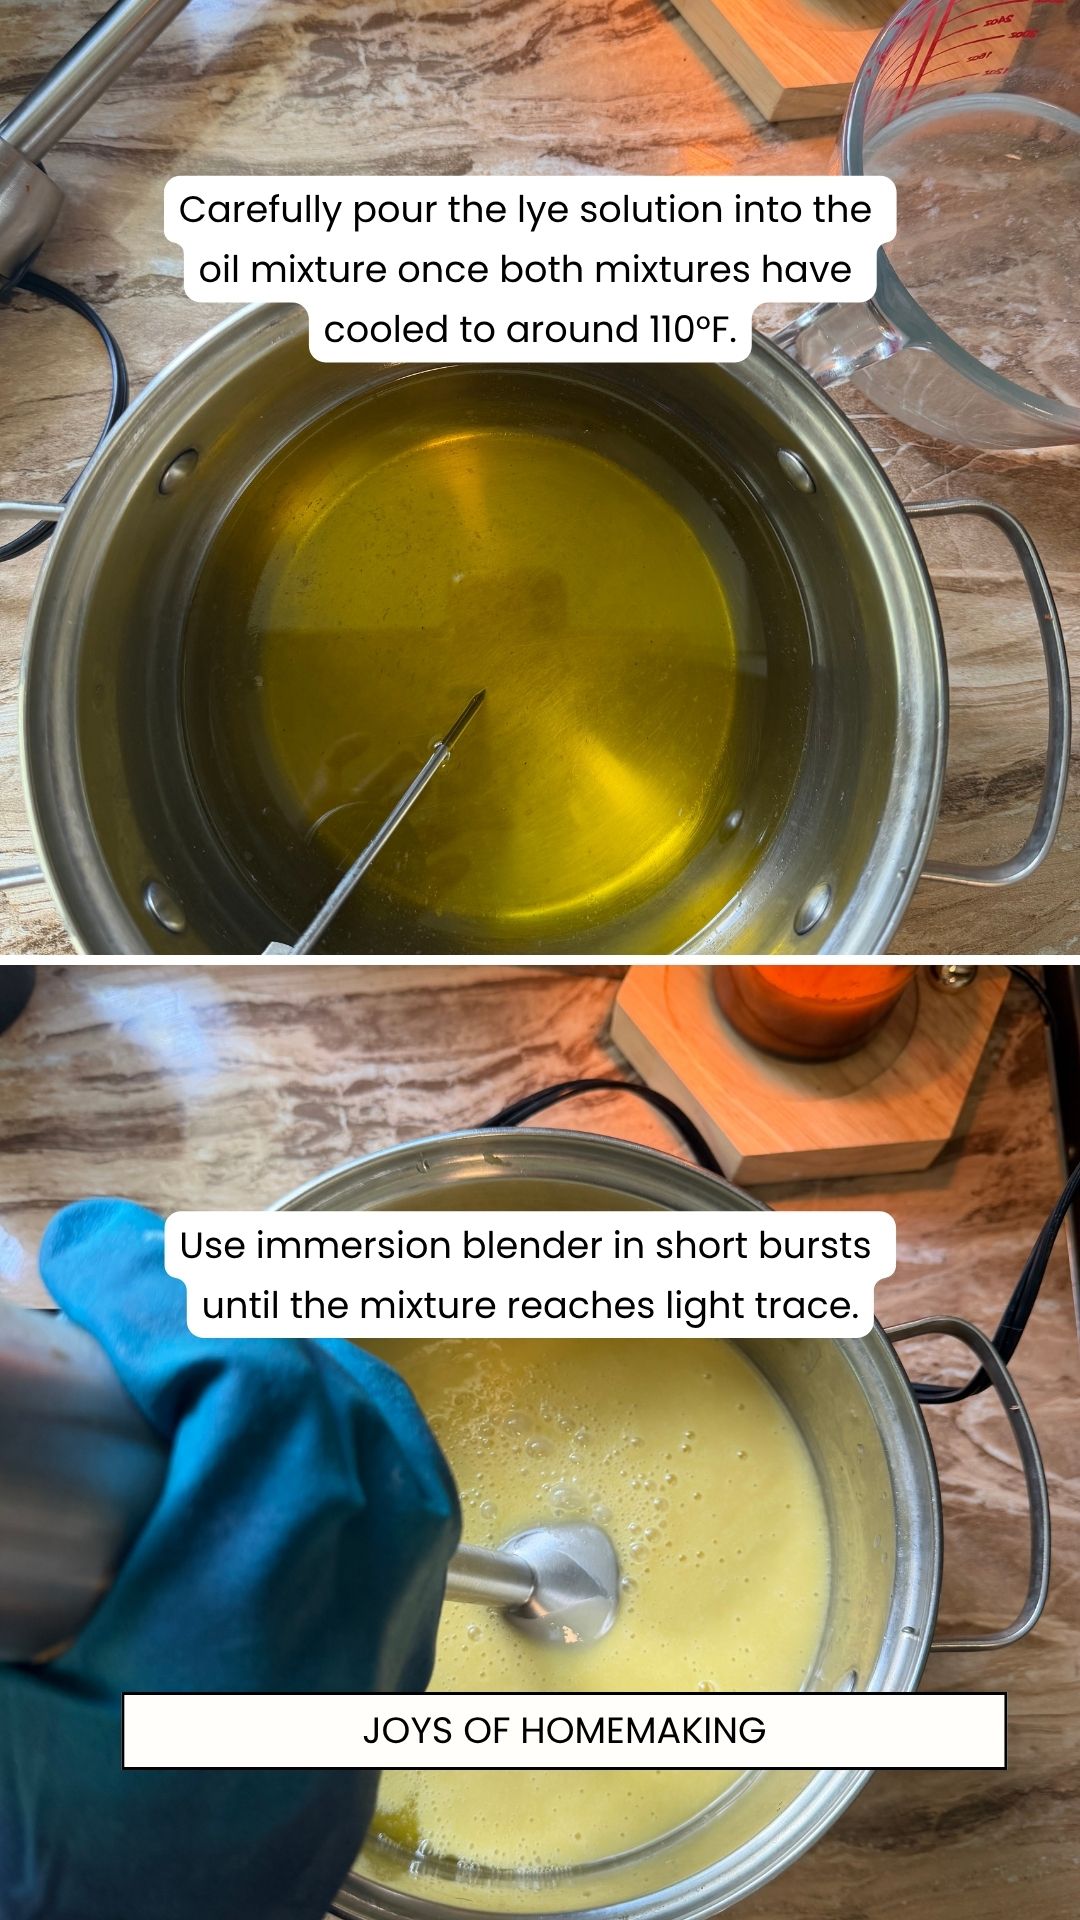
I like to combine the oils and lye solution when they have both cooled to around 100–110°F. They don't have to be exactly the same temperature—a small difference is perfectly fine.
If your oils are much hotter than the lye solution, you can place the oil container in a cool water bath to help it cool more quickly. Once the oils and lye solution are within a similar temperature range, you can proceed with mixing them together.
4. Combine
Carefully pour the lye solution into your oils.
Use your immersion blender in short bursts, alternating with stirring, until the mixture reaches light trace.
At light trace, the soap mixture is emulsified and slightly thickened but still easy to pour.
Tip: Don't overmix! As soon as the soap batter reaches light trace, stop blending and pour it into your soap molds right away.
5. Add Fragrance or Other Ingredients
If you're using a soap-safe fragrance, add it in at this point. I used lavender-lemon mix for this batch.
Remember: Don't assume that an ingredient is safe for soap simply because it's natural. Do your research to know whether the fragrance you're adding is soap-safe.
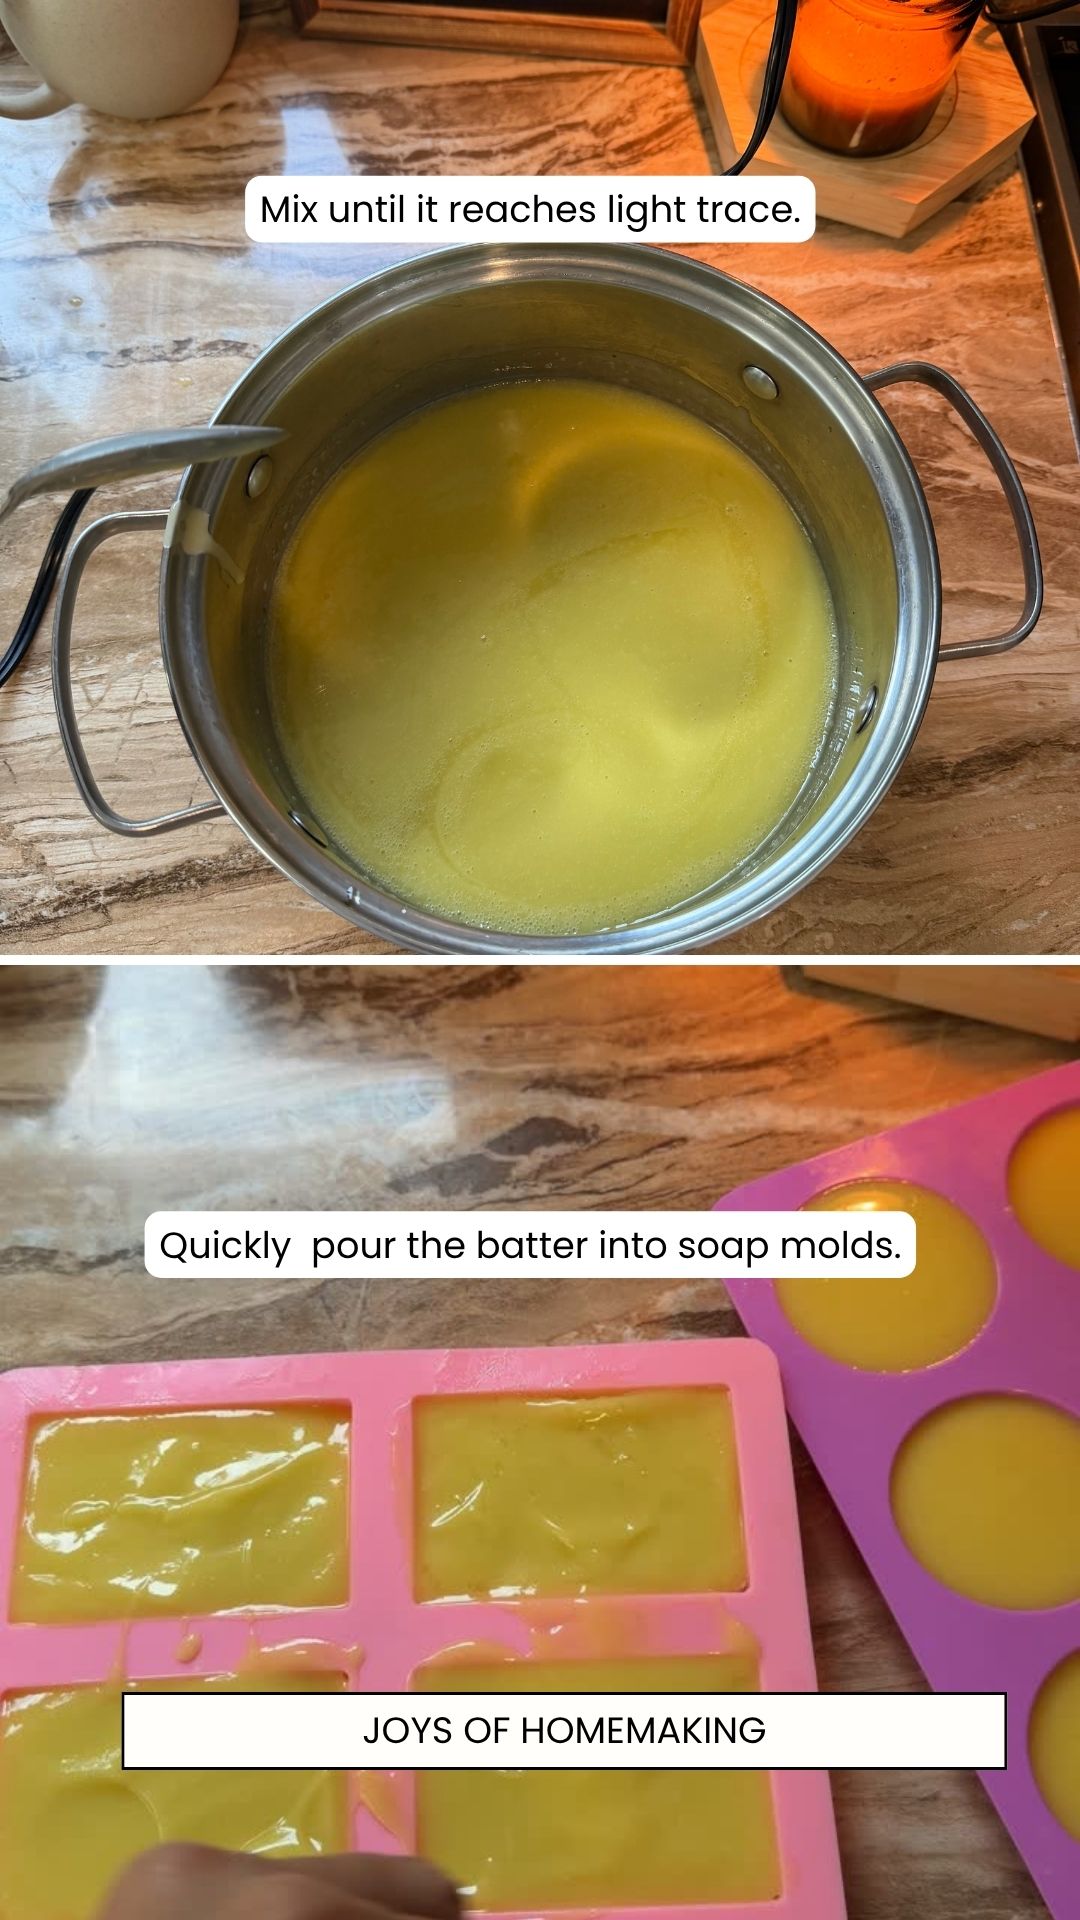
6. Pour Into the Mold
Pour the soap batter into your mold and gently tap the mold against the counter to help release large air pockets.
Place the mold in a well-ventilated area and leave the soap undisturbed for about 5 days or more, or until it is firm enough to unmold. Unlike my other soap recipes, this takes a bit more time to firm up.
7. Unmold and Cut
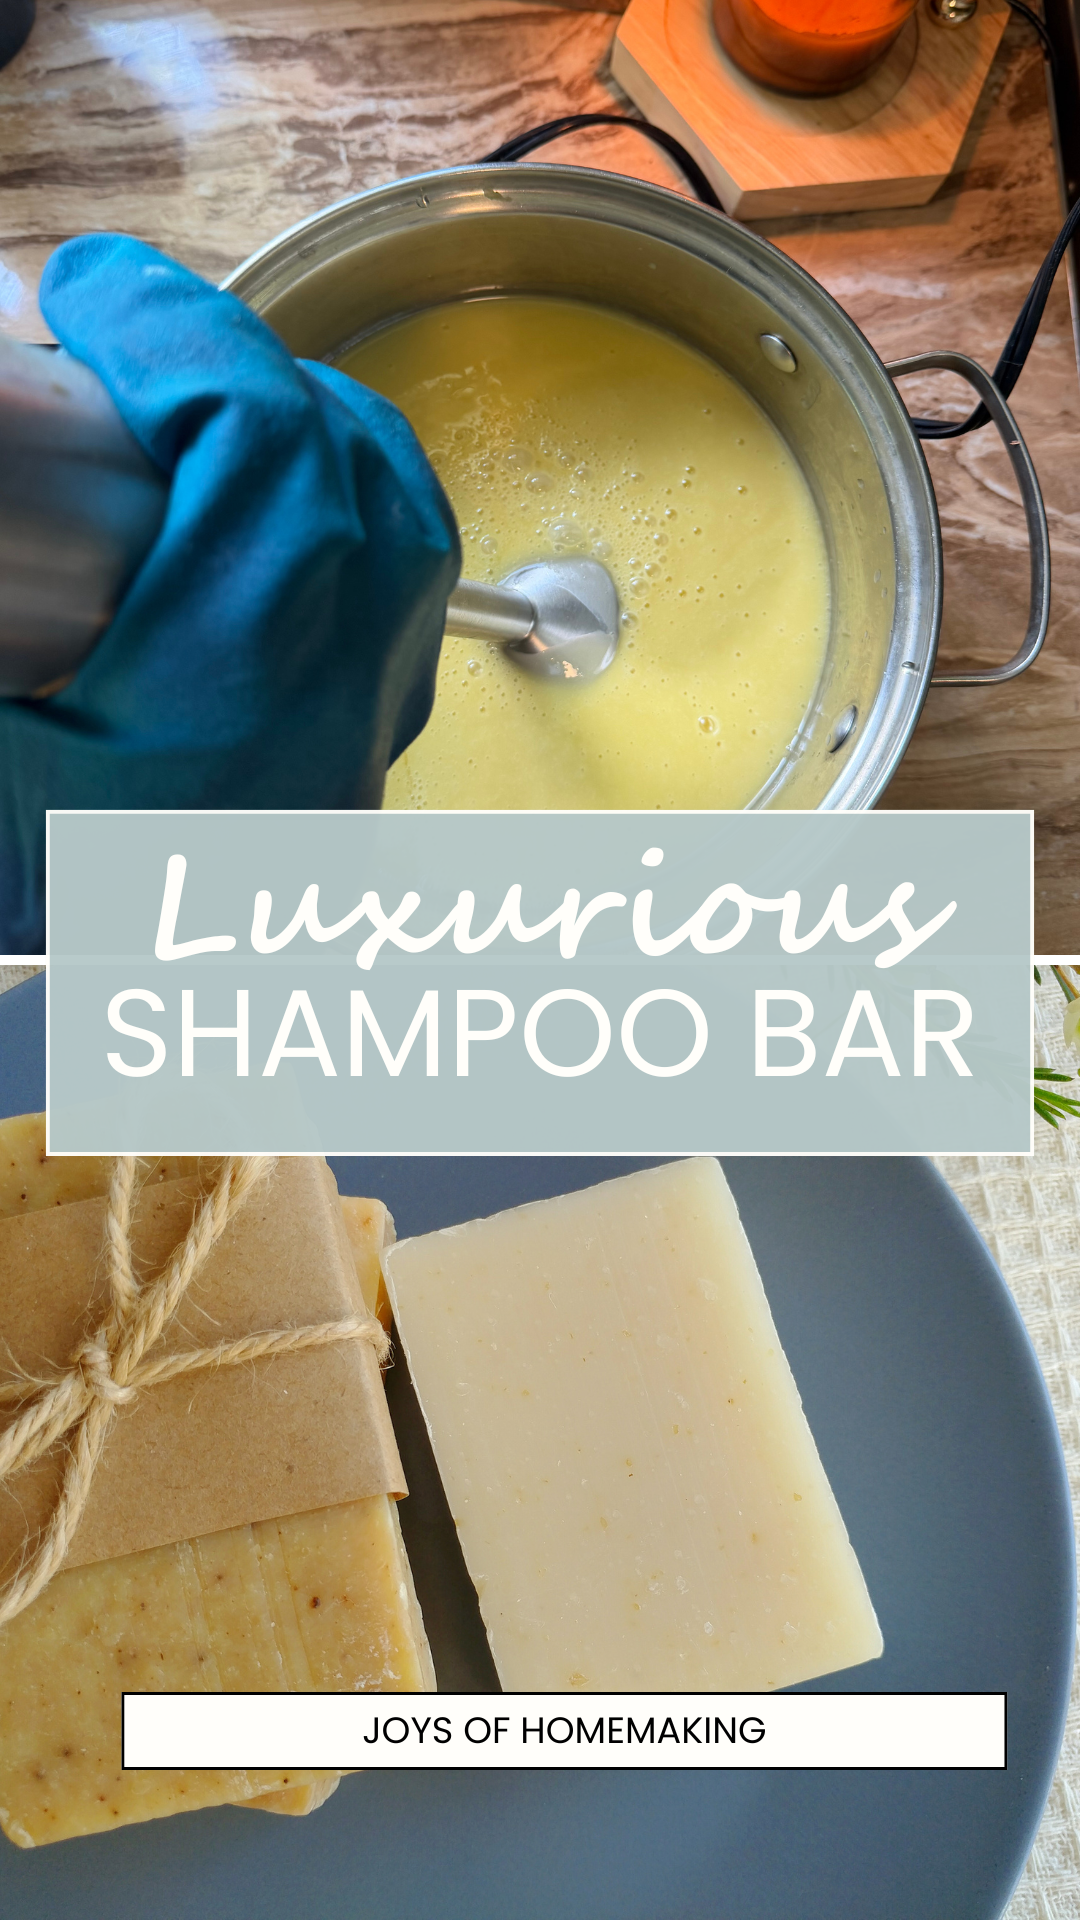
Once the soap is firm enough to remove from the mold, unmold it and cut it into bars.
If the soap still feels very soft, give it more time rather than forcing it out of the mold.
Don't Skip the Cure
This might be the hardest part of soap making when you're excited about a new batch.
You have to wait.
Freshly cut cold-process soap needs time to cure. During this period, excess water evaporates and the bars become harder and longer-lasting.
Follow the cure time appropriate for your particular formula. Many cold-process soaps are cured for several weeks before use.
Place your bars somewhere cool, dry, and well ventilated with space around them for air to circulate.
The difference between a freshly made bar and a properly cured bar can be significant, so don't rush this step.
How to Use This Shampoo Bar
Using a solid shampoo bar is simple.
Wet your hair thoroughly, wet the bar, and either rub the bar between your hands to create lather or gently apply the lather to your hair.
Then, massage your scalp and rinse thoroughly.
Because this is a soap-based shampoo bar rather than a conventional pH-balanced shampoo, it may feel different from bottled shampoo. Some people enjoy using soap-based bars on their hair, while others find that their hair prefers a different type of cleanser.
Your results can also vary depending on your hair and the water where you live or travel.
Make Smaller Bars for Traveling
One of my favorite things to do is cut a portion of my batch into smaller bars specifically for travel.
You don't need to bring a giant bar on a weekend trip.
A small piece is usually much easier to carry, and you can keep the rest of your cured bars at home.
When we're heading to the beach, I simply bring one small bar and pack it with our toiletries.
Just make sure the bar has a chance to dry between uses. Leaving a wet bar sitting in a closed container can make it soften much faster.
A draining soap dish or container works much better.
A Few Tips If You're New to Soap Making
If you're making cold-process soap for the first time, my biggest advice is don't start experimenting with the formula immediately.
Make a tested recipe as written first.
See what the finished soap feels like.
Then, if you decide you want more hardness, different lather, or another characteristic, start learning how the individual oils affect your soap.
And anytime you change the type or quantity of oils in a cold-process formula, run the new recipe through a reliable lye calculator again.
Never assume the original lye quantity will still be correct.
Learning how to formulate soap may sound technical at first, but once you understand the basics, it gives you so much more control over what you're making.
If you want to learn more about soap making, I can highly recommend this book.
Final Thoughts
These homemade shampoo bars are a simple, practical alternative to bottled shampoo, especially for travel. They’re easy to pack, help reduce plastic waste, and let you choose the oils you want to use.
If you’re new to soap making, follow the recipe carefully, handle lye safely, and always use a lye calculator before changing any ingredients.
Looking for More Homemade Ideas?
Browse around and get inspired!