Hello, homemaker!
Before we get into these cinnamon rolls, I feel like I should say this first: I am not a recipe developer, and I definitely don't claim to be an expert baker or cook.
This little space on the internet has always been about the things I make for my home and family, the simple skills I'm learning along the way, and the recipes and projects that turn out well enough that I want to share them with you.
And these cinnamon rolls?
Cinnamon rolls aren't exactly a necessity in our kitchen. They're not one of those pantry staples I make every week due to health reasons, and obviously, we don't eat cinnamon rolls every day—although I'm pretty sure my family would love to eat it every day!
But friends, this recipe was just too good not to share.
After several tries, a few disappointments, and plenty of experimenting, I finally made cinnamon rolls that turned out exactly the way I wanted them to.
Soft.
Fluffy.
Buttery.
Full of cinnamon sugar.
And then you spread that creamy cream cheese frosting over the warm rolls and...
Well, they're just so good.
These cinnamon rolls ended up becoming one of my favorite baking projects I've made so far, which is why I decided they absolutely deserved a spot in my 100 Homemade Projects in 1 Year series.
Why I Wanted to Learn How to Make Cinnamon Rolls
One of the biggest reasons I started learning how to make more things at home was simply because I wanted to rely less on the store.
Some things I make are very practical—bread, pantry staples, mixes, soaps, cleaners, and other everyday household things.
Cinnamon rolls are obviously a little different.
They're not something we need.
They're something we make because they're delicious.
And I think those homemaking skills matter too.
There have been plenty of times when we've bought cinnamon rolls from the store and ended up disappointed. Sometimes they're dry. Sometimes they taste old. Sometimes there's hardly any filling.
Once you learn how to make them yourself, you can make them exactly the way you like them.
Plus, this is one of those recipes that would be wonderful to know for special occasions.
I can see myself making a pan when we have guests, for a slow weekend breakfast, during the holidays, or even baking a batch to give to someone as a homemade gift.
What Makes These Cinnamon Rolls So Good?
First, I wanted a cinnamon roll recipe that I could make and enjoy within the same day. I didn't want a long waiting period or overnight proofing. If I'm craving cinnamon rolls today, I want to be able to make them today! I know this recipe is kind of dangerous, but if you're looking for a quicker homemade cinnamon roll recipe without having to wait until the next morning, this is a great one to try.
Second, you'll love the dough of these cinnamon rolls.
I wanted it to be incredibly soft and tender—not dry, tough, or too bread-like. After trying a few different methods, I finally landed on a dough that gives me the soft, fluffy cinnamon rolls I was looking for.
Then, another reason you'll love this recipe is the generous filling.
A generous layer of butter, dark brown sugar, and cinnamon melts into all those beautiful swirls as the rolls bake, giving you that rich, gooey cinnamon filling in every bite.
And finally, there's the cream cheese frosting.
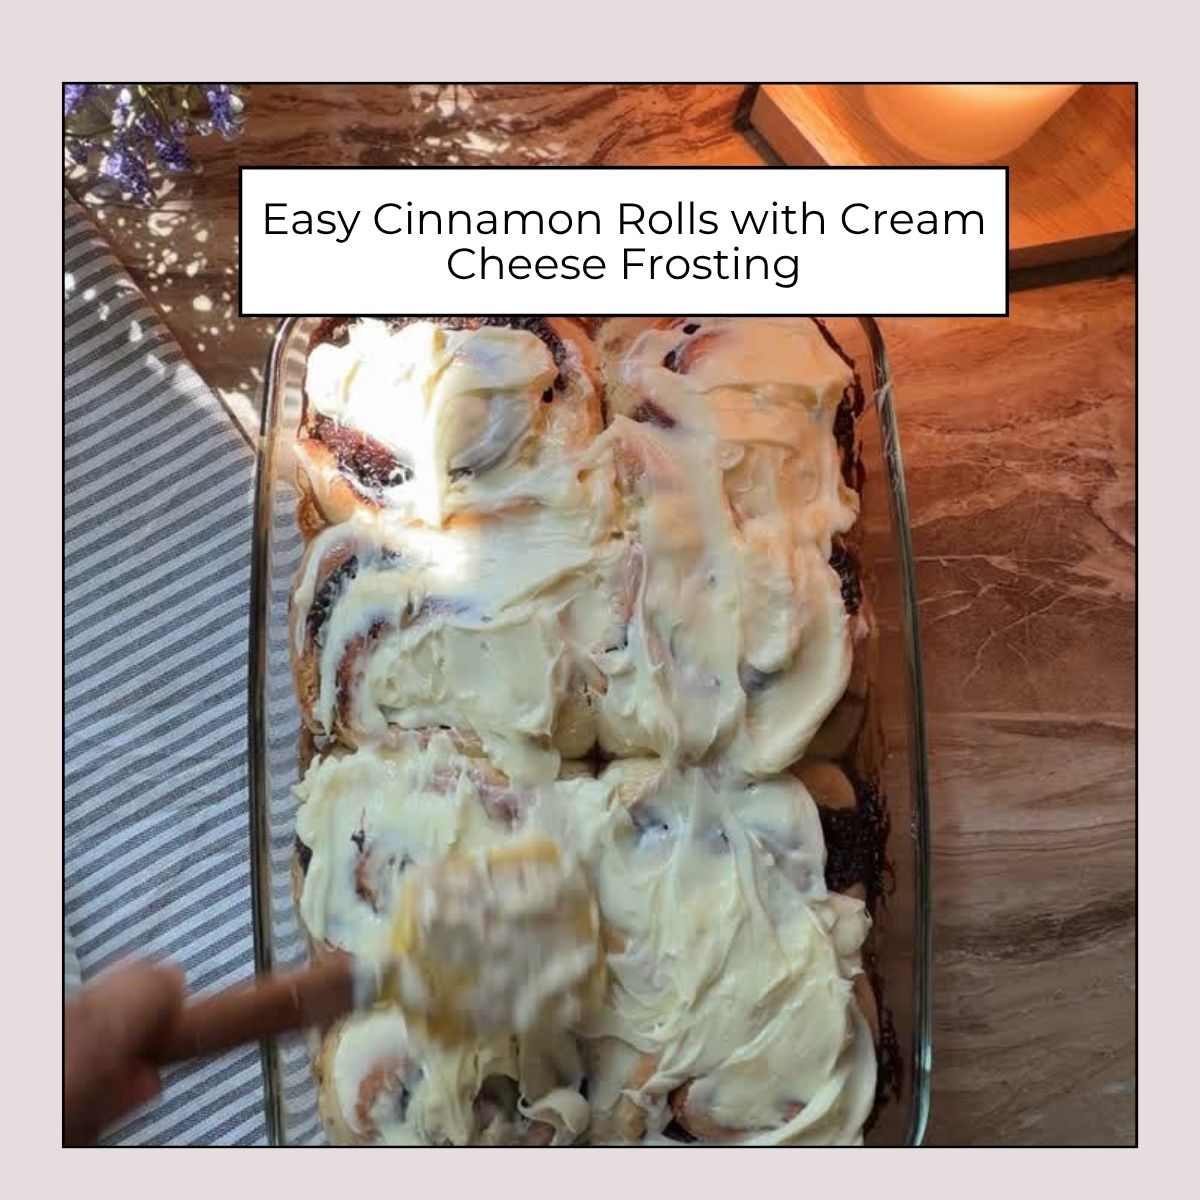
I love spreading it over the rolls while they're still slightly warm so some of the frosting melts into the layers while the rest stays creamy on top.
Soft dough, gooey cinnamon filling, and cream cheese frosting—that combination is what makes these cinnamon rolls so hard to resist.
Ingredients for Homemade Cinnamon Rolls
I recommend using a kitchen scale for the dough ingredients.
For the dough, you'll need:
- 400g or 2 ¾ cup all-purpose flour (I'd rather measure this by weight for accuracy.)
- 180 ml warm milk for the dough (180 ml is slightly over ¾ cup)
- ¼ cup warm milk (optional) for baking
- 2 ¼ teaspoon active dry yeast or instant yeast
- 50 g or ¼ cup sugar
- 1 large egg
- 56 g or 4 tablespoons butter
- ½ teaspoon salt
For the cinnamon filling:
- 70g softened butter or 5 tablespoons of butter
- 140g dark brown sugar or mascovado sugar
- 3 tablespoon ground cinnamon
- ½ teaspoon salt
And for the cream cheese frosting:
- 4 oz cream cheese
- 3 tablespoon butter
- ¼ cup powdered sugar
- Vanilla extract
- A splash of milk or cream, if needed
A Few Things I've Learned About Making Cinnamon Rolls
Cinnamon rolls aren't difficult once you understand the basic process, but I've learned that there are a few things that can make a big difference.
Don't Make the Milk Too Hot
The milk should be warm, not boiling hot.
If you're using active dry yeast, very hot liquid can damage the yeast and keep your dough from rising properly.
Think pleasantly warm rather than steaming.
Don't Add Too Much Flour
This is probably one of the biggest lessons I've learned while baking bread and other yeast doughs.
It's tempting to keep adding flour when the dough feels slightly sticky, but too much flour can give you dense or dry cinnamon rolls.
The dough should be softer than sandwich bread dough.
It may feel slightly tacky at first, and that's okay.
Give the Dough Time to Rise
Don't rush the rising time.
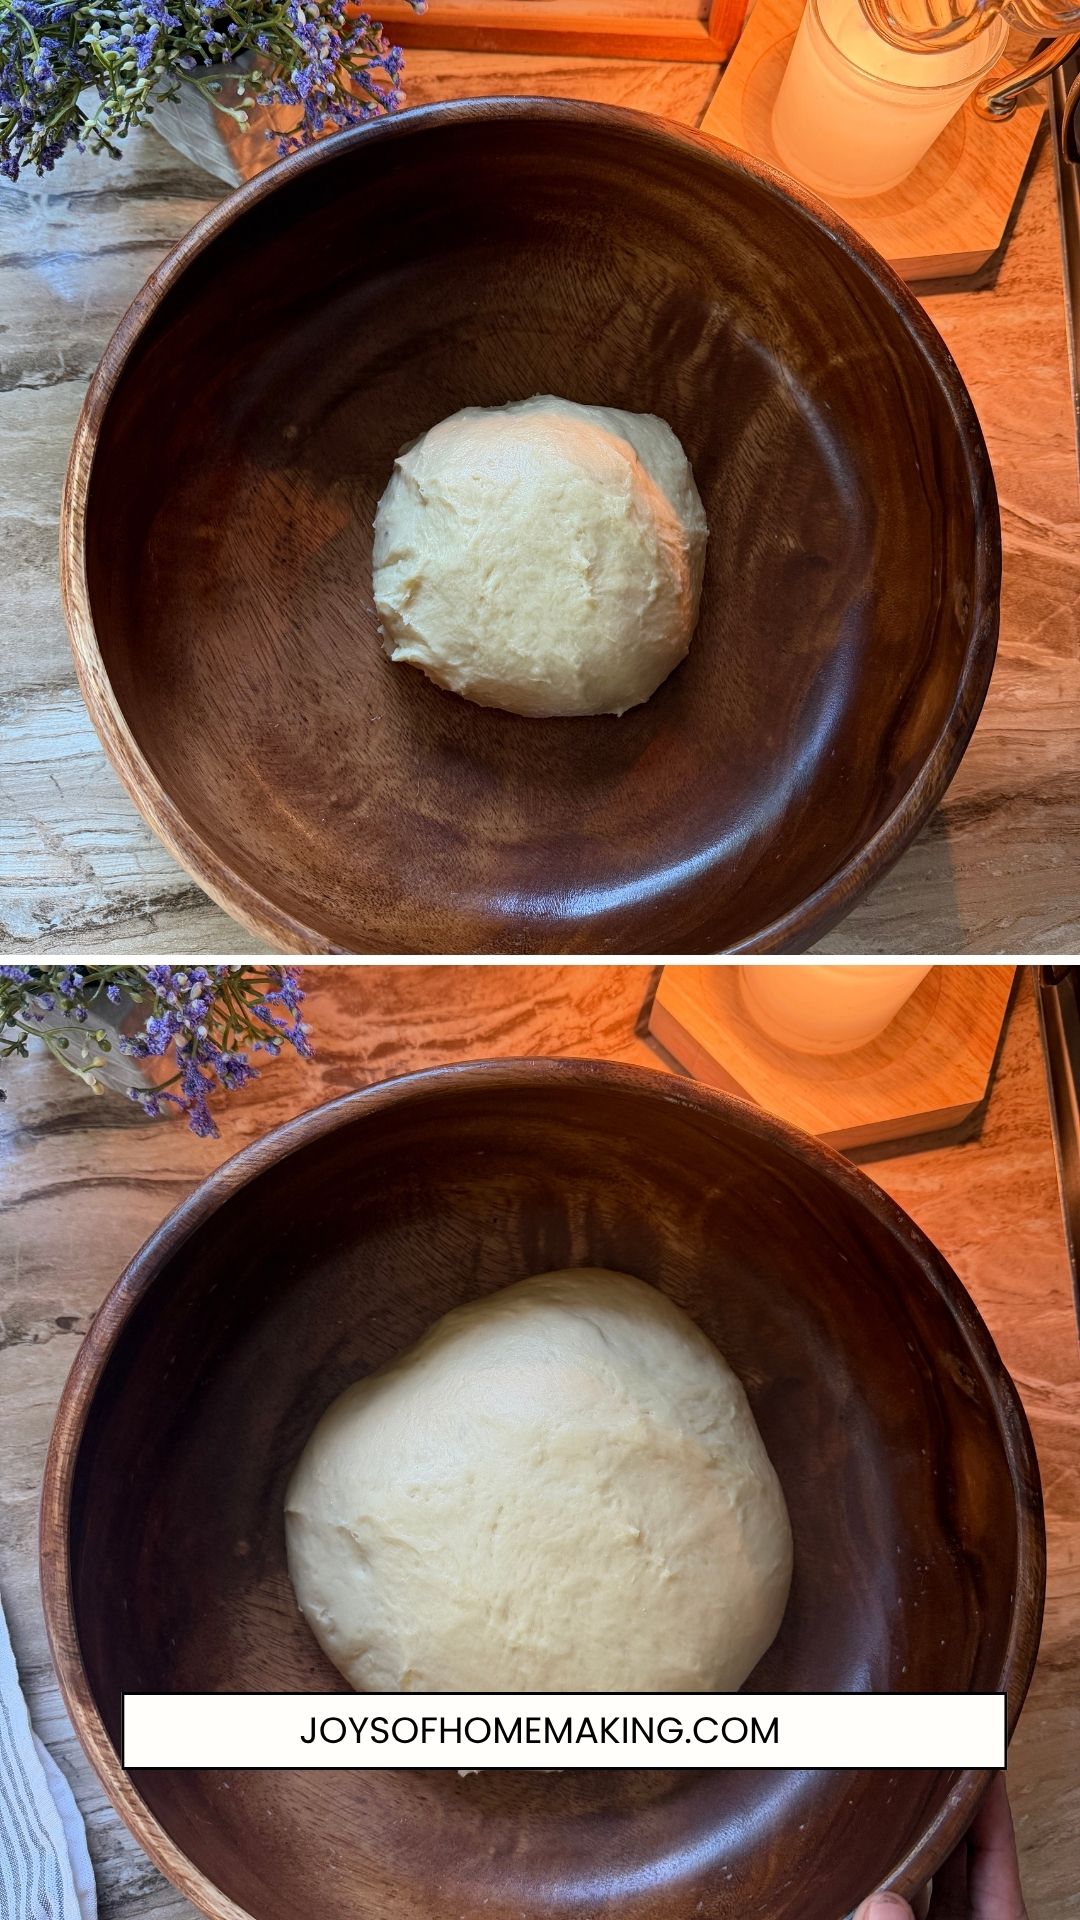
The dough should become noticeably puffy and roughly double in size before you roll it out.
Your kitchen temperature will affect how long this takes, so I prefer watching the dough rather than watching the clock. Usually it takes 1.5 hours but if the dough looks it hasn't grown much, give it more time.
Don't Roll the Dough Too Thin
You want enough dough between those cinnamon sugar layers so the finished rolls stay soft and fluffy.
Roll it into a large rectangle, but don't make it paper thin. This recipe is for 6-8 rolls, so the length of one side of the rectangle should just be enough for 8 rolls (about 2 inches thickness per roll.)
Be Generous With the Filling
This is not the place to be shy with cinnamon sugar. You either can mix the butter and sugar into a paste and spread it on the flattened dough or spread the softened butter over the dough, then sprinkle the cinnamon and brown sugar mixture evenly over the entire surface.
Make sure you get close to the edges too.
How to Make Homemade Cinnamon Rolls
1. Make the Dough
Start by combining your warm milk, yeast, and sugar.
If you're using active dry yeast, let it sit for a few minutes until it becomes slightly foamy.
Add the egg, salt, and flour.
Mix until everything starts coming together into a soft dough. Then, slowly add the butter and knead the dough until it becomes smooth and elastic.
You can do this by hand for about 15-20 minutes or use a stand mixer with a dough hook for 10-12 minutes. Honestly, I don't really look at the time. I just look at and feel the dough.
It's ready when:
- The dough pulls away: The dough forms a ball and pulls clean from the sides of the mixing bowl.
- The dough is smooth and elastic: The surface looks smooth, stretchy, and slightly tacky, but it does not stick to your fingers when you touch it.
- The dough passes the windowpane test: Pull a small piece of dough thin. You should see light pass through it without the dough tearing right away.
2. Let the Dough Rise (first rise)
Place the dough in a lightly greased bowl and cover it.
Let it rise in a warm place until it has roughly doubled in size. It takes 1-1.5 hours. or more.
This is where a little patience pays off.
3. Make the Cinnamon Filling
While the dough is rising, combine the brown sugar and cinnamon.
You'll also want your butter softened enough that you can easily spread it over the dough.
4. Roll Out the Dough
Once the dough has risen, gently place it on a lightly floured surface.
Roll it into a large rectangle.
Spread the softened butter evenly over the dough, then sprinkle the cinnamon sugar mixture all over the top.
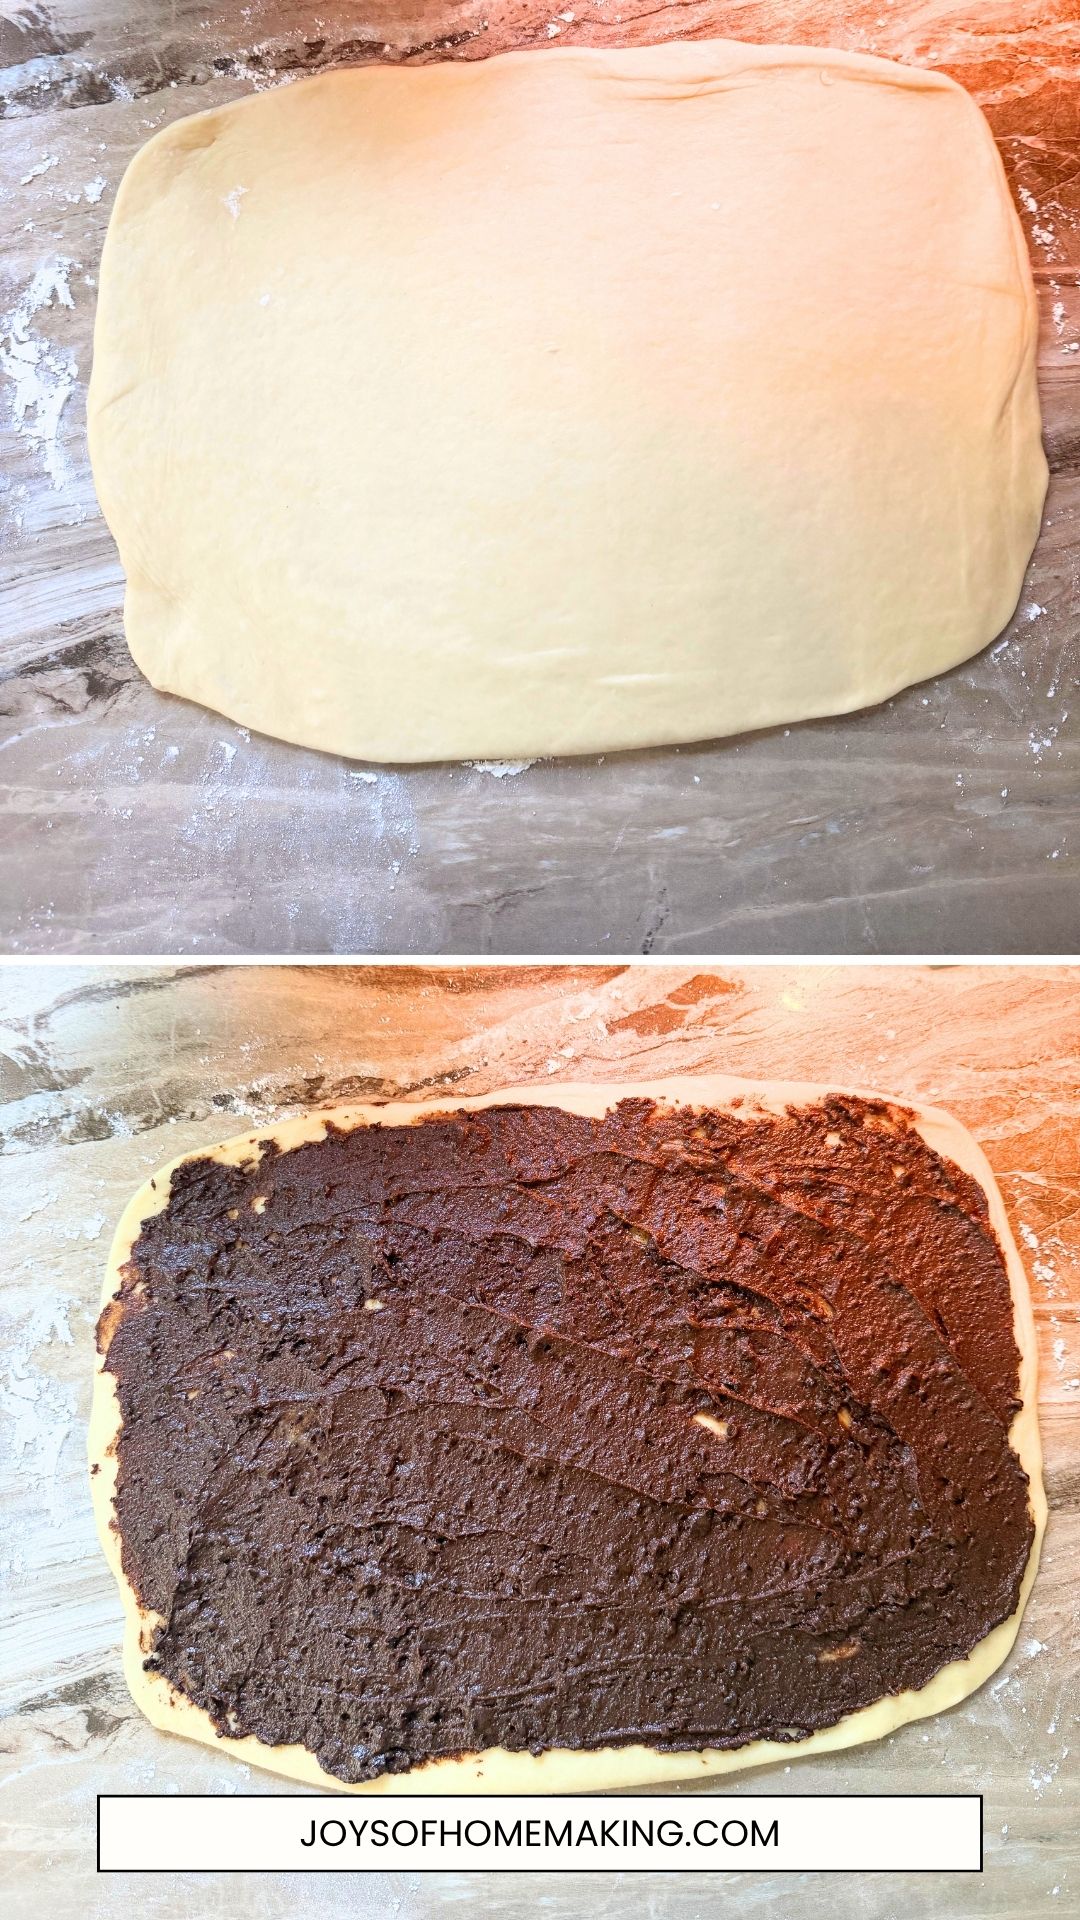
The size of the rectangle is 11 x 16-18 inches to make 8 cinnamon rolls. Each roll is about 2 inches thick.
5. Roll and Slice
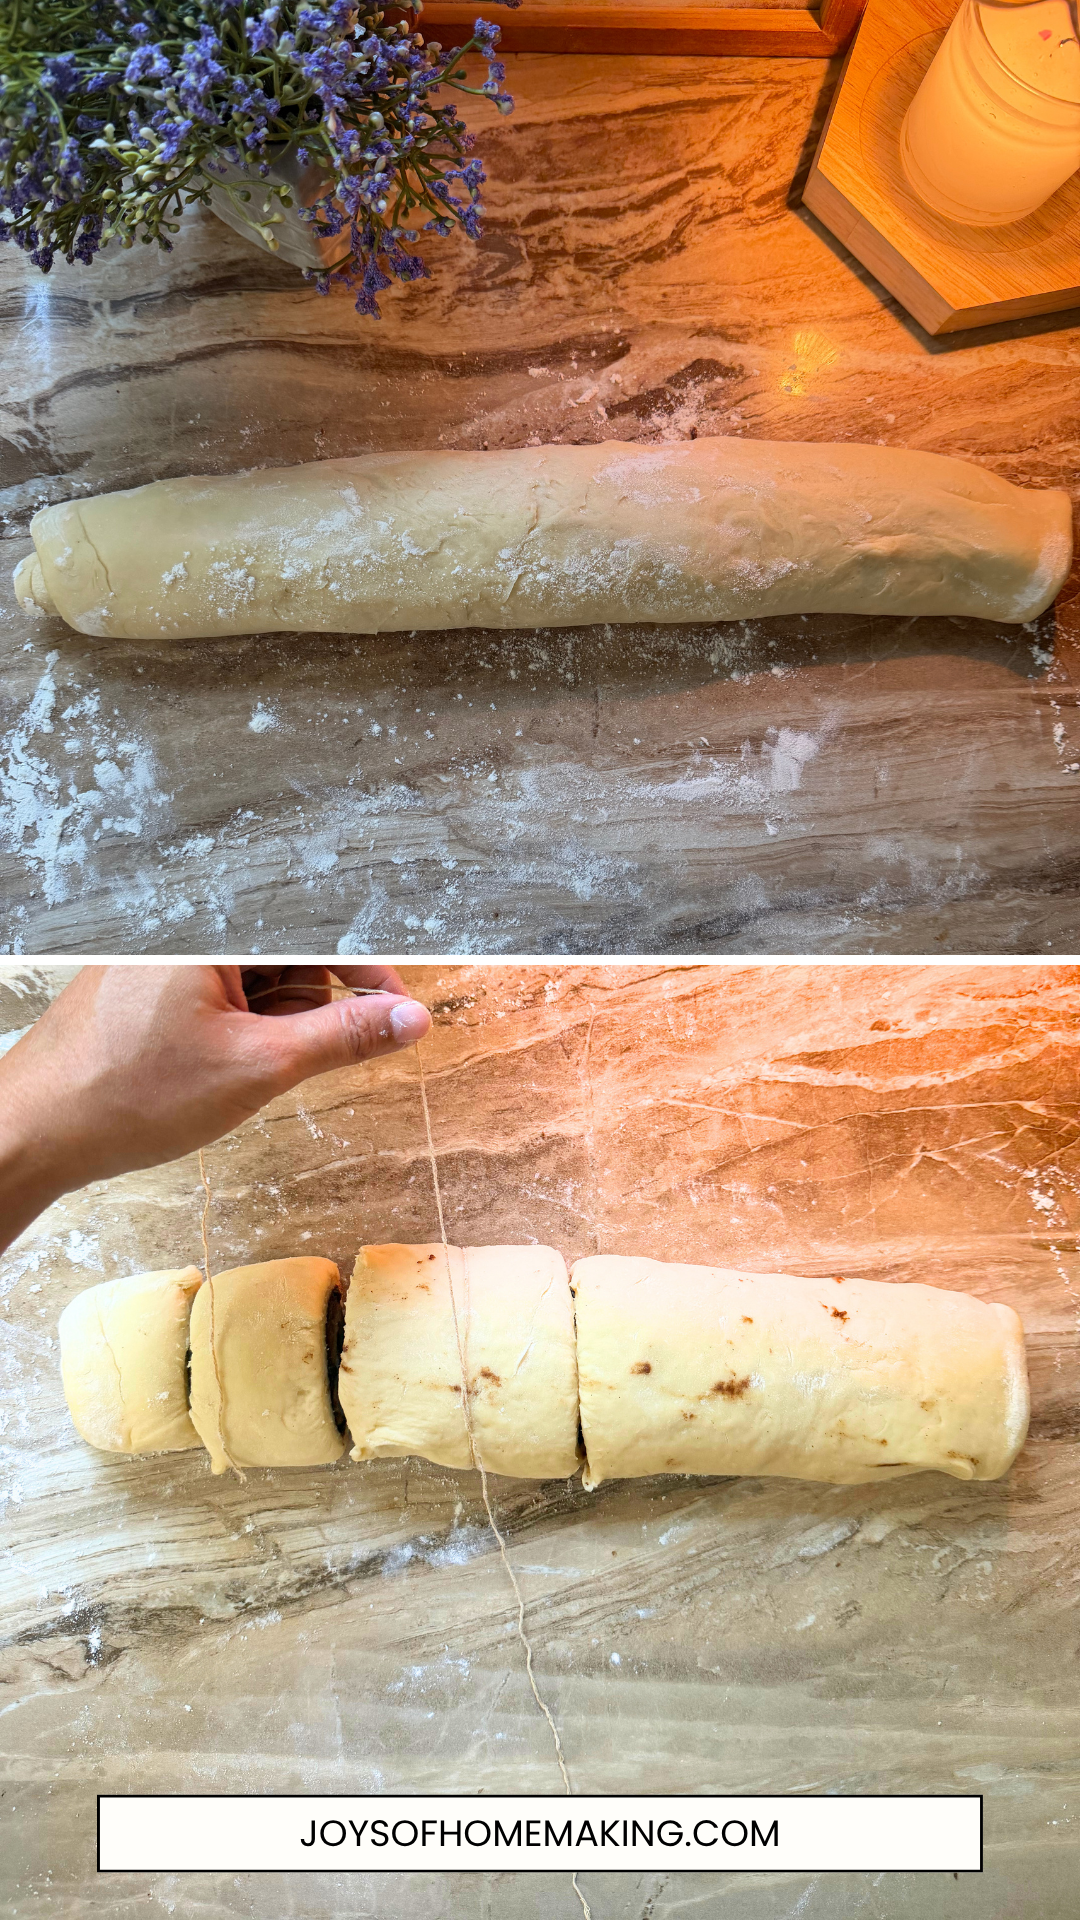
Starting from one of the longer sides, gently roll the dough into a log.
Try to keep it snug without squeezing the dough too tightly.
Slice the log into individual cinnamon rolls.
For cleaner slices, you can use a very sharp knife or even a kitchen twine.
6. Let Them Rise Again (second rise)
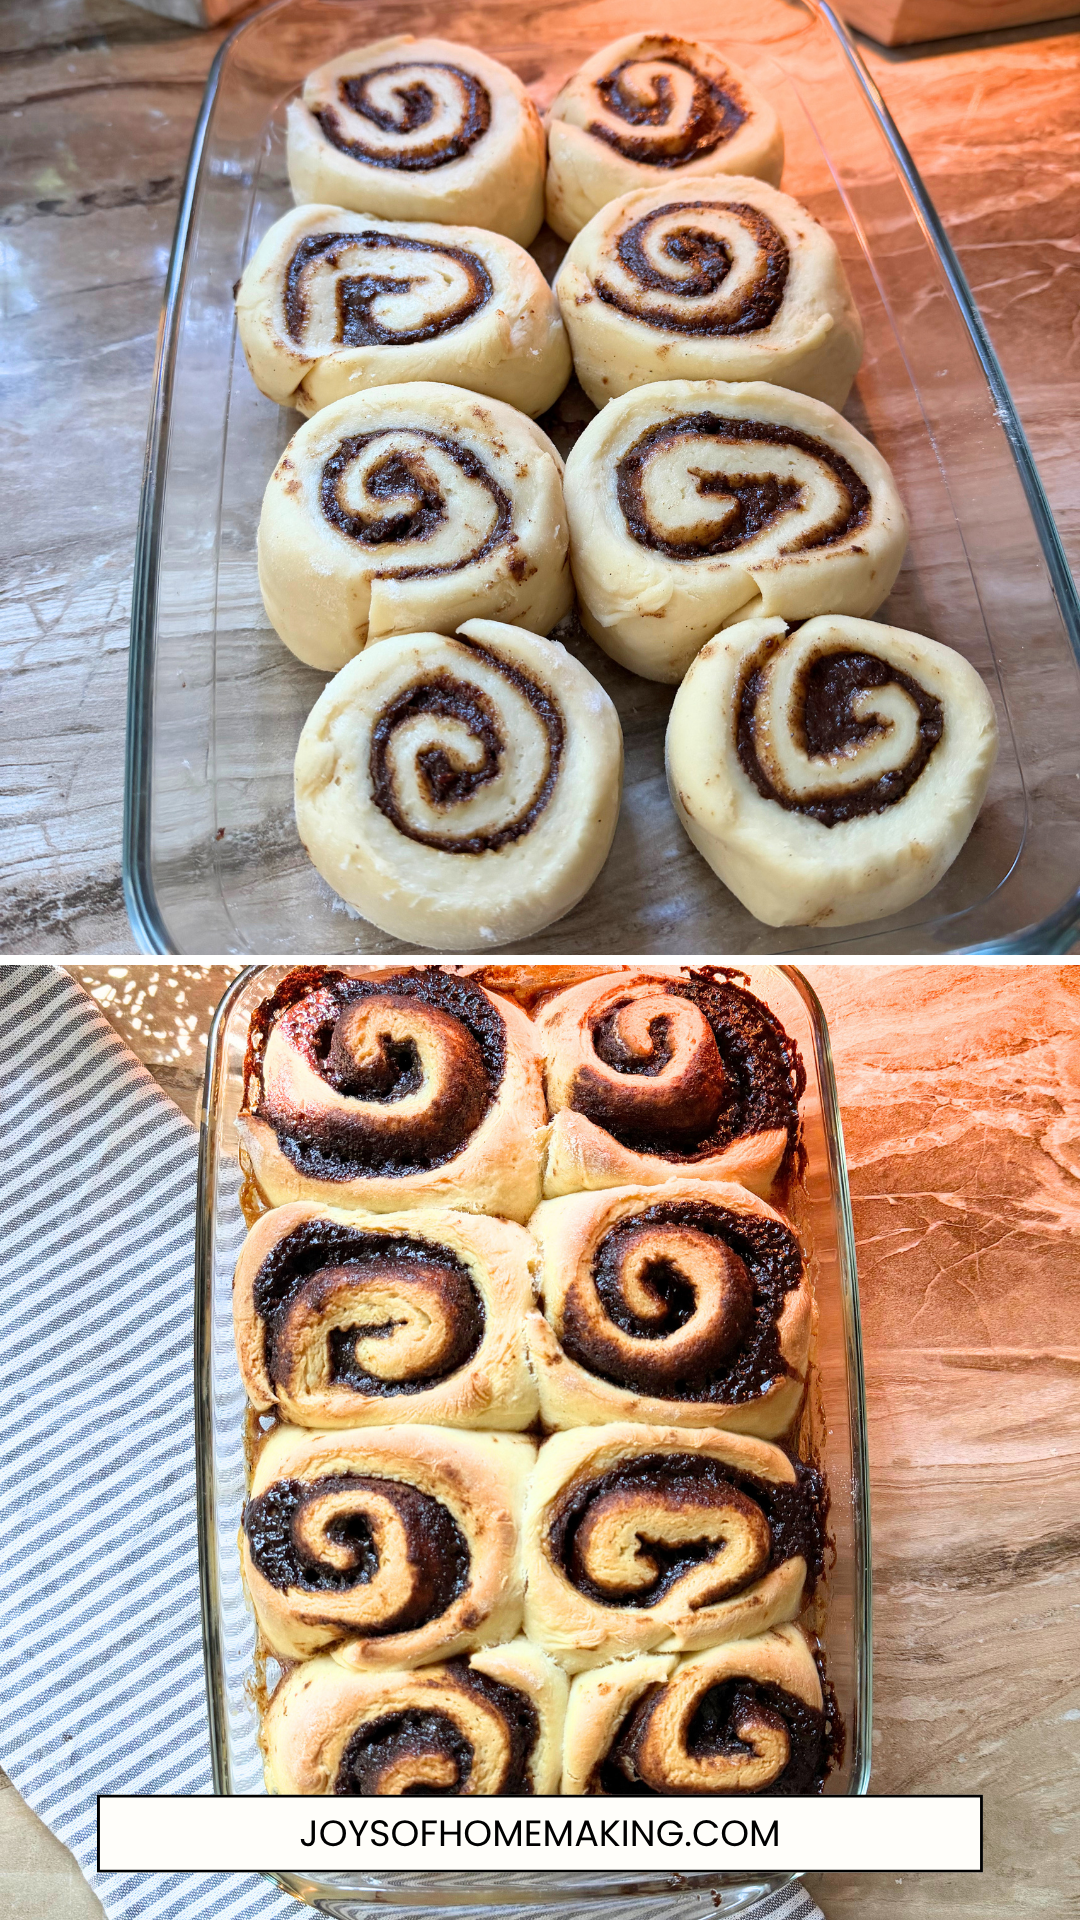
Arrange the cinnamon rolls in a greased baking dish, leaving a little room between them.
Cover the dish and let the rolls rise again until they look soft and puffy. This takes about an hour or more.
This second rise helps give them that beautiful fluffy texture.
7. Pour ¼ Cup Milk or Heavy Cream (optional)
This is optional but this will help make the dough softer. Before putting your cinnamon rolls pan into the oven, warm the milk and pour it over the cinnamon rolls.
8. Bake
Bake the cinnamon rolls at 375°F (190°C) for 25 minutes or until they're lightly golden on top and cooked through.
Try not to overbake them.
I would much rather pull my cinnamon rolls out when they're just done than leave them in too long and end up with dry rolls.
Make the Cream Cheese Frosting
While the cinnamon rolls are baking, prepare the frosting.
Beat together softened cream cheese and butter until smooth.
Add powdered sugar and vanilla extract.
If the frosting is thicker than you'd like, add just a tiny splash of milk or cream until you reach the consistency you want.
I like my frosting thick enough to sit on top of the cinnamon rolls but soft enough to slowly melt into them when they're warm.
Frost Them While They're Still Warm
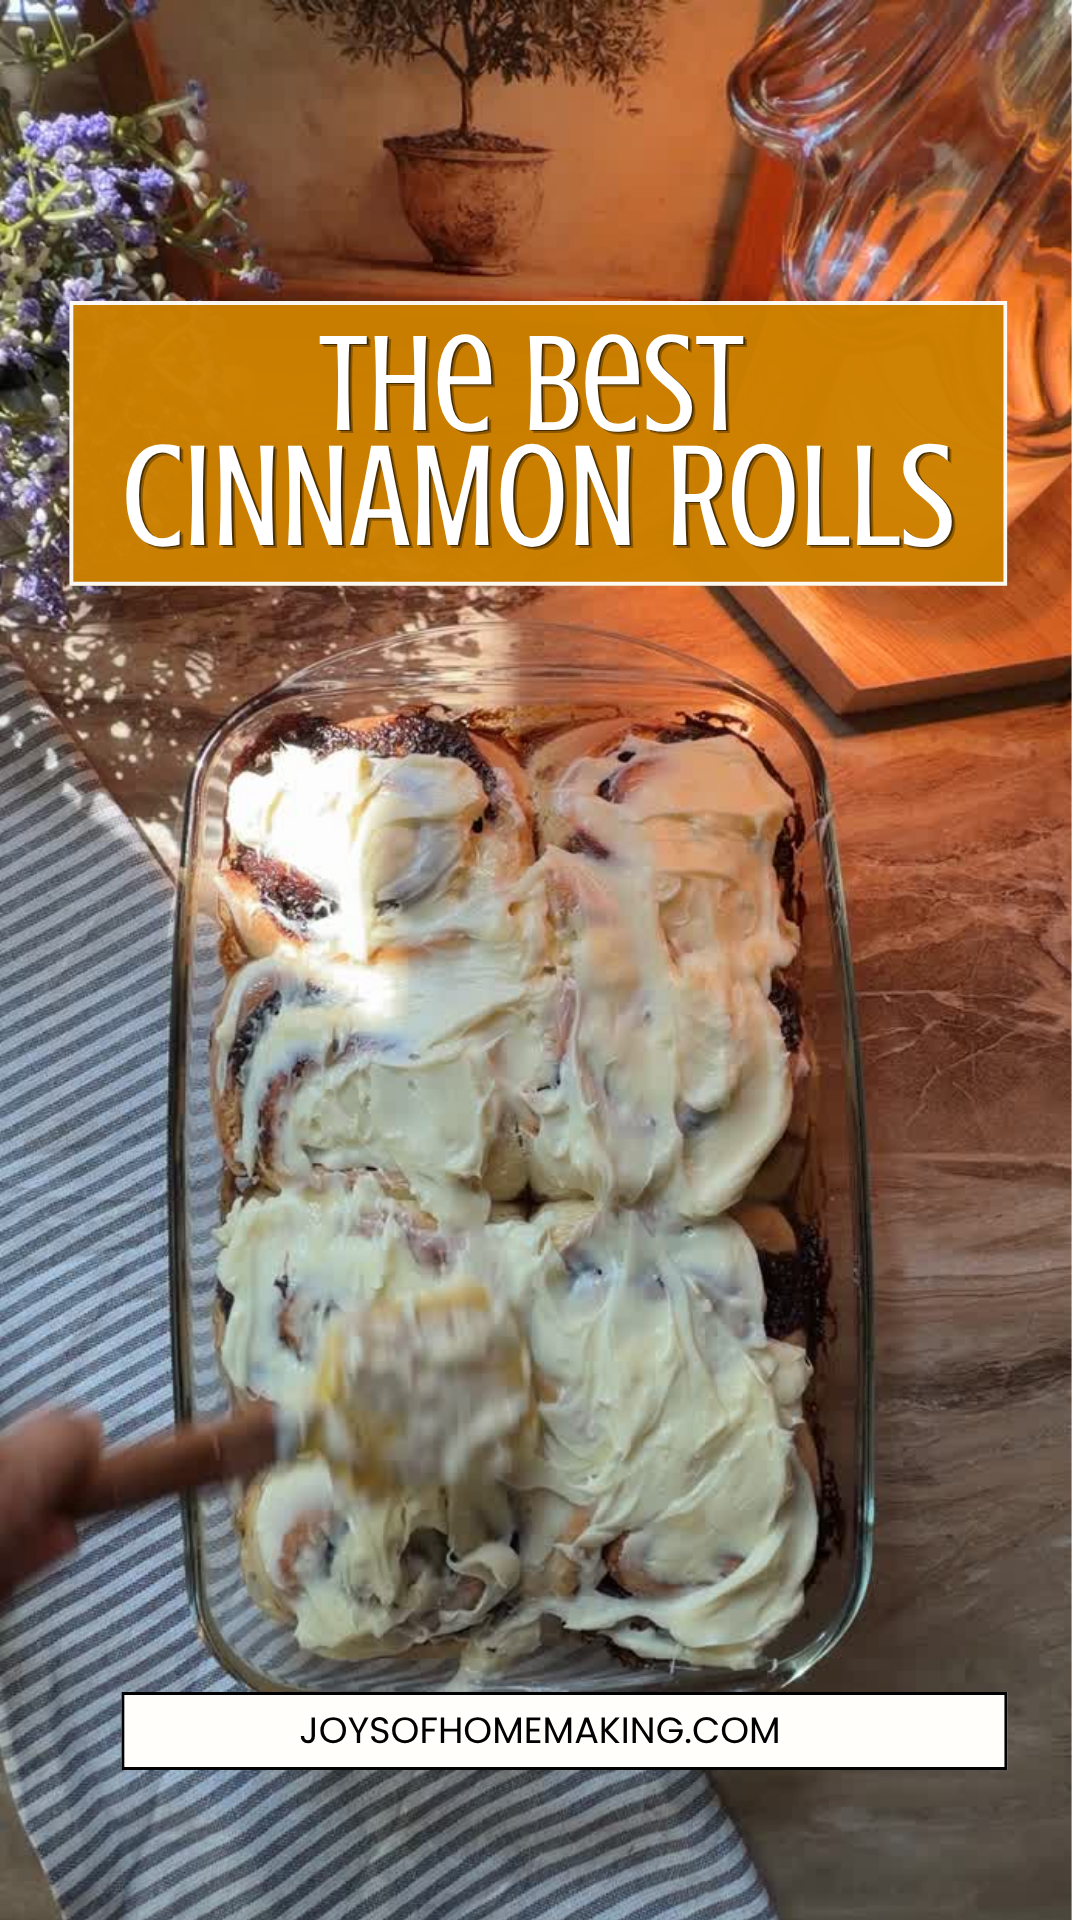
Once the cinnamon rolls come out of the oven, give them a few minutes to cool slightly.
Then spread that cream cheese frosting over the top.
This might be my favorite part.
Some of the frosting stays thick and creamy on top, while some melts down into the warm cinnamon swirls.
So good.
Can You Make Cinnamon Rolls Ahead of Time?
Yes, and that's another reason I love this recipe.
You can prepare the rolls the night before, arrange them in your baking dish, cover them, and refrigerate them overnight.
The next morning, take them out of the refrigerator for the second rise, and allow them to come closer to room temperature and rise until they're nice and puffy before baking.
That way, you can have fresh homemade cinnamon rolls in the morning without doing all of the work first thing after waking up.
You can also freeze the cinnamon rolls for up to 3 months.
If you want to freeze them before baking, shape the rolls first, then place them in a freezer bag and freeze. When you're ready to bake them, transfer the rolls to the refrigerator and let them thaw overnight. The next day, let them sit at room temperature for about 1 ½ to 2 hours, or until they look soft and puffy, before baking as usual.
You can also freeze the cinnamon rolls after they're fully baked. This is a great option if you like having a quick treat on hand. Just freeze the baked rolls, then warm one or two in the microwave whenever you're ready to enjoy them.
How to Store Homemade Cinnamon Rolls
Because these cinnamon rolls have cream cheese frosting, I like to keep leftovers covered in the refrigerator. These are great containers for cinnamon rolls.
When we want another one, I warm it slightly before eating.
They're definitely at their best fresh and warm, though.
And honestly, leftovers aren't usually a big problem in our house.
Looking for More Homemade Ideas?
Feel free to browse around and get inspired!
Final Thoughts
These cinnamon rolls might not be a pantry staple, but they have definitely earned a place in my 100 Homemade Projects in 1 Year series.
After a few failed attempts, finally pulling a pan of soft, fluffy cinnamon rolls from the oven felt like such a win.
And with that cream cheese frosting on top?
This might just be my favorite baking project so far.
If you're learning how to make more things from scratch at home too, add homemade cinnamon rolls to your list. They're a fun skill to learn, and your family probably won't mind being your taste testers.