Hello, homemaker!
I gotta be honest: while I love baking bread, it can feel like a chore sometimes.
One of my favorites—dinner rolls—requires kneading. And another favorite—ciabatta—needs stretch-and-folds four times, every 30 minutes. When you’re busy, the waiting can feel like forever. And somehow it always feels like every step has to be done just right to end up with those perfect loaves.
But what if I told you that you can bake a truly good, crusty, bakery-style bread without all the fuss?
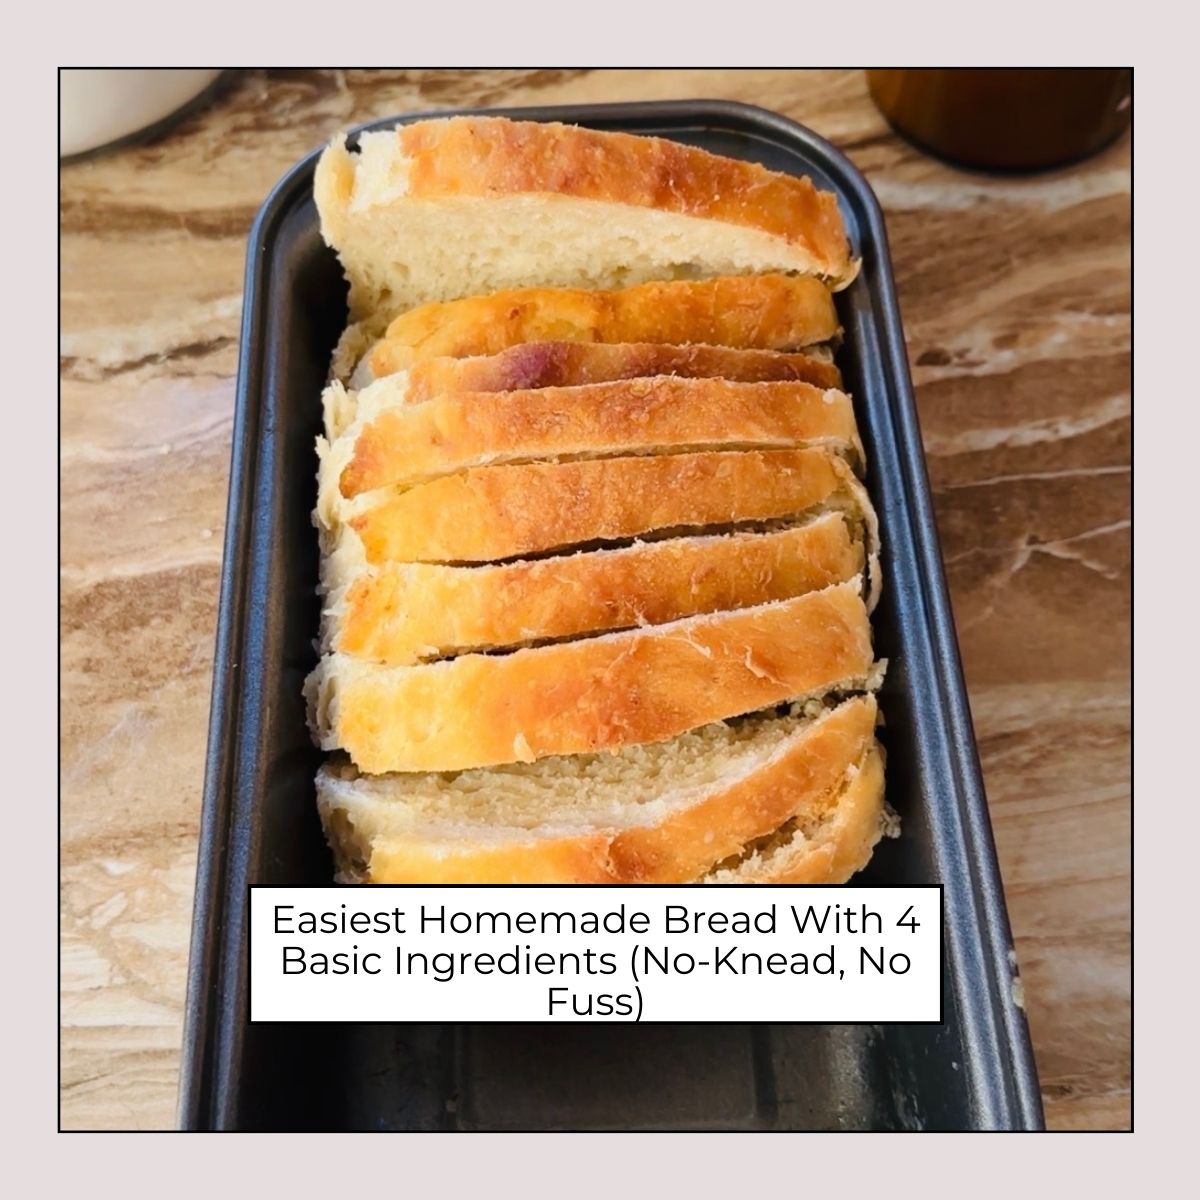
I’ve been on the hunt for the easiest homemade bread recipe and I finally found one that was so close to perfect… so I tweaked it to my liking. Now it’s my go-to: no kneading, no stretch and folds, no fuss—just mix-mix-mix the ingredients and let the dough rise.
And the best part? It uses only four basic ingredients you probably already have: flour, yeast, sugar, and salt.
Why You’ll Love This Easy Homemade Bread
- Only 4 ingredients (plus water, which I’m guessing you’ve got)
- No mixer needed
- No kneading, no stretch and fold
- Great for beginners
- Crisp crust + soft, chewy inside
- Flexible schedule (the dough does the work while you live your life)
If you’ve ever wanted homemade bread without the “project,” this is it.
Ingredients You’ll Need
This recipe is intentionally simple. Here’s what you’ll use:
- Flour – you can use all purpose-flour or bread flour (more on that below)
- Yeast – instant yeast or active dry yeast
- Sugar – helps feed the yeast and supports browning
- Salt – for flavor (don’t skip it)
And yes, you’ll also need warm water to bring everything together.
Easiest Homemade Bread (4 Ingredients) – No-Knead Recipe
Ingredients
- 3 cups flour (about 420g)
- 1 ½ teaspoons salt
- 2 tablespoons sugar
- 1 ½ teaspoons instant yeast (or active dry yeast)
- 1 ¾ cups warm water (about 105–110°F)
- Butter (optional): This is optional, but I highly recommend brushing the top of the dough with butter. It adds so much extra flavor!
Equipment (Simple Options)
- Large mixing bowl
- Wooden spoon or spatula
- Parchment paper (helpful but optional)
Step-by-Step Instructions
1) Mix the dough
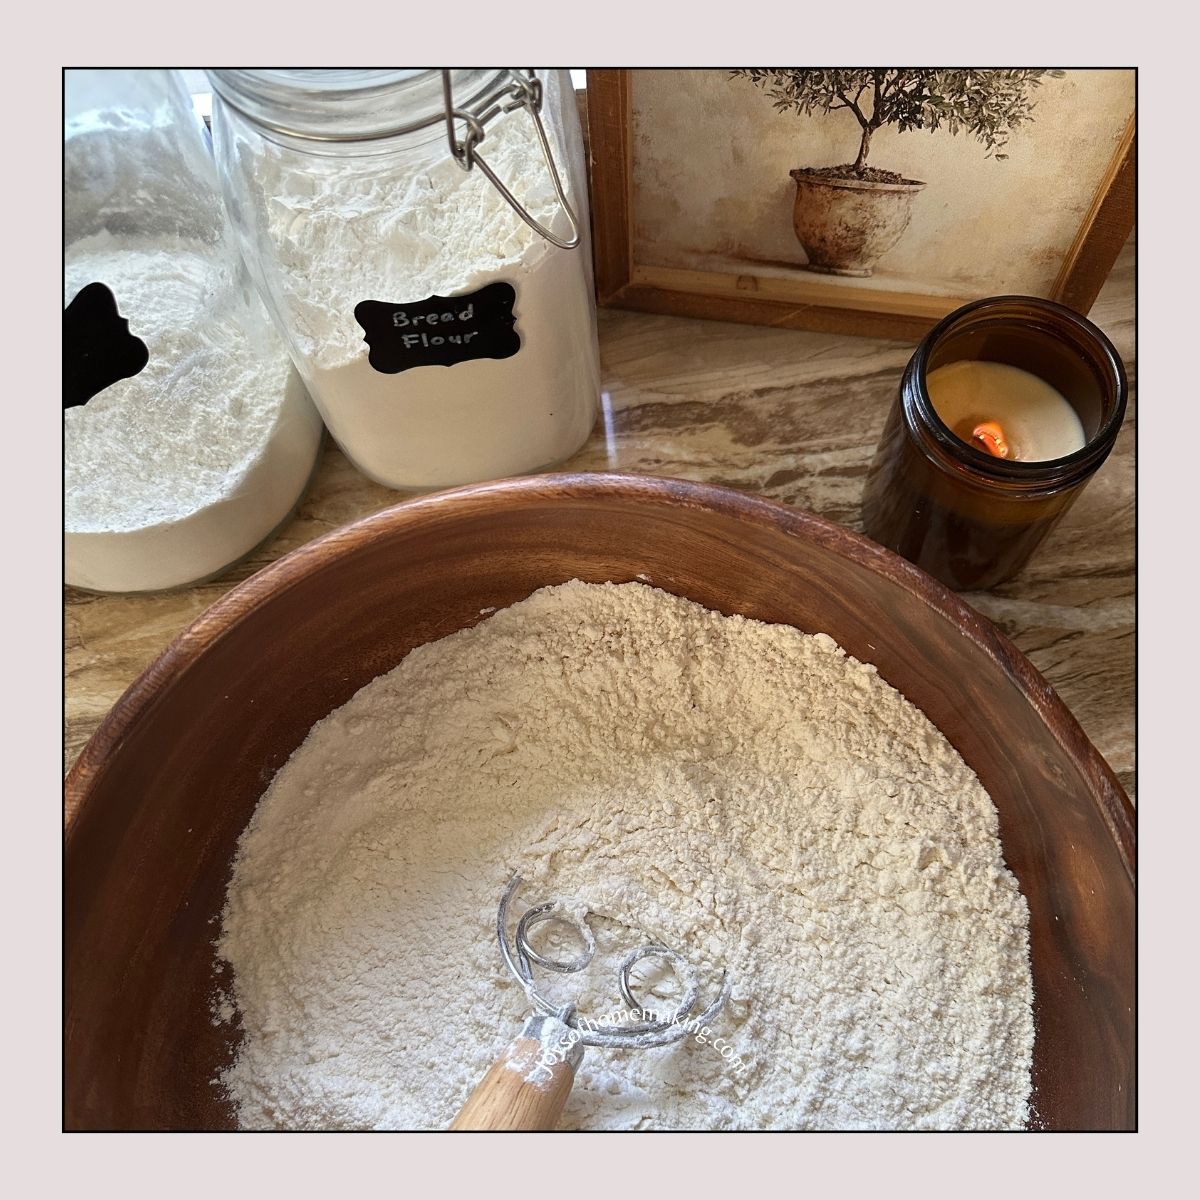
In a large bowl, stir together the flour, salt, sugar, and yeast.
Pour in the warm water and mix until no dry flour remains. The dough will look shaggy and sticky. That’s perfect.
No kneading. No mixer. Just stir until it comes together.
2) Let it rise (the “wait” that does the work)
Cover the bowl with a lid, plastic wrap, or a clean kitchen towel.
Let the dough rise at room temperature for at 2 hours or more, or until it’s doubled in size and looks puffy with bubbles on top.
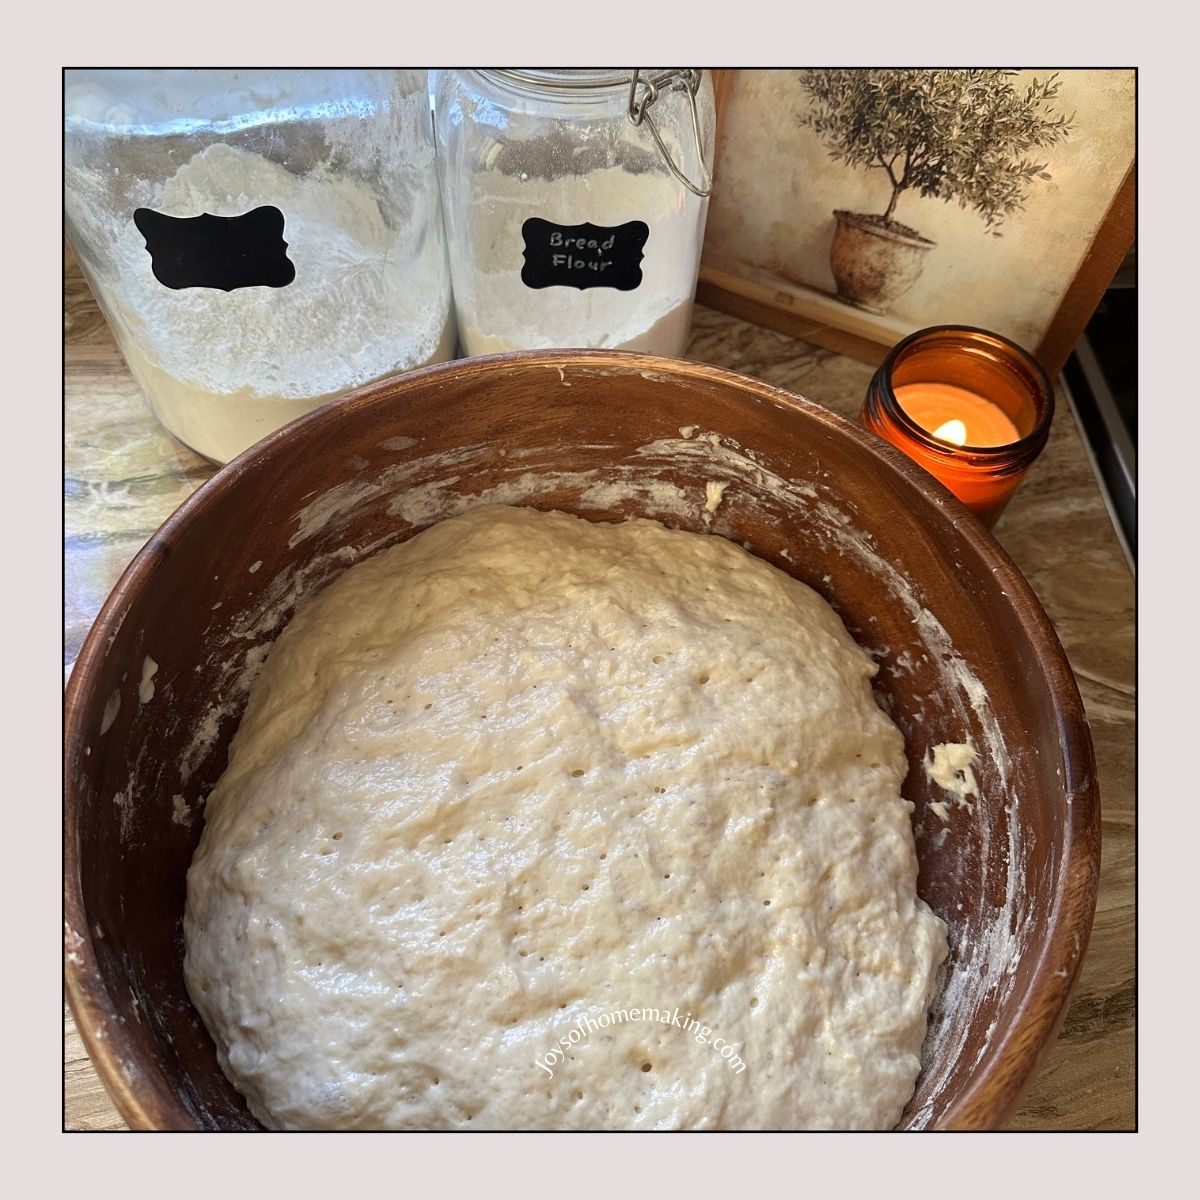
If your kitchen is cool, it may take a bit longer. That’s okay—this dough is forgiving.
3) Shape (quick and easy)
Lightly flour your counter and scrape the dough out.
Fold the dough over itself a few times—just until it comes together into a rough ball. This isn’t kneading—just a quick shape-up. You can bake it as one round loaf, or place the dough into a loaf pan like this:
You can also divide it in half and shape each piece into a baguette-style loaf. I just cut the dough into two pieces, then gently stretch and roll each one into a simple baguette shape.
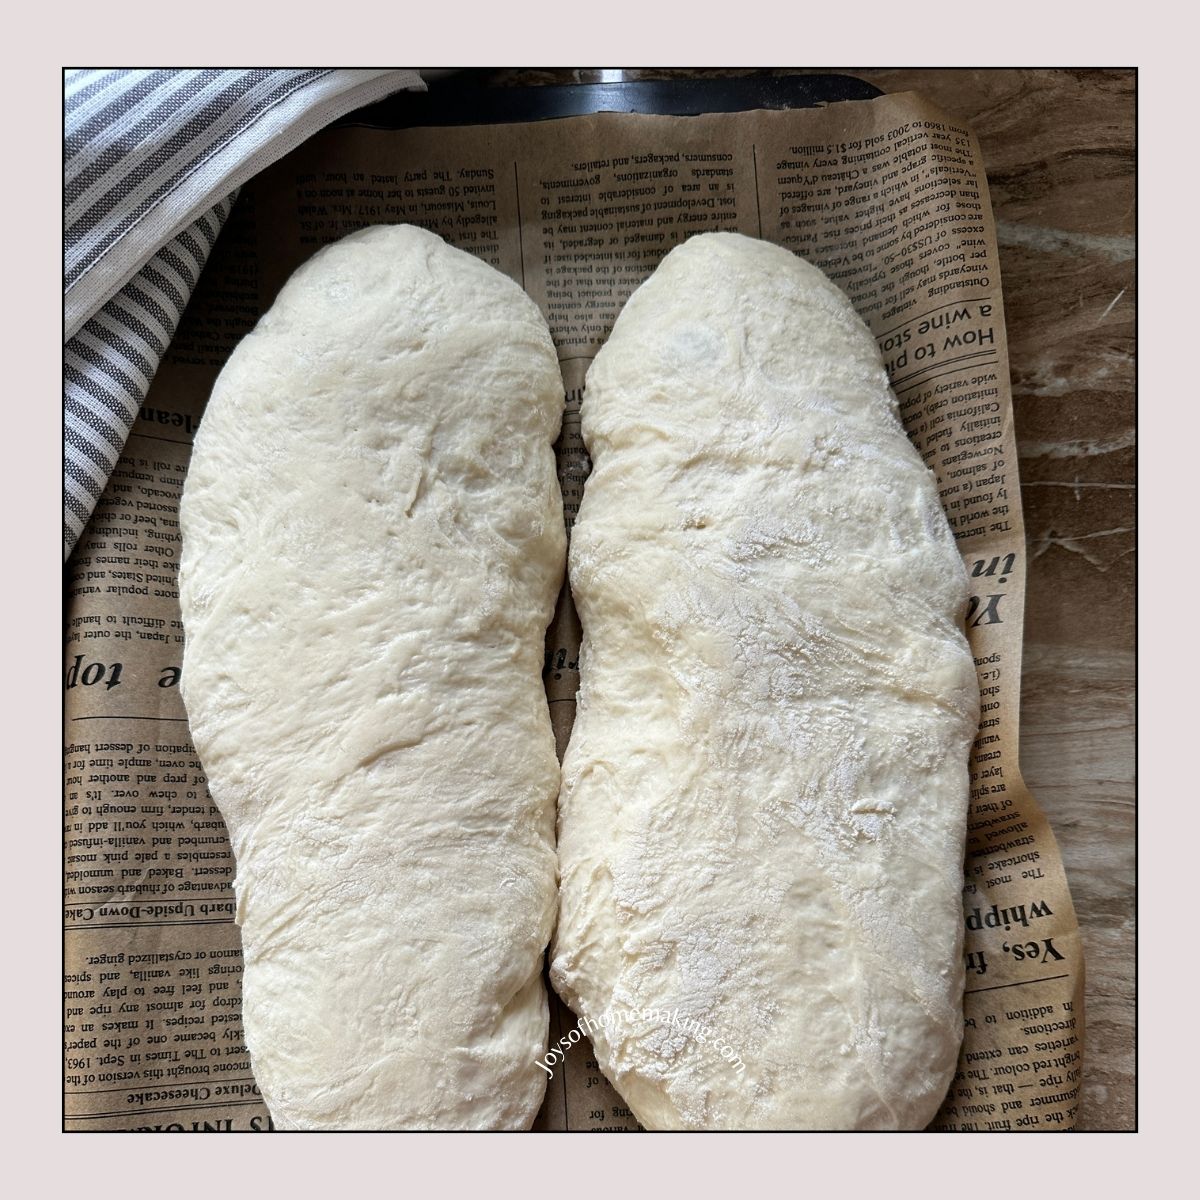
Place the dough on a piece of parchment paper (or lightly floured surface).
Either way, let the dough rest for 20–30 minutes while you preheat your oven before baking. This is your second proof or rise.
How to Tell It’s Ready
Your dough is proofed and ready to bake when:
- It looks noticeably bigger and airy
- The surface has small bubbles
- A gentle poke leaves an indent that slowly springs back (not instantly)
If it springs back right away, it likely needs a little more time. If it collapses and doesn’t bounce back, it may be over-proofed—but don’t worry, it will still bake up delicious (just slightly flatter).
4) Refrigerate the dough for better flavor (Make Ahead Option)
If you want even better flavor (and a super convenient make-ahead bread), refrigerating the dough is the secret. A slow, cold rise gives the yeast more time to work, which creates a deeper, slightly tangy, “bakery-style” taste—and it also makes the dough easier to handle.
You can skip this step and bake the bread after second proofing, but I recommend refrigerating it for best results.
Why Refrigerate?
- More flavor: a longer fermentation develops a richer taste
- Better texture: you often get a nicer, chewier crumb
- Make-ahead friendly: mix today, bake tomorrow (or later)
How to Do a Cold Rise (Overnight Proof)
- Mix the dough as directed.
- Cover the bowl tightly (lid or plastic wrap).
- Place it in the refrigerator for 8 to 24 hours.
That’s it. No extra work—just time doing the heavy lifting.
When You’re Ready to Bake
- Remove the dough from the fridge.
- Let it sit at room temperature for 45–90 minutes, or until it looks slightly puffy (it doesn’t always “double” cold).
- Shape the dough (round loaf or baguette-style), then let it rest for 20–30 minutes while the oven preheats.
- Bake as directed.
How Long Can It Stay in the Fridge?
For best results, bake within 24 hours, but you can usually stretch it to 48 hours if needed. The longer it sits, the stronger the flavor will be—just keep in mind it may get a bit looser and more bubbly.
Quick Tip
Cold dough can feel sticky at first. Use lightly floured hands and a floured surface, and avoid adding too much extra flour—just enough to shape it easily.
This is my favorite way to make this bread when I know tomorrow will be busy: mix at night, bake the next day—fresh bread with almost no effort.
5) Preheat the oven and Bake
Preheat the oven to 375°F. Just before baking, place an empty pan on the lower rack and carefully pour 2–3 cups of boiling water into it to create steam. Then set your baking sheet (or pan) with the dough into the oven and bake for 25 minutes.
That pan of boiling water creates steam in the oven, and steam makes a big difference in how your bread bakes—especially for no-knead dough.
Here’s what it does:
- Helps the loaf rise more (better “oven spring”)
Steam keeps the outside of the dough soft for the first part of baking, so the bread can expand upward instead of “setting” too early. - Creates a crispier, shinier crust
Moist heat encourages better browning and gives you that crackly, bakery-style crust once the steam dissipates. - Prevents the crust from drying out too quickly
Without steam, the surface can firm up fast and limit how much the dough can grow, which can lead to a denser loaf.
In short: steam = more lift + better crust—it helps your dough bake up taller with a nicer exterior.
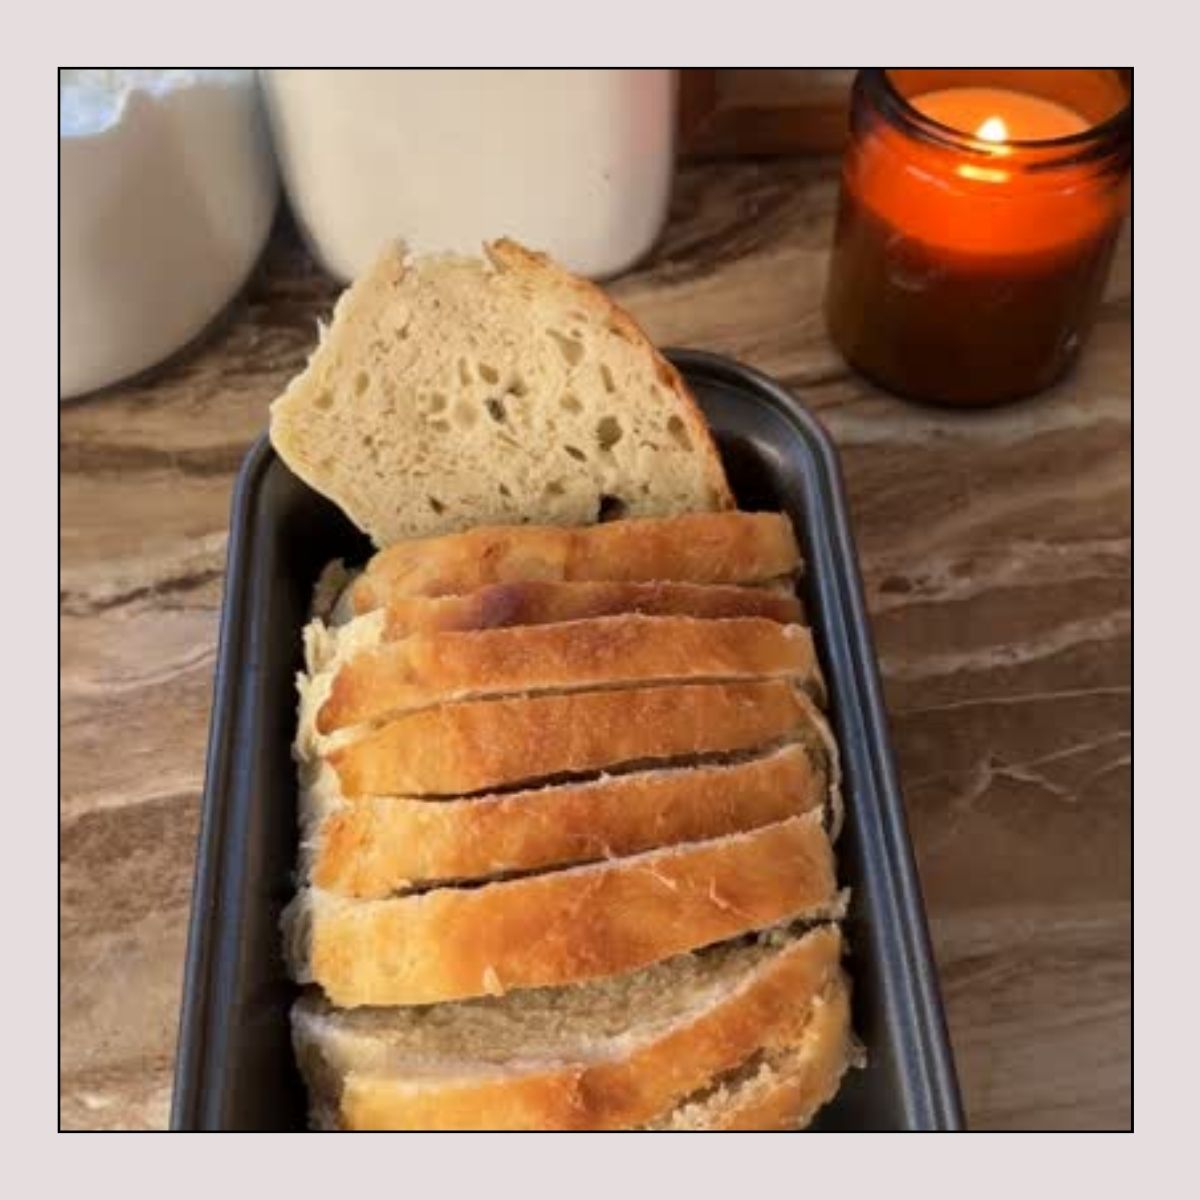
5)Cool before slicing
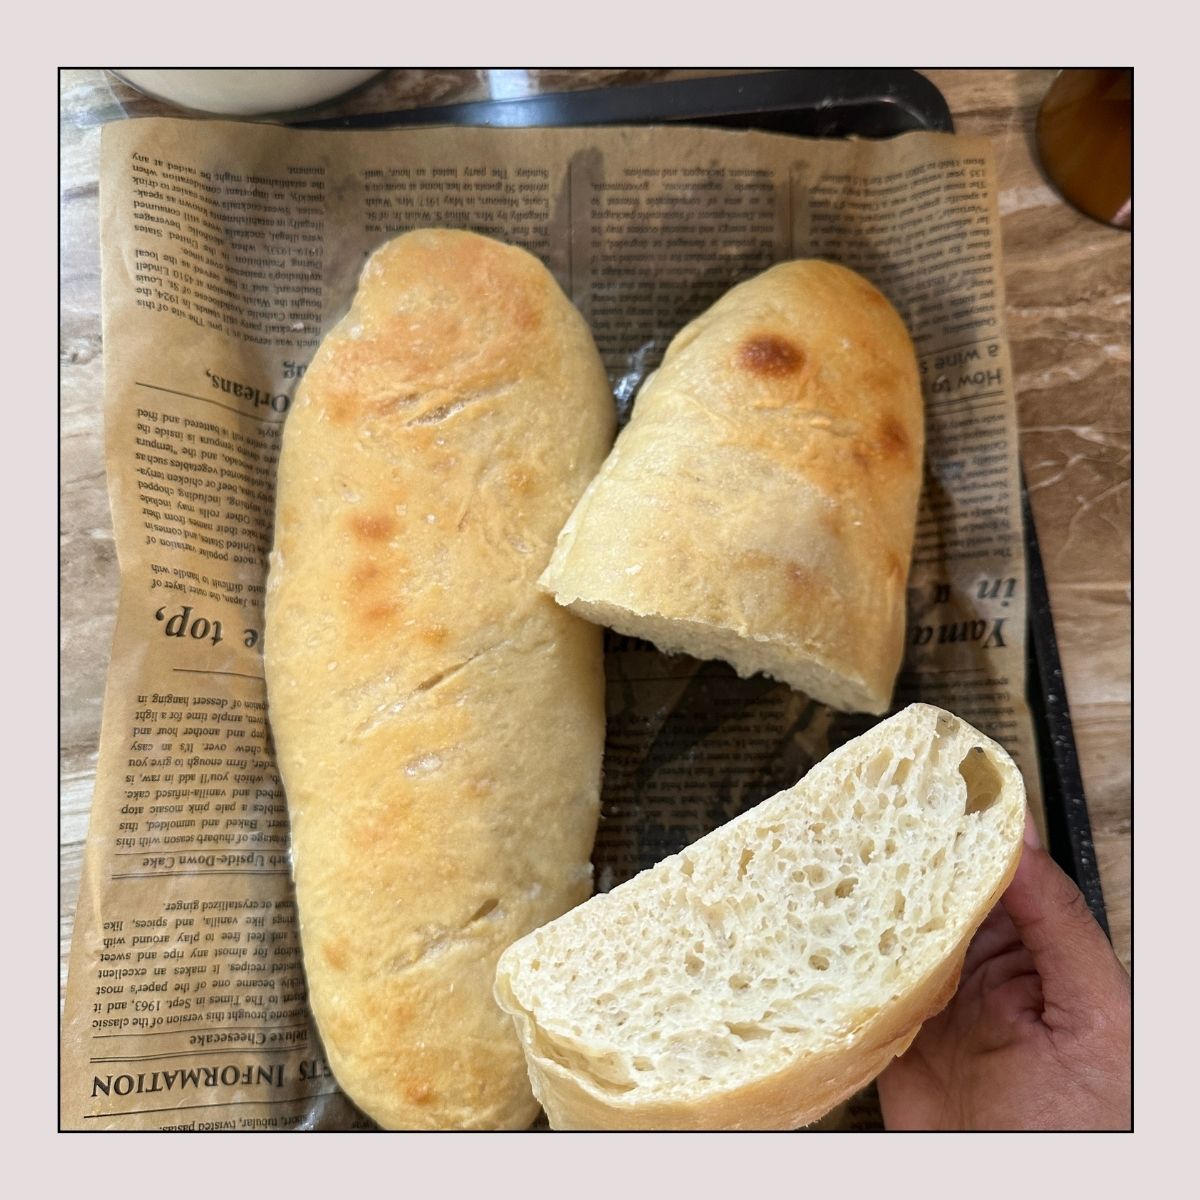
This part is hard, I know. But let the bread cool on a rack for at least 30 minutes.
If you slice too early, the inside can turn gummy. Cooling finishes the texture.
Baking Options
Option 1: Baking Sheet Method
- Preheat oven to 450°F
- Place dough on a parchment-lined baking sheet
- Put a small oven-safe pan on the lower rack and pour in hot water right after you add the bread (this creates steam)
- Bake 25–35 minutes until golden
Option 2: Dutch Oven
If you have a Dutch oven, this is hands-down the best way to bake this bread. The lid traps steam inside, which helps the loaf rise taller and creates that crisp, crackly, bakery-style crust.
How to Bake in a Dutch Oven
Preheat the oven to 450°F. Place your Dutch oven (with the lid on) inside the oven while it preheats. Let it heat for at least 20–30 minutes.
Transfer the dough. Carefully remove the hot Dutch oven. Lift the dough in using parchment paper (recommended for easy transfer and less sticking).
Cover and bake. Put the lid back on and bake for 25 minutes.
Uncover and finish baking. Remove the lid and bake for another 10–15 minutes, or until the top is deep golden brown.
Cool before slicing. Transfer the bread to a cooling rack and let it cool for at least 30 minutes for the best texture.
Tips for the Best No-Fuss Bread
Use warm water, not hot
Too hot can kill yeast. Aim for water that feels warm but not uncomfortable on your finger—about 105–110°F.
Don’t add too much flour
Sticky dough is normal for no-knead bread. Adding lots of flour can make the loaf dense. Use just enough flour to keep it manageable when shaping.
Want a softer crust?
Brush the warm loaf lightly with butter after baking and cover loosely with a towel while it cools.
Want extra crunch?
Bake the last few minutes a little longer uncovered, and let it cool fully uncovered.
Flour Options (What Changes and What Doesn’t)
- All-purpose flour: easiest, consistent, great results.
- Bread flour: slightly chewier with a bit more rise
- Half whole wheat: use 1 ¾ cups whole wheat + 1 ¾ cups all-purpose; you may need 1–2 tablespoons extra water
This recipe is flexible—just keep the dough shaggy and slightly sticky.
My preference: I’ve made this recipe with both all-purpose flour and bread flour, and I personally prefer it with all-purpose flour. The texture turns out a little denser and more tender, and the flavor reminds me of dinner rolls—without, of course, any kneading.
How to Store Homemade Bread
- Room temp: wrap in a clean towel or place in a bread bag for 2–3 days
- Freeze: slice first, then freeze in a bag up to 2 months
- To reheat: toast slices, or warm the whole loaf in a 350°F oven for 10 minutes
Easy Serving Ideas
This is one of those “goes with everything” breads:
- With butter and a sprinkle of salt (simple perfection)
- For grilled cheese
- Alongside soup or pasta
- For sandwiches
- Toasted with jam or honey
Troubleshooting (Because Life Happens)
My dough didn’t rise much.
Your yeast may be old, or your room is cold. Give it more time in a warmer spot (near the oven, on top of the fridge, etc.).
My bread is dense.
Most often: too much flour added during shaping, or it didn’t rise long enough.
Final Thoughts: Homemade Bread Without the Fuss
If you’ve ever felt like homemade bread is “too much,” I really want you to try this one. It’s the kind of recipe that makes bread baking feel doable on a random weekday—not just when you’re in the mood for a full baking project.
Four basic ingredients. A bowl. A spoon. Mix, wait, bake.
And when you pull that golden loaf out of the oven, you’ll be so glad you did.
If you make it, let me know how it turns out—and how you served it. I always love hearing the little twists that make a simple recipe feel like yours.