Hello, homemaker!
I have to admit, I felt a little pressured trying to finish my 24 Days of Homemade (or Handmade) Christmas series last year.
I didn't plan everything as well as I should have, and there were days when I found myself scrambling to finish a project just so I could keep up with the challenge.
But you know what? Despite all that, I had so much fun!
I loved making all those little Christmas projects, learning new things, and finding simple ways to make the holiday season a little more meaningful for our family.
In fact, I enjoyed it that I've decided to do it all over again this year!
Only this time, I'm hoping to be a little more organized and, most importantly, get my boy involved in as many projects as possible.
We love Christmas in our home. And as my son grows older, I want Christmas to be something he genuinely looks forward to every year.
Not just because of the gifts, but because of everything else that makes this season so special.
The joy of giving, the little acts of kindness, the time spent with people we love, and, above all, remembering the true meaning of Christmas.
I want him to remember the Christmas traditions we created together, the things we made with our own hands, and the simple moments we shared as a family.
And I think making things together is such a lovely way to do that.
So, here we are again!
Welcome to Day 1 of this year's 24 Days of Homemade (or Handmade) Christmas!
I've prepared another collection of Christmas projects for our Advent calendar.
You can follow along here on the blog, and I'll also be sharing reels of our projects on Instagram and Facebook.
For our first project, we're making something simple, inexpensive, and meaningful: DIY pinpoint Christmas cards!
I wanted to start with Christmas cards because this gives my son plenty of time to write heartfelt messages to our family and friends before Christmas arrives.
And instead of buying ready-made cards this year, I thought it would be fun to make our own.
I'll also be sharing some free printable Christmas patterns that you can use to make these pretty little cards at home.
Let's get started!
What Are Embossed Pinpoint Christmas Cards?
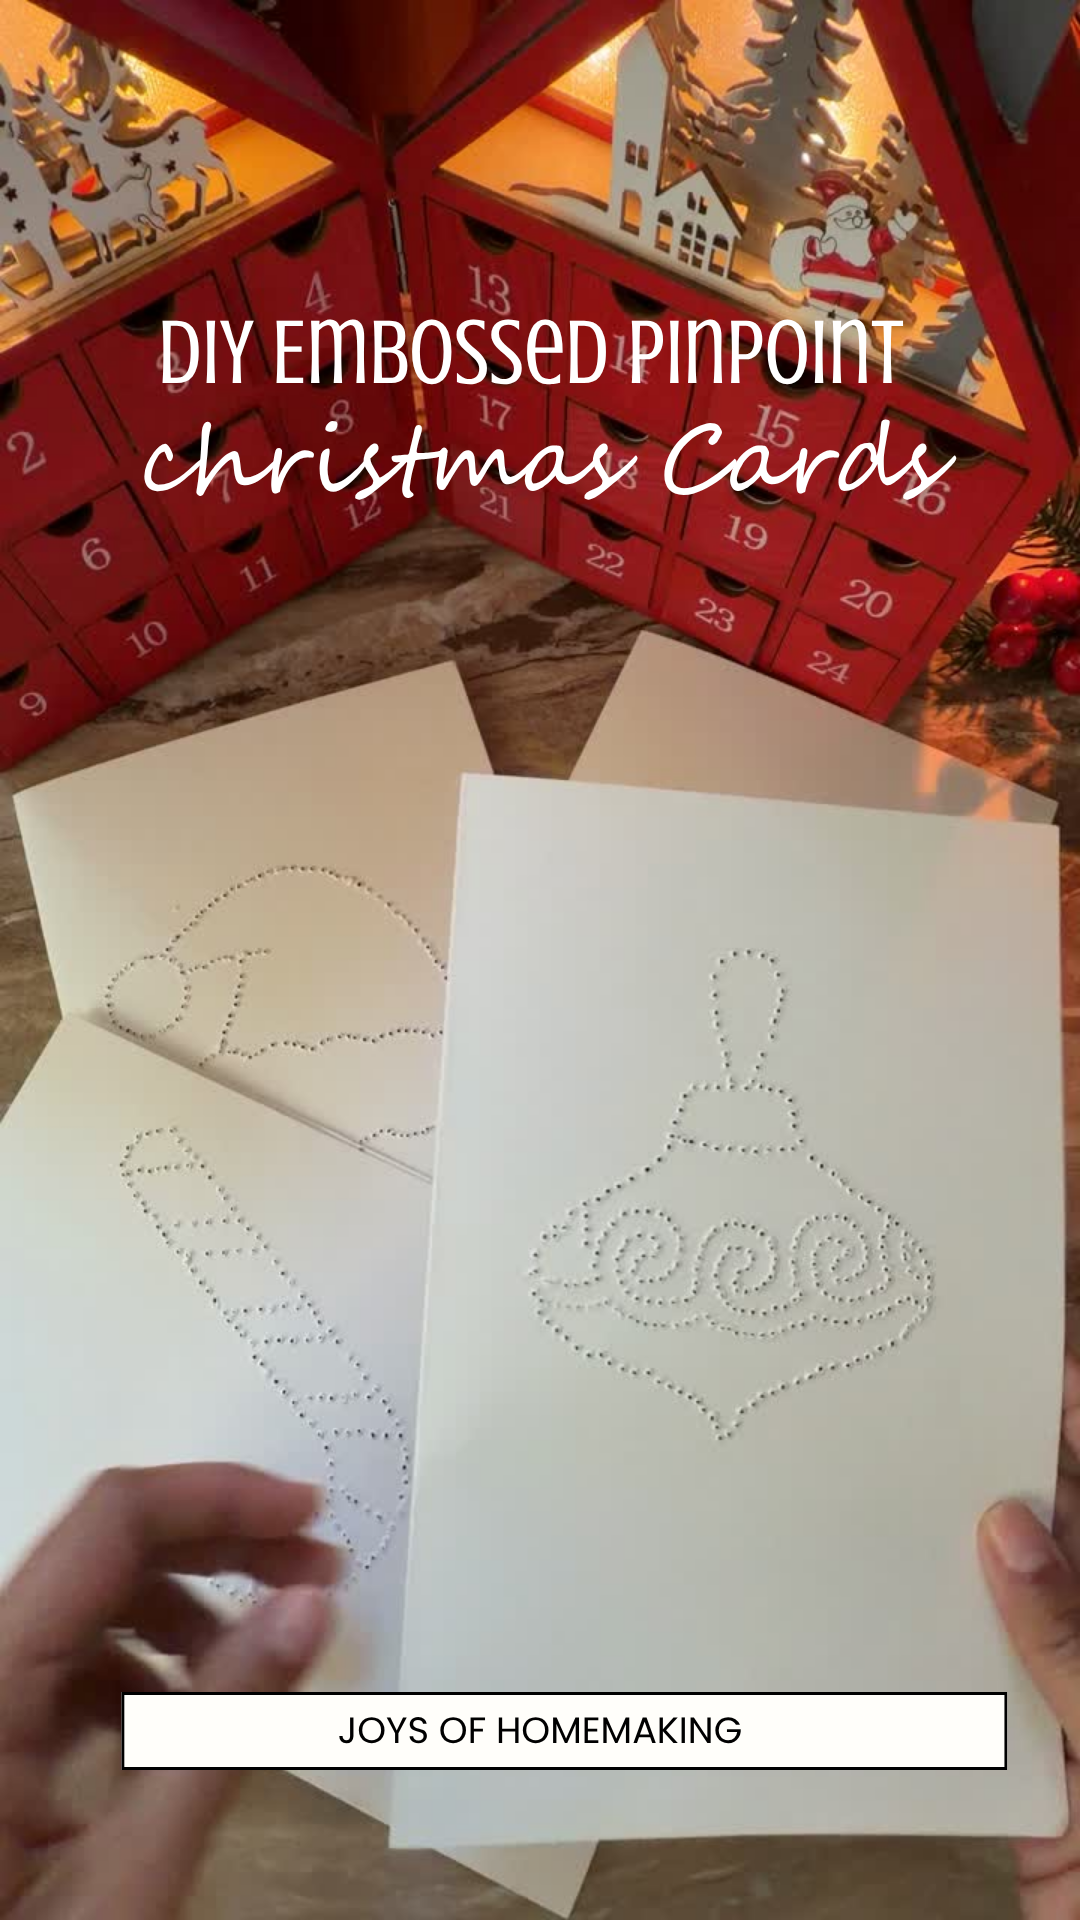
Embossed pinpoint Christmas cards are handmade greeting cards with beautiful raised designs created using a simple pin or needle.
Instead of drawing or painting a design onto the cardstock, you carefully poke tiny holes from the inside of the card toward the outside.
This creates a slightly raised texture around each hole on the front of the card, giving your Christmas design a delicate, embossed appearance.
When all the little holes come together, they form a beautiful Christmas tree, snowflake, star, or whatever pattern you've chosen.
I love how something as simple as cardstock and a thumb pin can create such a pretty effect!
And the best part? You don't need any fancy embossing tools or expensive craft supplies to make these cards.
How to Make DIY Embossed Pinpoint Christmas Cards
Making these embossed Christmas cards is surprisingly easy. The most important thing to remember is to poke the holes from the inside of your card toward the front so that the raised texture appears on the outside.
Step 1: Prepare Your Christmas Card
Start by cutting your cardstock to your preferred size.
Fold it neatly in half to create a traditional greeting card.
You can use white, cream, kraft, or colored cardstock. I recommend using something fairly thick so the embossed design holds its shape nicely.
Step 2: Choose and Print Your Christmas Pattern
Next, choose a Christmas design for your card.
You can use a simple Christmas tree, star, snowflake, Christmas ornament, or any other festive pattern you like.
I'm also sharing some free printable Christmas patterns below that you can download and use for this project. No sign up needed!
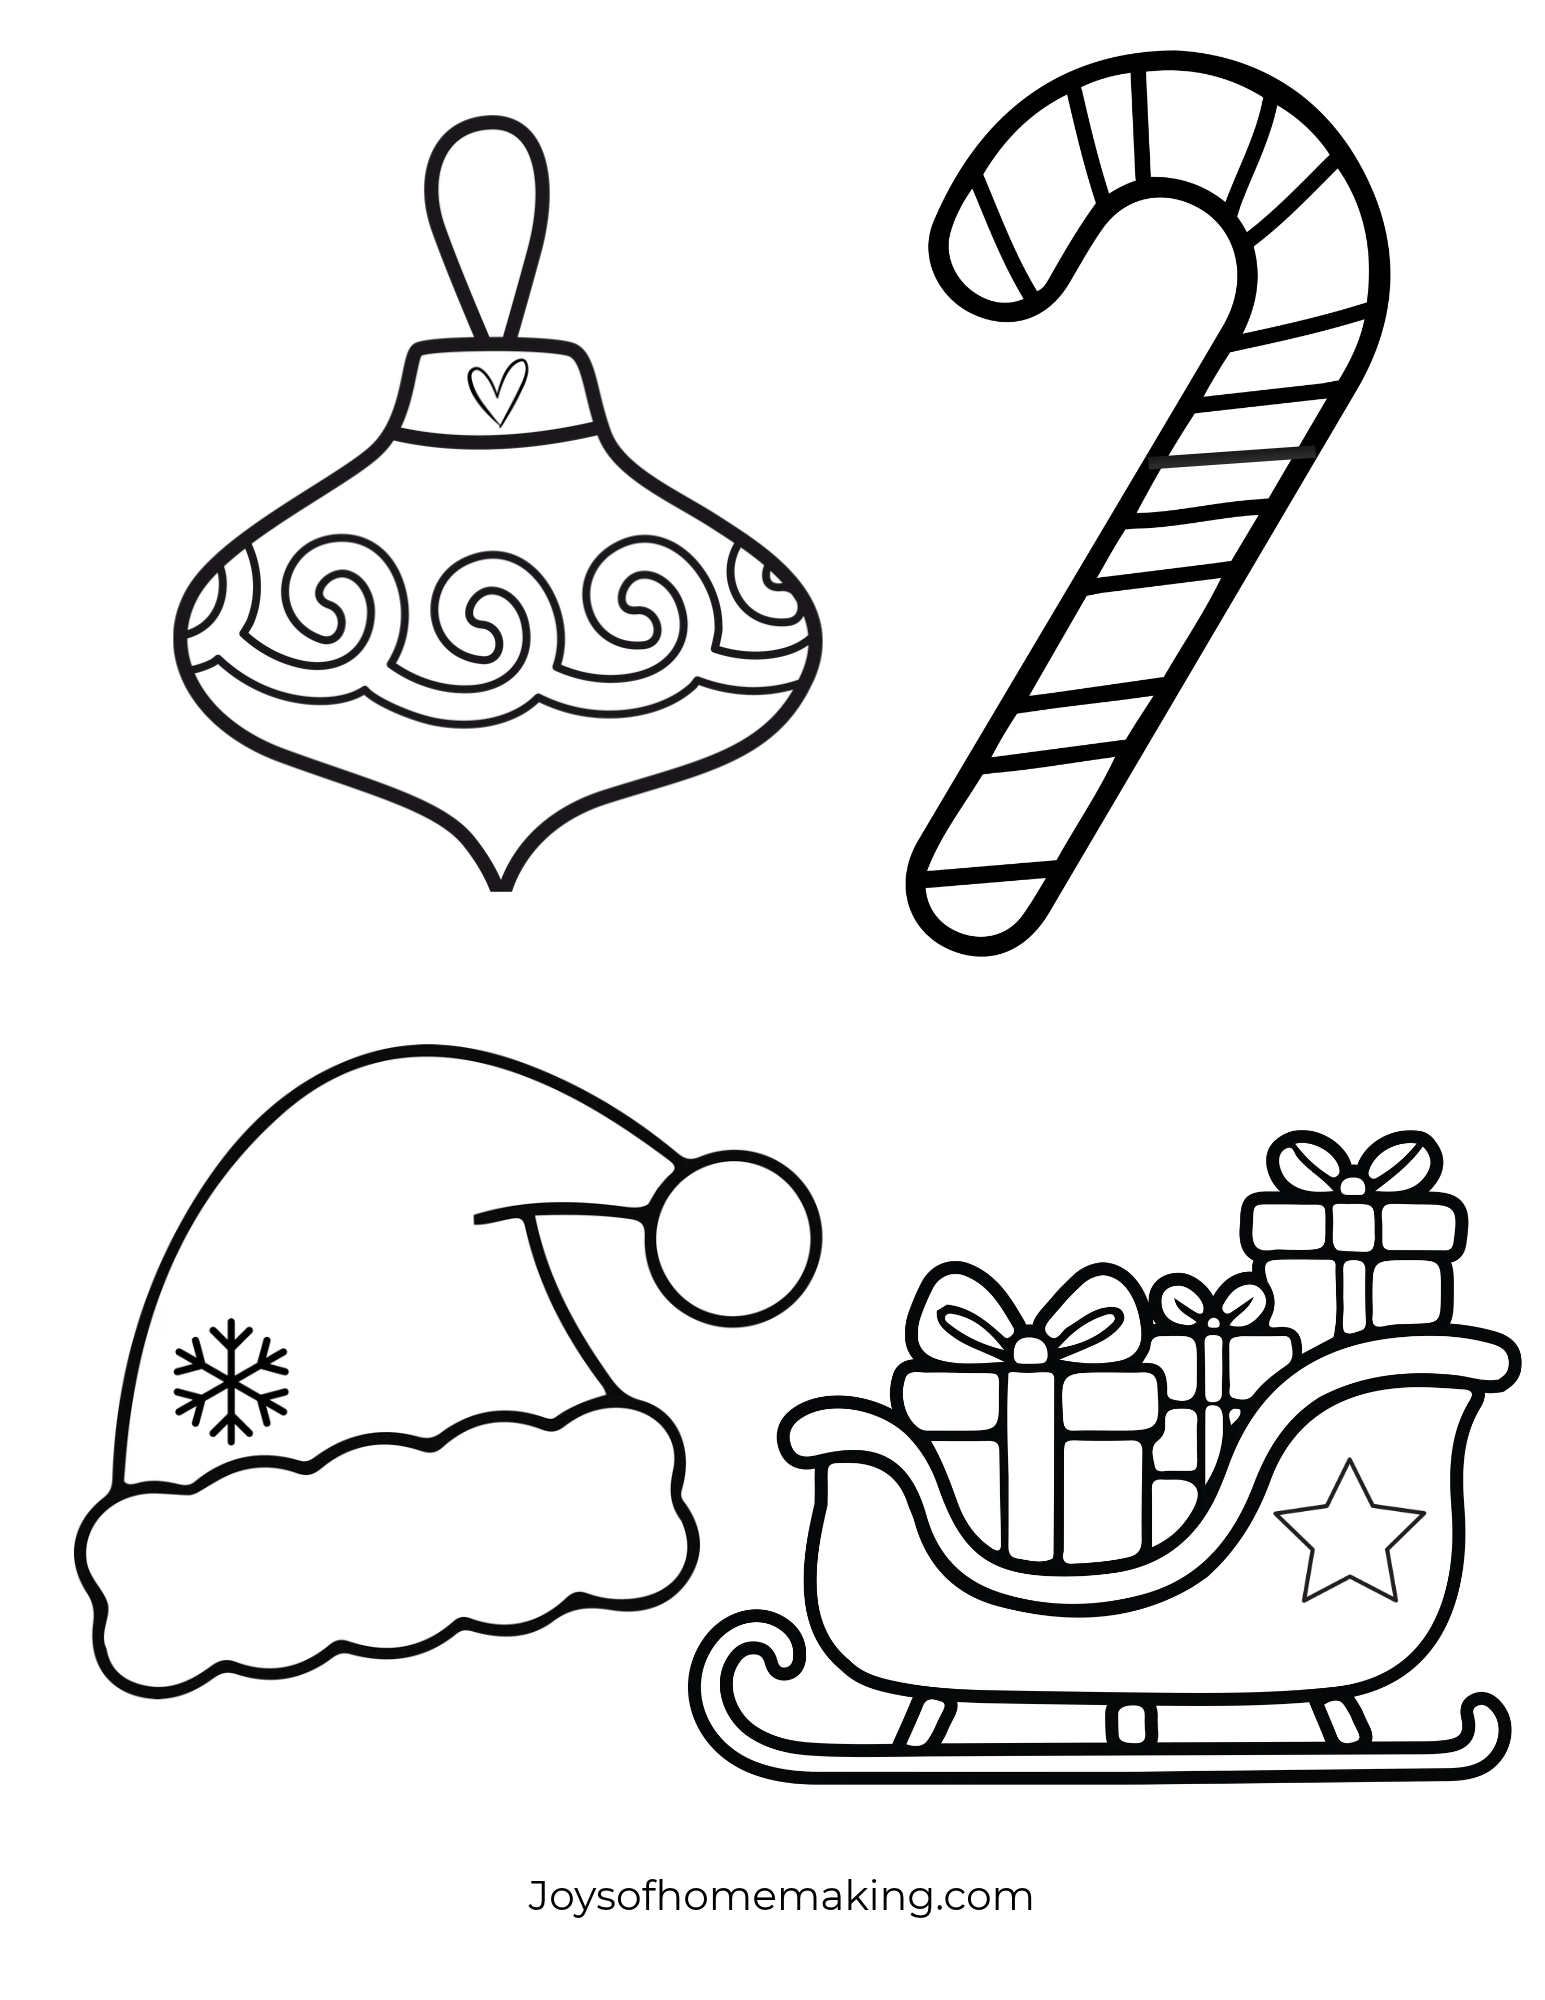
Print your chosen pattern and cut it down to fit the front of your card.
Step 3: Place Your Pattern Inside the Card
Now, this part is important!
Instead of placing your Christmas pattern on the outside of your card, place it on the inside of the front panel.
Open your folded card and position the pattern against the inside of the front cover, making sure it's centered where you want your embossed design to appear.
Secure it with a little painter's tape or washi tape so it doesn't move while you're working.
Since you'll be poking from the inside outward, the raised texture will appear on the front of your finished card.
Tip: If your pattern has letters, numbers, or other directional details, mirror the design before printing so it reads correctly on the outside.
Step 4: Poke the Holes from the Inside Out
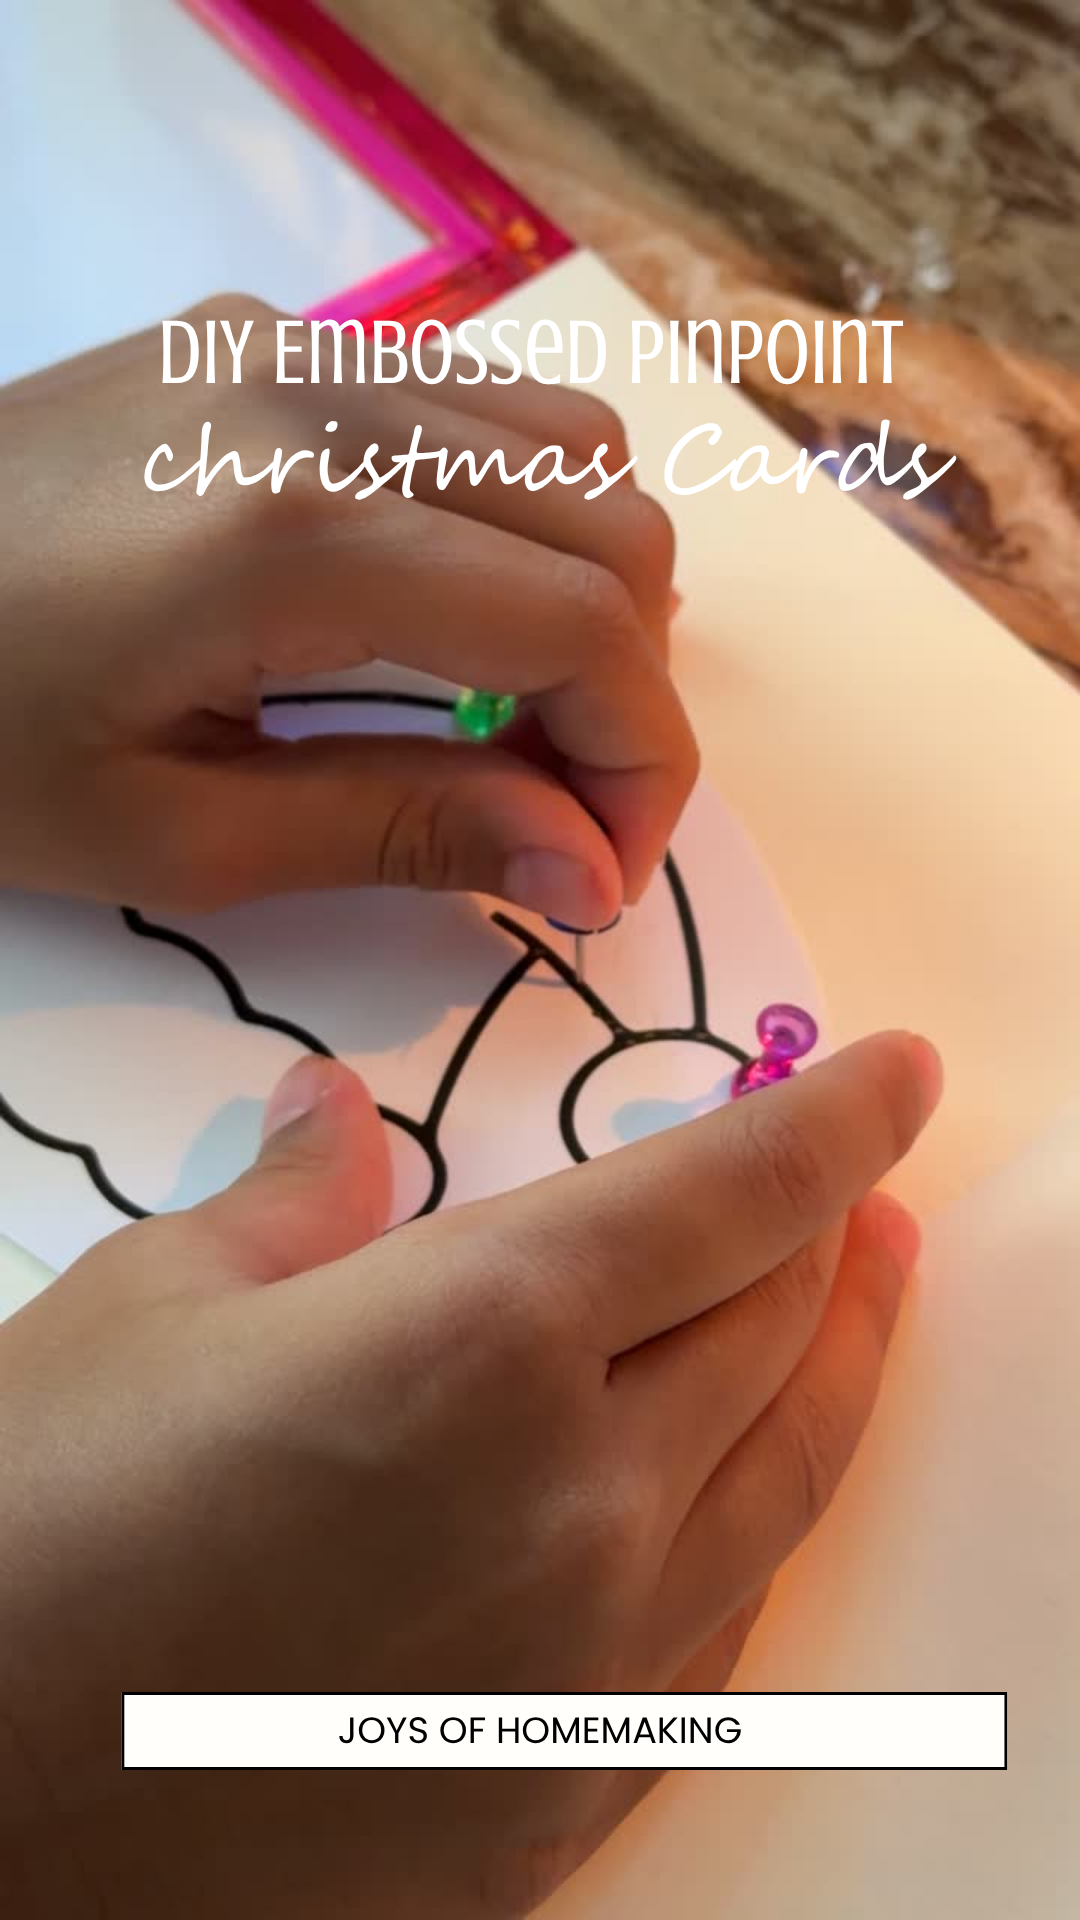
Now comes the fun part!
With your card opened flat, place a piece of corkboard, cardboard, or thick craft foam underneath the outside of the front panel to protect your work surface.
Using a thumb pin or needle, carefully poke tiny holes along the lines of your printed Christmas pattern.
Make sure you're pushing the pin from the inside of the card toward the outside.
As the pin goes through the cardstock, it pushes a little of the paper outward, creating a slightly raised edge around each hole.
That's what gives your Christmas card its embossed texture!
Try to keep your holes evenly spaced, and avoid making them too close together so the paper doesn't tear.
You don't need to push the pin all the way through to its widest part. Just enough to create a small opening and a raised edge on the opposite side.
Take your time and follow the lines of the pattern until the entire design is complete.
Step 5: Remove the Pattern and Admire Your Embossed Design
Once you've finished poking all the holes, carefully remove the tape and lift away your printed pattern.
Close your card and turn it over to see the front.
You should now have a beautiful Christmas design made of tiny, raised pinholes!
I think this is the most satisfying part of the project.
The little raised dots give the design a lovely texture, almost like a delicate embossed illustration.
And when light catches those tiny raised edges, the design becomes even prettier!
Step 6: Write a Heartfelt Christmas Message
Now that your embossed Christmas card is finished, it's time to write a little message inside.
This is actually one of the reasons I wanted to make these cards first in our 24 Days of Homemade (or Handmade) Christmas series.
I wanted my son to have plenty of time to think about the people he wants to give his cards to and write something meaningful for each of them.
It doesn't have to be anything fancy.
A simple Christmas greeting, a little thank-you, or a few heartfelt words can make a handmade card even more special.
If you want to cover the pinholes on the inside of your card, you can glue a piece of plain paper over the back of the embossed design. This also gives you a clean surface for writing your message.
And that's it!
You've made a beautiful DIY embossed pinpoint Christmas card using just a few simple supplies.
Tips for Making Beautiful Embossed Pinpoint Christmas Cards
Always poke from the inside out. This is the secret to getting that lovely raised, embossed effect on the outside of your card.
Use sturdy cardstock. Thin paper can tear easily, while cardstock holds the tiny raised details much better.
Keep your holes small. You want to create delicate, raised dots rather than large openings in the paper.
Space your holes evenly. Leaving a little space between each hole helps keep the design neat and prevents tearing.
Choose simple patterns if you're a beginner. Christmas trees, stars, and ornaments are great designs to start with.
Use a soft backing surface. Corkboard or thick craft foam makes it easier to push the pin through the paper while protecting your work surface.
Take your time. This is one of those Christmas crafts that's meant to be enjoyed slowly, especially when you're making it with your children.
Supervise children around sharp pins. Adults should handle the pinpricking for younger children. Older children who can safely use sharp tools should still work under adult supervision.
Merry Christmas!