I’ve always loved sourdough bread—the tangy flavor, the chewy texture, and that beautifully golden crust. For the longest time, though, I never dared to make it myself. It just seemed so complicated, like something best left to artisan bakers with wood-fired ovens and years of experience.
But here’s the truth: it’s not complicated at all.
It all begins with one simple thing—a strong, healthy sourdough starter.
At first, the idea of making your own starter from scratch might sound intimidating. But it’s actually one of the most rewarding (and surprisingly simple) kitchen projects you can take on. Part science, part magic, and all heart, the process requires no fancy equipment or special skills. Just a clean jar, some flour, water, and a little daily care and patience.
So if you’ve been wondering whether you can make sourdough at home without buying a starter—yes, friend, you absolutely can.
Let’s get started!
What is a Sourdough Starter?
In case you’re wondering what a sourdough starter is, let me break it down for you.
A sourdough starter is simply a mixture of fermented flour and water that is used to make bread rise. This leavening agent contains naturally occurring yeasts and bacteria that help to create bubbles in the dough, causing it to expand and become light and fluffy when baked.
Bread made with a sourdough starter has a tangy flavor and chewy texture. This unique taste comes from the lactic acid produced during fermentation, which gives sourdough bread its signature tang.
While sourdough starter is most commonly used to make sourdough bread, it can also be used as a substitute for yeast and other commercial leavening agents in a variety of baked recipes. For example, instead of using baking powder for pancakes, you can add a bit of sourdough starter to the batter. This will not only help the pancakes rise and become fluffy, but it will also give them a unique flavor that sets them apart from the usual breakfast fare.
How Long Does It Take to Make a Sourdough Starter?
Unfortunately, there is no shortcut to making a sourdough starter. While it's a simple process, it takes at least 7 days, maybe even longer, to create a starter.
Think of it like planting a seed – you need to give it time to sprout and grow.
To begin, you’ll mix whole wheat flour with water to kickstart the fermentation process.
Once your starter is established, you need to continue to feed it regularly to keep it alive and thriving.
It’s really not that hard. You’re just basically mixing flour and water together in a container, then giving it more flour and water to keep it happy and growing. And then you wait. And wait some more. Before you know it, your starter has doubled in size and is all bubbly and active, ready to be used in your favorite bread recipe.
Tips for Success
Make sure you have a feeding schedule in place.
Consistency is key when it comes to making a sourdough starter, so set a daily feeding schedule for your starter and stick to it religiously. I like to feed my starter in the morning right after I stumble out of bed and into the kitchen. It’s like giving it a little breakfast to start the day off right.
Pay close attention to the temperature.
Yeast is a finicky little beast, so you want to make sure your starter is cozy and warm to help it thrive. Aim for a room temperature of around 70-75 degrees Fahrenheit. If it’s too cold, it will be sluggish and won’t rise properly. If it’s too hot, it will get all funky and sour.
One trick is to place your starter on a cookie sheet inside your oven for a few hours. Make sure the oven is turned off with the light on. This cozy spot will give your starter a little boost it needs to get going.
Keep an eye on its growth.
As your starter grows, strap a rubber band around the container to see how much it rises. When it falls, you’ll see streaks of starter clinging to the sides of the container.
How Do You Know if Your Sourdough Starter Has Gone Bad?
A healthy sourdough starter should have a pleasant, slightly sour aroma. If your starter smells like alcohol or vinegar, that’s a sign that it might have gone off.
Next, take a peek at the appearance. If its moldy or you notice any pink, orange, or black discoloration, it’s time to start from scratch.
However, if you forget to feed it for a while, you might notice that the liquid on top starts to look funky and dark. That means your starter is feeling a bit hungry. All you have to do is give your starter a good meal, and that liquid will turn clear again.
Tools
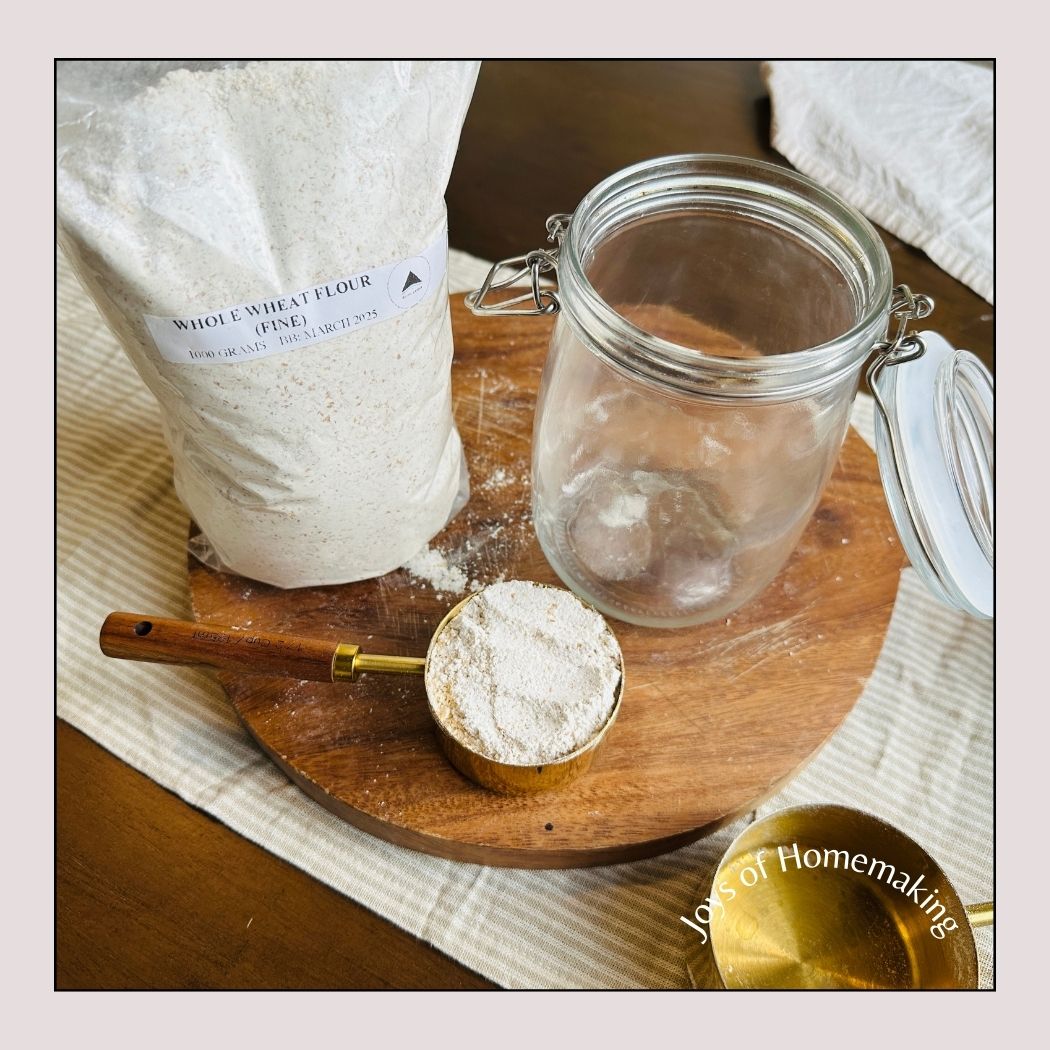
Non-reactive container
I suggest using a non-reactive container that is made of see-through material like a mason jar. This is important because you don’t want any unwanted flavors or chemicals leaching into your sourdough and affecting its taste.
You also want to easily observe the fermentation process of your starter. Watching your sourdough bubble grow can be fascinating, and having a see-through container allows you to witness this transformation.
Additionally, choose one that has a minimum 1 quart capacity. This will provide enough space for your sourdough starter to expand as it ferments. You don’t want to risk your container overflowing and making a mess in your kitchen!
Baker’s portion scale
No more guessing or approximating! With a baker’s portion scale, you can be confident that your measurements are spot on. But, don't fret if you don't have one. You can use a measuring cup instead.
Offset spatula
An offset spatula is great for stirring all your ingredients together, but if you don’t have one, a trusty spoon will do just fine.
Rubber band
To keep track of how much your starter is growing, simply use a rubber band to mark the level before each feeding.
Ingredients
Whole grain flour
You can use any type of flour to make a sourdough starter but I like using whole grain wheat flour. This flour is full of nutrients and fiber, which can help to create a more flavorful and robust starter.
Water
Some might tell you to use distilled water, but tap water can also do the trick.
How to Make Sourdough Starter from Scratch
I was absolutely thrilled when I succeeded on my first attempt—I managed to create my very own sourdough starter! If you haven’t tried making one yet, I highly recommend giving it a go.
Day 1
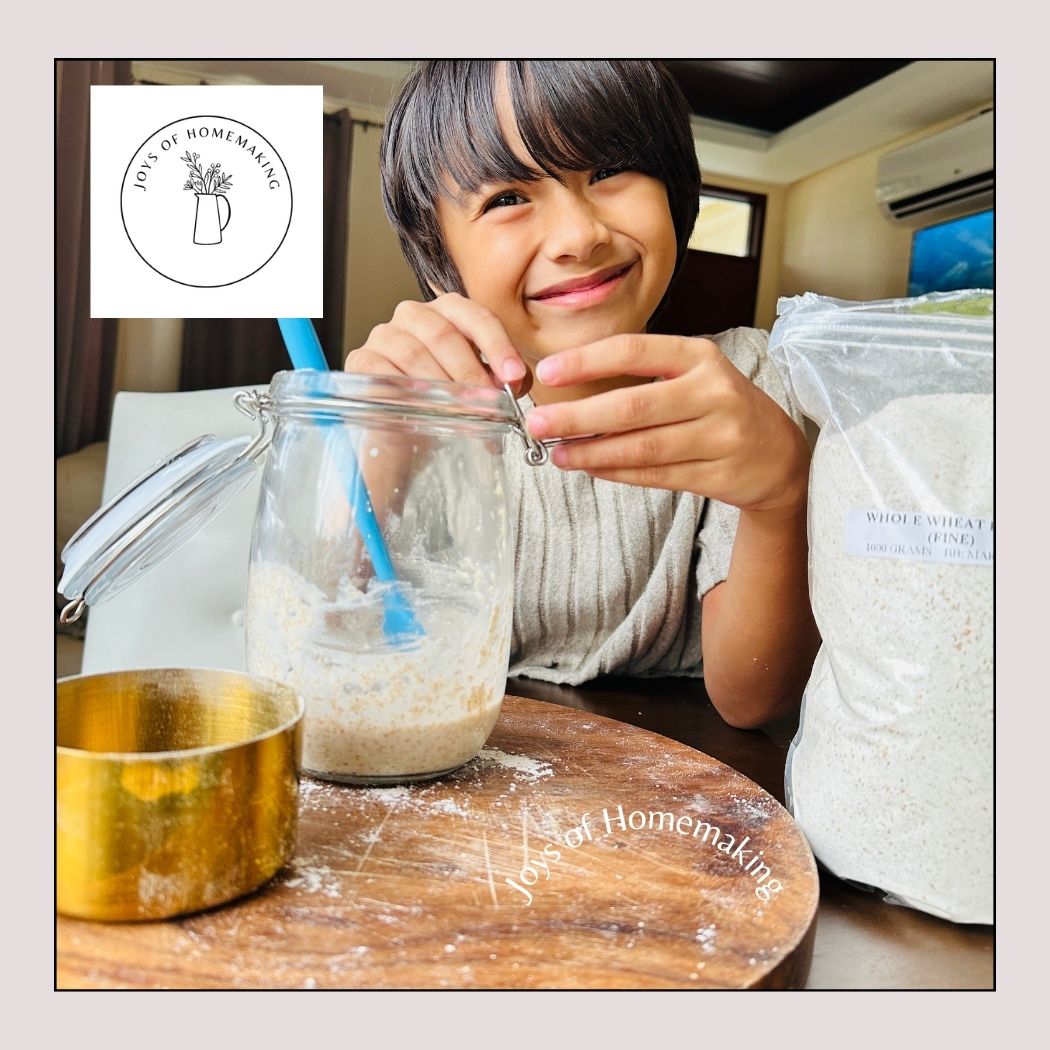
Gather your ingredients. You’ll need 50 grams of flour and 50 grams of room temperature water. That’s basically about ½ cup of flour and half a cup of water.
Mix the flour and water together in your container and give it a good stir until there’s no dry flour left in sight.
Once everything is well combined, cover the container loosely and let the mixture rest for about 24 hours in a room that is comfortably warm, around 70 degrees Fahrenheit.
On day one, your starter should resemble a moist dough that’s been mixed well with the flour. It will have a subtle smell that brings to mind the comforting scent of grains.
Day 2
Keep an eye out for some tiny bubbles on the surface. These bubbles are a sign of fermentation, which is a good thing! Sometimes those sneaky bubbles can disappear overnight, leaving you wondering if they were ever there in the first place. It’s all part of the process, so just be patient.
Whether you start to notice some bubbling happening or your starter seems to still be asleep, don’t worry too much. Stir in another ½ cup of flour and ½ cup of room temperature water. Mix it all together, cover, and let it sit for another 24 hours at room temperature.
On the second day, you shouldn’t be getting any funky smells from the starter. If it does, it might be telling you that something isn’t quite right. So keep an eye on it and make sure it’s on the right track.
Day 3
By the time day three rolls around, you should start to see some bubbles forming on the surface of your mixture. This is a good sign that the yeast and bacteria are waking up and getting to work. You might also notice that the mixture has expanded a bit, showing that fermentation is happening.
That's completely normal. Just give it a stir and remove about ½ - ¾ cup of the starter. Then, place it in a quart-sized jar. Now, feed with another ½ cup of flour and ½ cup of water.
The remaining mixture in the other jar is your discard. For the rest of the week, you’ll need to discard a portion of your starter daily. However, don’t toss it all—some of it can be saved and used in various delicious recipes.
Day 4
Feed your starter with ½ cup of flour and water. In the evening, if you notice a layer of liquid on top, you can feed it again with the same amount.
Days 5-7
By this point, your sourdough starter should have doubled in size. Look out for these telltale signs that it’s working, like lots of bubbles and little pools of water with tiny bubbles on top. And when you give your starter a sniff, you should catch a whiff of something tangy, but not too strong.
To keep your starter alive and active, you need to keep feeding it. Feed it twice, morning and night, with the same amount. Just repeat the steps from day three – mixing flour and water, stirring it up, and letting it sit.
Day 7 Readiness Test
Let’s check if your starter is ready. Look for lots of bubbles and texture that’s like fluffy roasted marshmallows. If you see these things, congrats! Your starter is active and ready to roll.
Now, if your current container is looking a little worse for wear, it might be time to transfer your starter to a new, clean jar. Give it a good scrub down and make sure it’s nice and cozy in its new home.
However, if your starter is looking a bit sad with just a few measly bubbles and no real growth, don’t fret! Just keep repeating the steps from days 3 to 6 until it’s nice and bubbly.
Sourdough starters are picky little things that thrive on the bacteria in your surroundings. If you’re living in a dry place, don’t be surprised if your starter is taking its sweet time to get going compared to someone living in a swampy, humid location. So be patient and keep up with the feeding routine.
Final Thoughts
If you’ve been thinking about making your own sourdough starter, take this as your sign to go for it! And if you’ve got kids, even better! This is such a fun, hands-on way to explore science together and make memories you’ll both treasure. Trust me, slicing into that first loaf you made from scratch—especially with little helpers by your side—is a moment worth savoring.
So roll up your sleeves and get started. You’ve got this, joyful homemaker!
“The best things in life take time. Just like sourdough, we rise slowly, but we rise strong.”