“Two ingredients, a quiet wait, and flavor blooms like poetry.”
Hello, homemaker!
When I started Joys of Homemaking not so long ago, I set myself the goal of learning and sharing at least a hundred homemaking skills and projects within a year. My mission was to become a better (and joyful) homemaker and embrace a more sustainable lifestyle by learning how to make things from scratch.
I really enjoy making homemade food (from breads and yogurt to cheeses and sauces) and pantry staples that I would normally buy at the store. At the top of my list was homemade vanilla extract. I had always been curious about how it’s made and where it comes from, so I did a little research—and to my surprise, I discovered that it’s incredibly simple to make, using only two ingredients!
So, I ordered vanilla beans from Amazon for my very first batch of pure vanilla extract. What started as a simple kitchen project quickly turned into a little educational experience not just for me, but for my son, too. We ended up folding it into our Nature Study as part of our home education.
I actually held onto the beans for a few days before making the extract so we could explore them together. We split open a pod, examined that magical paste inside, and marveled at where that incredible vanilla flavor really comes from. Honestly, I had never even touched a vanilla bean before, so it was just as fascinating for me as it was for my boy.
Soon after we put together our first bottle of homemade vanilla extract, we went a step further by watching videos about vanilla beans, from where they grow to the intricate process of producing them. This simple DIY indeed turned into a little moment of wonder and learning, and that made it all the more special.
Why Make Homemade Vanilla
Since this is my very first batch, I can’t describe the taste just yet. It takes a few months before homemade vanilla extract is ready to use. I’ll definitely update this post once my extract is ready, but based on my research, pure vanilla extract has a richer, deeper flavor compared to the imitation versions you usually find in stores. It’s perfect for baking, drinks, desserts, and more—and I can’t wait to finally try it!
It’s also customizable. If you like it strong and bold, you can simply add more beans. If you prefer light, use fewer beans.
Store-bought pure vanilla beans can be pricey, so making your own saves money in the long run as long as you use cheaper alcohol.
Beyond the taste, I really enjoyed the process. Making vanilla extract is something fun to share with family and friends. Homemade vanilla extract is also a nice gift to give for special occasions like Christmas.
The Not-So-Sweet Side of Homemade Vanilla
Compared to imitation vanilla, pure vanilla extract is definitely more expensive. That is because vanilla beans are the second most expensive spice in the world. No wonder that little bottle at the store feels like a splurge! Because of its price, most people use the cheaper alternative: imitation vanilla. It is made with lab-produced vanillin, a compound found in vanilla beans that gives it that familiar flavor. Since it’s not exactly natural and it is easy to produce, it’s cheaper compared to the real deal.
Of course, aside from the cost, there’s one more “downside” to making your own vanilla extract: the waiting game. Pure vanilla needs time to work its magic before it’s ready to use.
What Kind of Vanilla Bean Should You Use
There are three main types of vanilla beans: Madagascar, Tahitian and Mexican. Madagascar vanilla beans are probably the most popular as Madagascar is the world’s major producer of vanilla. So, for this project, I chose Madagascar as it’s the most recommended.
In addition to varieties, there are also different grades of vanilla beans to choose from. Grade A beans are longer and moist but they are more expensive. On the other hand, Grade B beans less pretty or less pump but they are cheaper than Grade A beans. If you are trying to cut back on cost, definitely use Grade B. It's also recommended for making vanilla extract.
The Only 2 Ingredients You Need

- Vanilla beans – Look for whole beans. Madagascar vanilla beans are the classic choice but you might also want to try Tahitian or Mexican. For this project, I used Madagascar vanilla beans as it’s the most recommended.
- Alcohol – Vodka is the most popular (since it’s neutral and lets the vanilla shine), but rum or bourbon give your extract a warm, complex flavor. There's no need for you to buy expensive alcohol though. I picked the cheapest vodka I could find.
That’s it! Two ingredients. No fancy equipment required.
Container
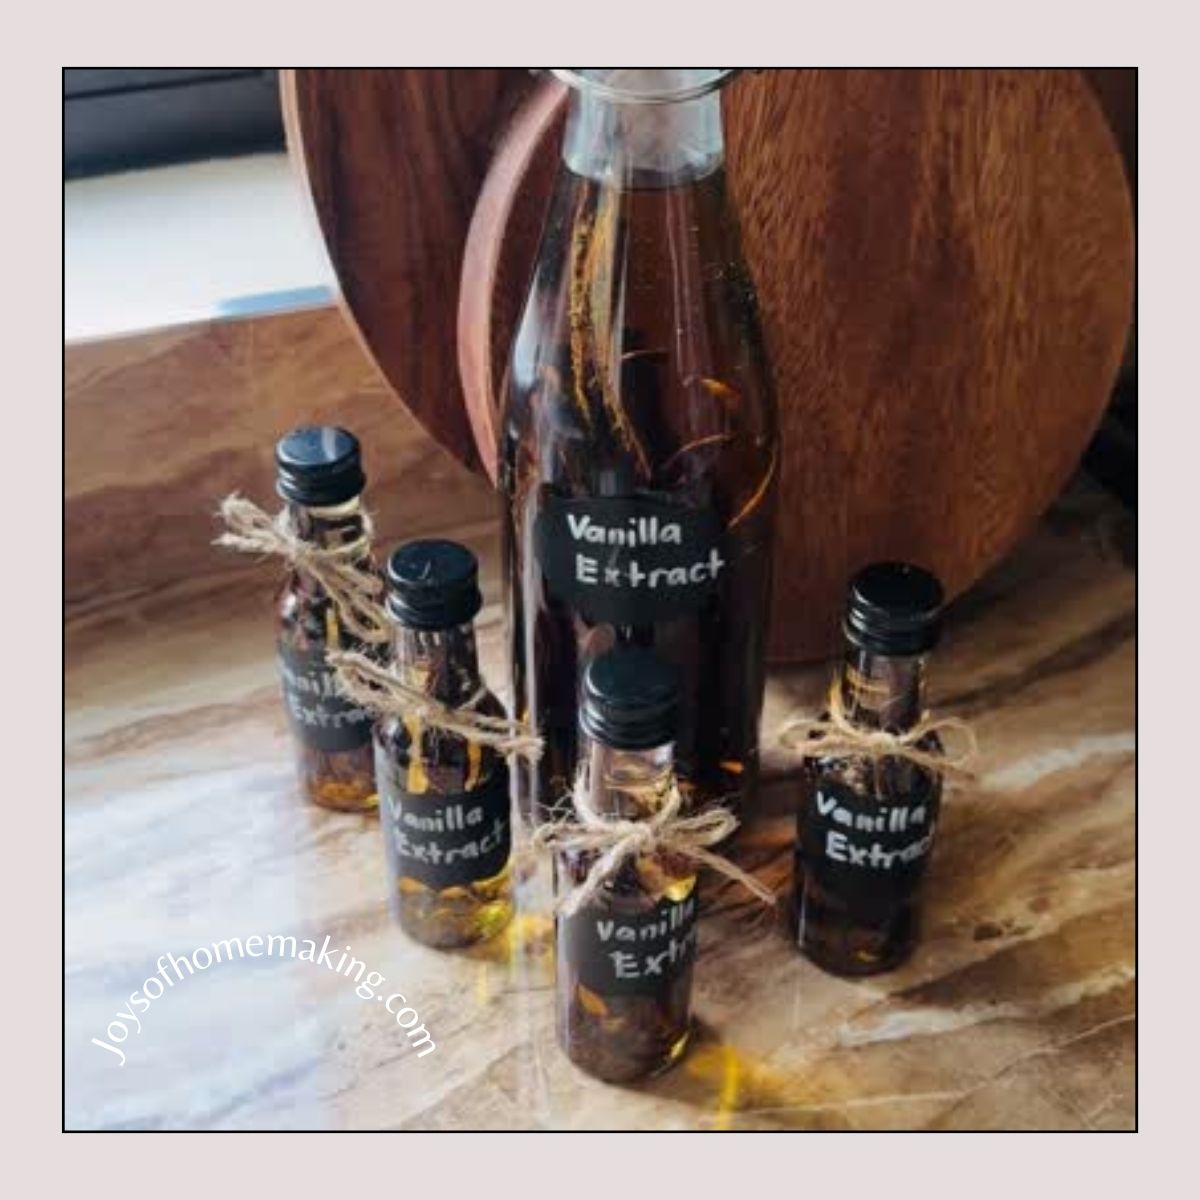
You can store your homemade vanilla in any sealed container but a glass bottle or a glass jar with tight lid works best. For mine, I used a 500 ml glass bottle I picked up online, and I also poured some into cute little mini containers to give away as Christmas gifts.
If Amazon is more convenient for you, check out similar products there.
Alcohol and Vanilla Bean Ratio
A good rule of thumb is to use about six beans for every 8 oz (1 cup) of alcohol. Stick to that ratio and your vanilla extract will turn out just fine. Of course, the more beans you use, the stronger and richer the flavor will be.
Since I wanted mine extra bold, I went all in and used all 30 beans I had with 700 ml (16 oz) of vodka. I filled a 17 oz bottle with 22 beans, then tucked 2 beans each into 4 1.7 oz mini bottles for gifting.
How to Make It
- Split the beans. Slice them lengthwise. This Madagascar beans also already comes split for making extract.
- Clean or sterilize your container. A glass jar or bottle works best. I bought my glass bottle here.
- Fill your container with alcohol (vodka, rum, or boubon.) Remember the ratio of 6 beans for every 8 oz ( 1 cup) of alcohol.
- Drop the cut beans into your container.
- Seal and wait. Store it in a cool, dark place and give it a gentle shake every week.
Here’s the hardest part: the waiting game. Vanilla extract needs at least 8 weeks to infuse, but the longer you wait, the richer the flavor. I usually start using mine around the 2-month mark, but if you can hold out for 6 months, you’ll be rewarded with liquid gold.
Tips and Fun Extras
- Reuse and refresh. As you use your extract, you can top it off with more vodka to keep it going.
- Make it a gift. Pour your homemade vanilla into little glass bottles (just like what I did in the video), tie with a ribbon, and boom—thoughtful, homemade holiday or hostess gift.
Experiment. Mix bean varieties or try different spirits to create your own signature vanilla flavor.
There you have it--homemade vanilla extract! Let me know how it turns out for you!
Ingredients
Equipment
Method
“Two ingredients, a quiet wait, and flavor blooms like poetry.”