The simple things are also the most extraordinary things, and only the wise can see them." – Paulo Coelho
Hello, homemaker!
Lately, I’ve been whipping up butter with my 8-year-old, and he’s absolutely fascinated by how easy it is to make!
If you've never made your own butter before, you're in for a delightful surprise—it’s so much easier than you might think! With just one or two simple ingredients, you can create fresh, creamy homemade butter that rivals anything you’ll find in the store—minus the preservatives and additives.
The best part? You don’t need any fancy kitchen gadgets. A standard blender (or mixer) and a little bit of time are all it takes.
If this sounds like a kitchen adventure you’d love, you’re going to enjoy what’s coming next. In this post, I’ll walk you step by step through the butter-making process—from pouring the cream into the blender to the magical moment it turns into butter. So, tie on your apron, grab your blender, and let’s make some delicious butter together!
Why Make Butter Using a Blender
Making butter the traditional way involves shaking cream vigorously in a jar or churn for quite some time until it eventually turns into butter. If you’ve ever tried this, you probably know how tiring it can be for your arm. While I appreciate this traditional method, I have to admit that I would only go for it if I didn’t have the convenience of a blender at home.
If you don’t feel like working your arms to the bone, a blender makes things a lot quicker and easier. If you are using a high-powered blender, you could see results in as little as two minutes. It’s definitely a time-saver, especially when you have many other things on your to-do list.
Another popular way to make butter is to use a stand mixer. While this method does work, I noticed that it takes quite a bit longer than expected and leaves a mess on the kitchen countertop. Unlike working with the mixer, the blender keeps the ingredients contained, so there are fewer spills and splatters.
What Cream is Best for Making Butter

You might think that making butter at home requires fancy ingredients or special skills, but let me assure you, it’s quite simple and doesn’t have to cost a lot. In fact, all you need is some cream, and you can create delicious butter right in your kitchen.
The good news is that you can use any cream that contains at least 35 percent fat. You don’t even need to check the label closely for that information because most of the cream available in grocery stores, including heavy cream and whipping cream, has enough fat for butter-making. Just grab a carton from the store, and you are good to go!
It's also perfectly fine to use pasteurized cream. Pasteurization ensures that the cream lasts longer and remains safe for consumption. Some people prefer pasteurized cream for this reason, and it works just as well for making butter.
The Ideal Cream Temperature
To make delicious homemade butter, the temperature of the cream you use is really important.
Here’s a simple tip: cream that is slightly cool or at room temperature will turn into butter more quickly than cream that comes straight from the fridge. This is because colder cream is thicker and does not churn as easily.
To speed things up, I suggest that you let the cream sit out for about 30 minutes before you start churning. This small step allows the cream to warm up slightly and become much easier to work with.
Another fun technique is to culture your cream overnight if you’re interested in making cultured butter. All you need to do is add a spoonful of yogurt to your cream and let it sit at room temperature overnight. This method introduces friendly bacteria that will ferment the cream, giving your butter a delicious tangy flavor.
How to Make Butter in a Blender
Ingredients
- 1 liter heavy cream
- ¼ teaspoon salt, if making salted butter
Equipment
- Blender (or mixer)
- Spatula
Instructions
1. Let the cream warm up.
Pour the cream into your blender and let it sit for 30 minutes until it reaches room temperature. This simple step is crucial as it helps the cream blend more easily. If you use chilled cream right from the fridge, the butter will take longer to form. By allowing the cream to warm up, you will achieve a better consistency and a quicker result.
2. Blend until the cream changes in consistency.
Turn on the blender. Start at a low speed, then gradually increase the speed. The goal is to blend the cream until it separates into buttermilk and butter.
Initially, the cream will whip into a fluffy mass, creating thick whipped cream. Continue mixing until you notice larger crumbs beginning to form. The process may take anywhere from one to ten minutes depending on the strength of your blender (or mixer).
I used my stand mixer and it still works just fine. It just caused some splashes!
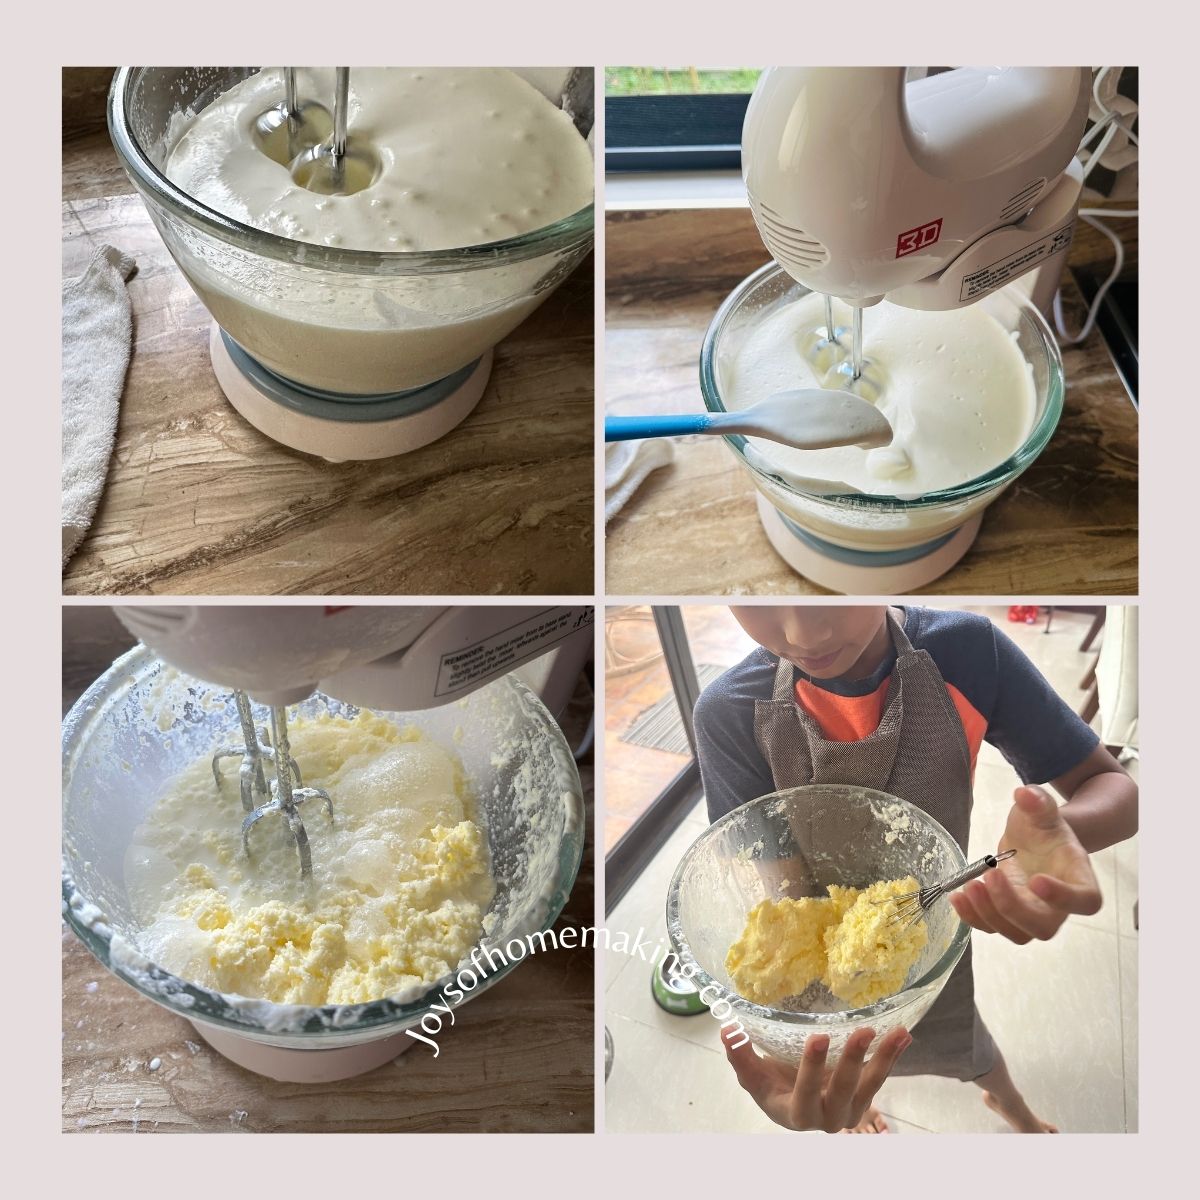
3. Allow the butter to separate from the buttermilk.
Once you reach the stage where the crumbs are visible, pause the blender and let the contents sit for a few minutes. During this time, the butter will start to float to the top while the buttermilk settles below it. When you see two distinct layers, you are ready to proceed.
4. Remove the buttermilk.
Switch off the blender and pour the buttermilk into another container, leaving the butter in the blender. It might be helpful to use a spatula to hold back the butter, ensuring that you only remove the buttermilk. The buttermilk can be saved for use in baking or cooking, as it adds a lovely flavor to pancakes, biscuits, or marinades.
5. Wash the butter to remove excess buttermilk.
Once you have separated the butter from the buttermilk, it’s time to wash the butter to remove any remaining buttermilk, which can spoil the butter if not rinsed properly. Pour enough cool water into the blender to cover the butter completely. Then cover the blender, and pulse it a few times. You will notice that the water starts turning cloudy.
After pulsing, let it stand for a moment. This resting time allows the buttermilk to separate from the butter more effectively. After a brief pause, pour off the liquid. Repeat this process until the rinse water appears mostly clear.
6. Add salt (optional).
Adding salt enhances the flavor and acts as a natural preservative. After pouring off the buttermilk, you can now add salt to the butter. Add salt according to your taste preference. It’s best to start with a small amount and pulse the blender a few times to mix the salt evenly throughout the butter. After blending, taste the butter to determine if you would like to add more salt.
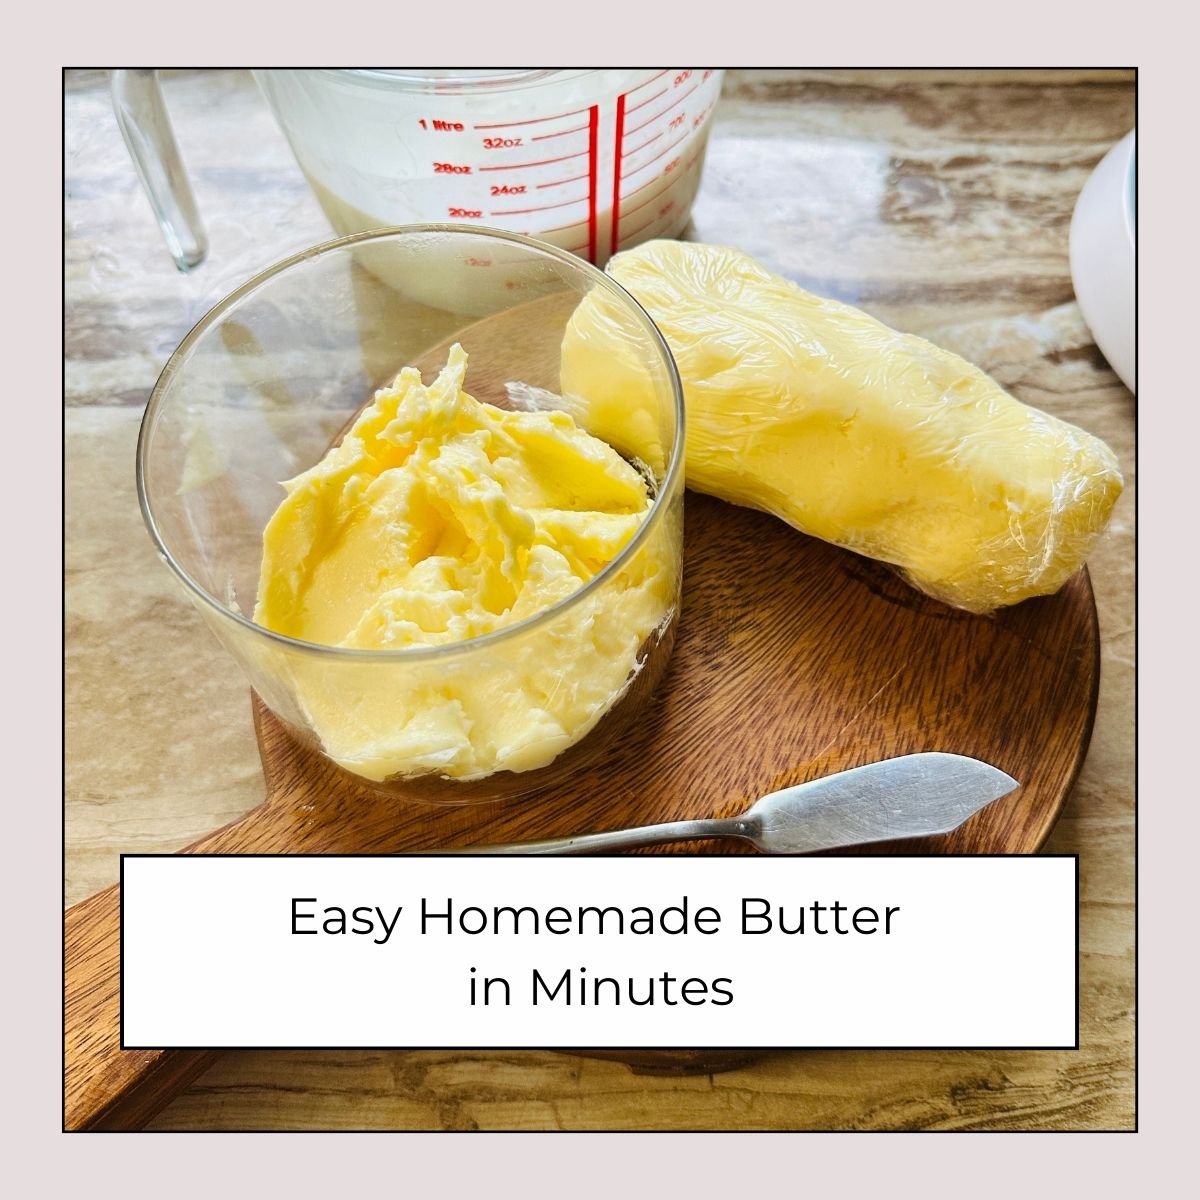
7. Store the Butter.
Carefully scrape the butter out of the blender into a clean storage container or butter keeper. If you prefer, you can shape the butter into a log using plastic wrap. This method not only makes it easy to store but also allows for convenient slicing when you need some for cooking or spreading.
What to Do When Cream Won’t Turn to Butter
When making butter, it’s essential to know what to expect. As the cream is blended, it should gradually change from liquid to a whipped consistency and eventually turn into butter. However, sometimes, the process gets stuck. When your cream remains in the whipped cream phase, it can be discouraging.
One common reason for this issue is the formation of air bubbles around the blender blades. These bubbles can trap the cream and prevent it from blending properly, leading to a standstill in the churning process.
To troubleshoot this problem, check the consistency of your cream. If it looks thick and fluffy, you might be on the right track. However, if you notice that the whipped cream is not changing despite blending for a while, stop the blender and carefully scrape down the sides of the container. This will help break the air bubbles that are causing the blockage. Once you have scraped down the sides, start blending again. Restart the mixer at a low speed to see if the cream incorporates smoothly.
How to Store Your Butter Properly
Storing butter properly is essential to maintain its freshness and texture. Freshly made butter has a delightful soft and creamy texture, which makes it easy to spread on bread or use in cooking. However, the way you store it can affect its quality over time.
One of the best ways to store butter is to use a butter keeper. A butter keeper is a container designed to maintain the creaminess of the butter. This method is great if you plan to use the butter within a short period and prefer the ease of spreading right from the counter. Alternatively, if you prefer a firmer texture, you can wrap the butter in wax paper and place it in the refrigerator. When stored in the fridge, butter can last for several weeks.
When kept at room temperature, it will last for about a week. However, it’s important to note that leaving butter out for too long can lead to spoilage, especially in warmer temperatures. If you want to store butter for an even longer period, freezing is the best solution. You can freeze homemade butter for up to three months.
Final Thoughts
And just like that—you've made your own butter. With just a bit of cream and a few minutes of effort, you've turned a simple kitchen staple into a delicious, wholesome creation.
Whether you're new to DIY or a seasoned homesteader, this project proves that sometimes the best things in life really are simple.
The simple things are also the most extraordinary things, and only the wise can see them." – Paulo Coelho
Now go ahead—spread the goodness!