“Every leaf speaks bliss to me, fluttering from the autumn tree.” – Emily Brontë
Hello, homemaker!
Living in a tropical country, we don’t exactly get to experience crisp autumn air, falling leaves, or pumpkin patches. But that doesn’t mean we can’t bring the cozy vibes of fall into our homes! Since my son is American, I also want to share with him the beauty of fall even if it’s just through decorations.
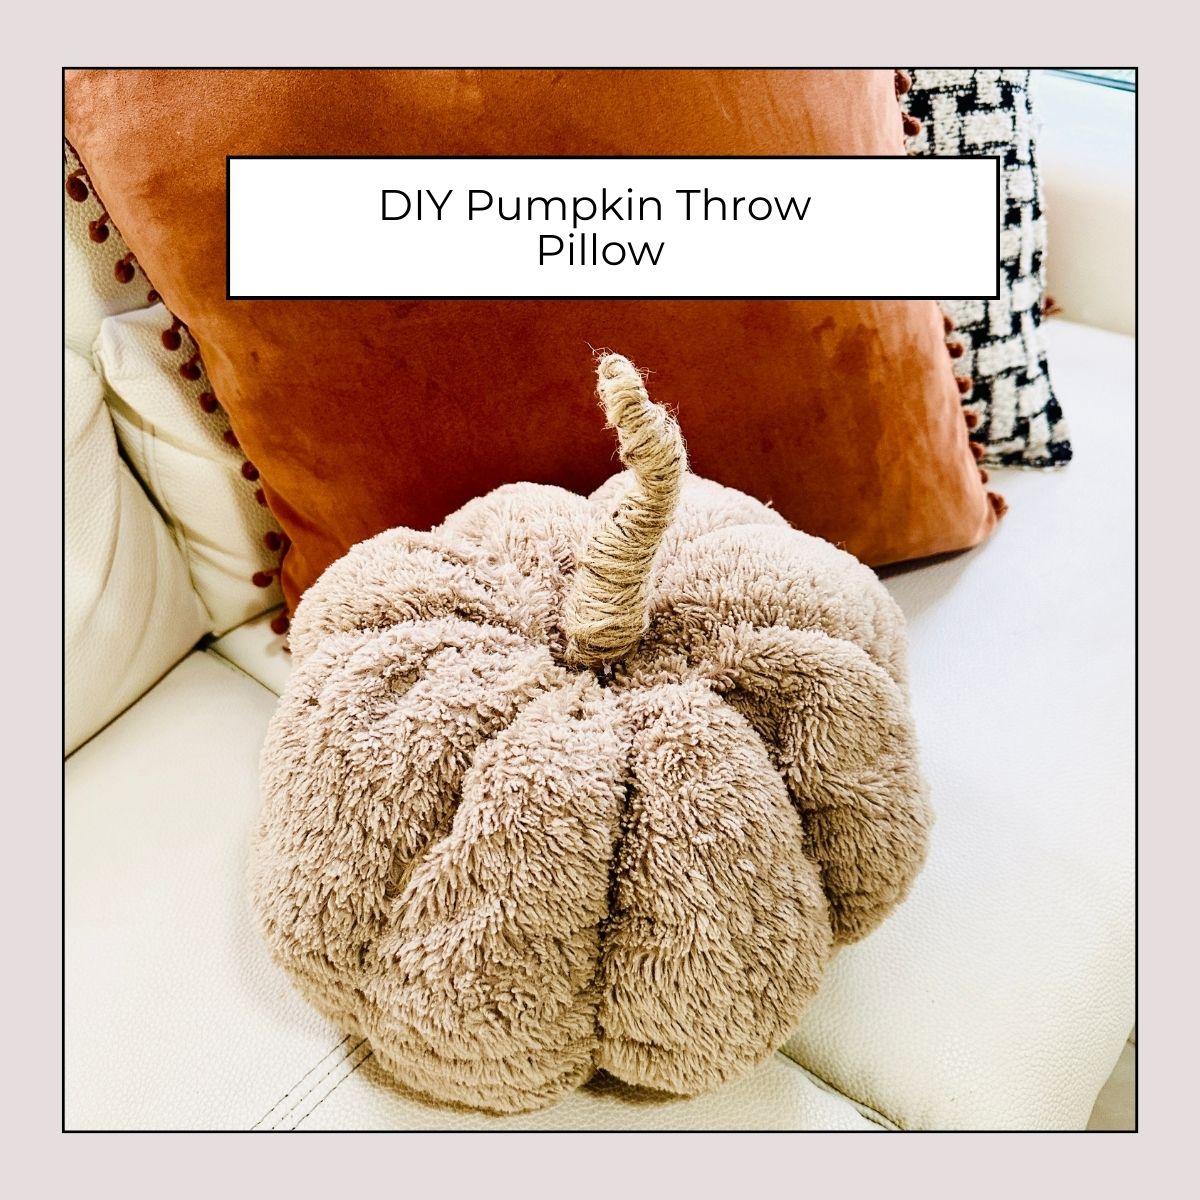
That's why, today, I decided to repurpose some old throw pillow covers and turn them into DIY Pumpkin Throw Pillows.
The result? A simple, budget-friendly project that instantly added warmth and seasonal charm to our living space. It was not only fun and beginner-friendly, but also only required a few materials I already had on hand.
Why Make a Pumpkin Throw Pillow?
Pumpkin-themed décor is a fall classic. Instead of buying new decorative pillows (which can get pricey), this project lets you:
- Repurpose old pillow covers you’re no longer using.
- Add seasonal accents without overwhelming your existing décor.
- Create custom colors and textures that match your home.
Plus, it’s a quick DIY—you can whip one up in under an hour!
Materials You’ll Need
Here’s what I used (feel free to adapt with what you have):
- Old throw pillow cover (solid-colored works best, but patterned can be fun, too). You can also use old shirts.
- Pillow insert or stuffing - I used inserts from old pillows.
- Yarn or twine (for creating pumpkin “sections”). I used jute twine.
- A needle with a large eye (or upholstery needle)
- Fabric scraps, felt, or artificial leaves for the stem (optional)
- Hot glue gun or fabric glue
- Scissors
Step-by-Step Tutorial
Step 1: Prepare the Pillow
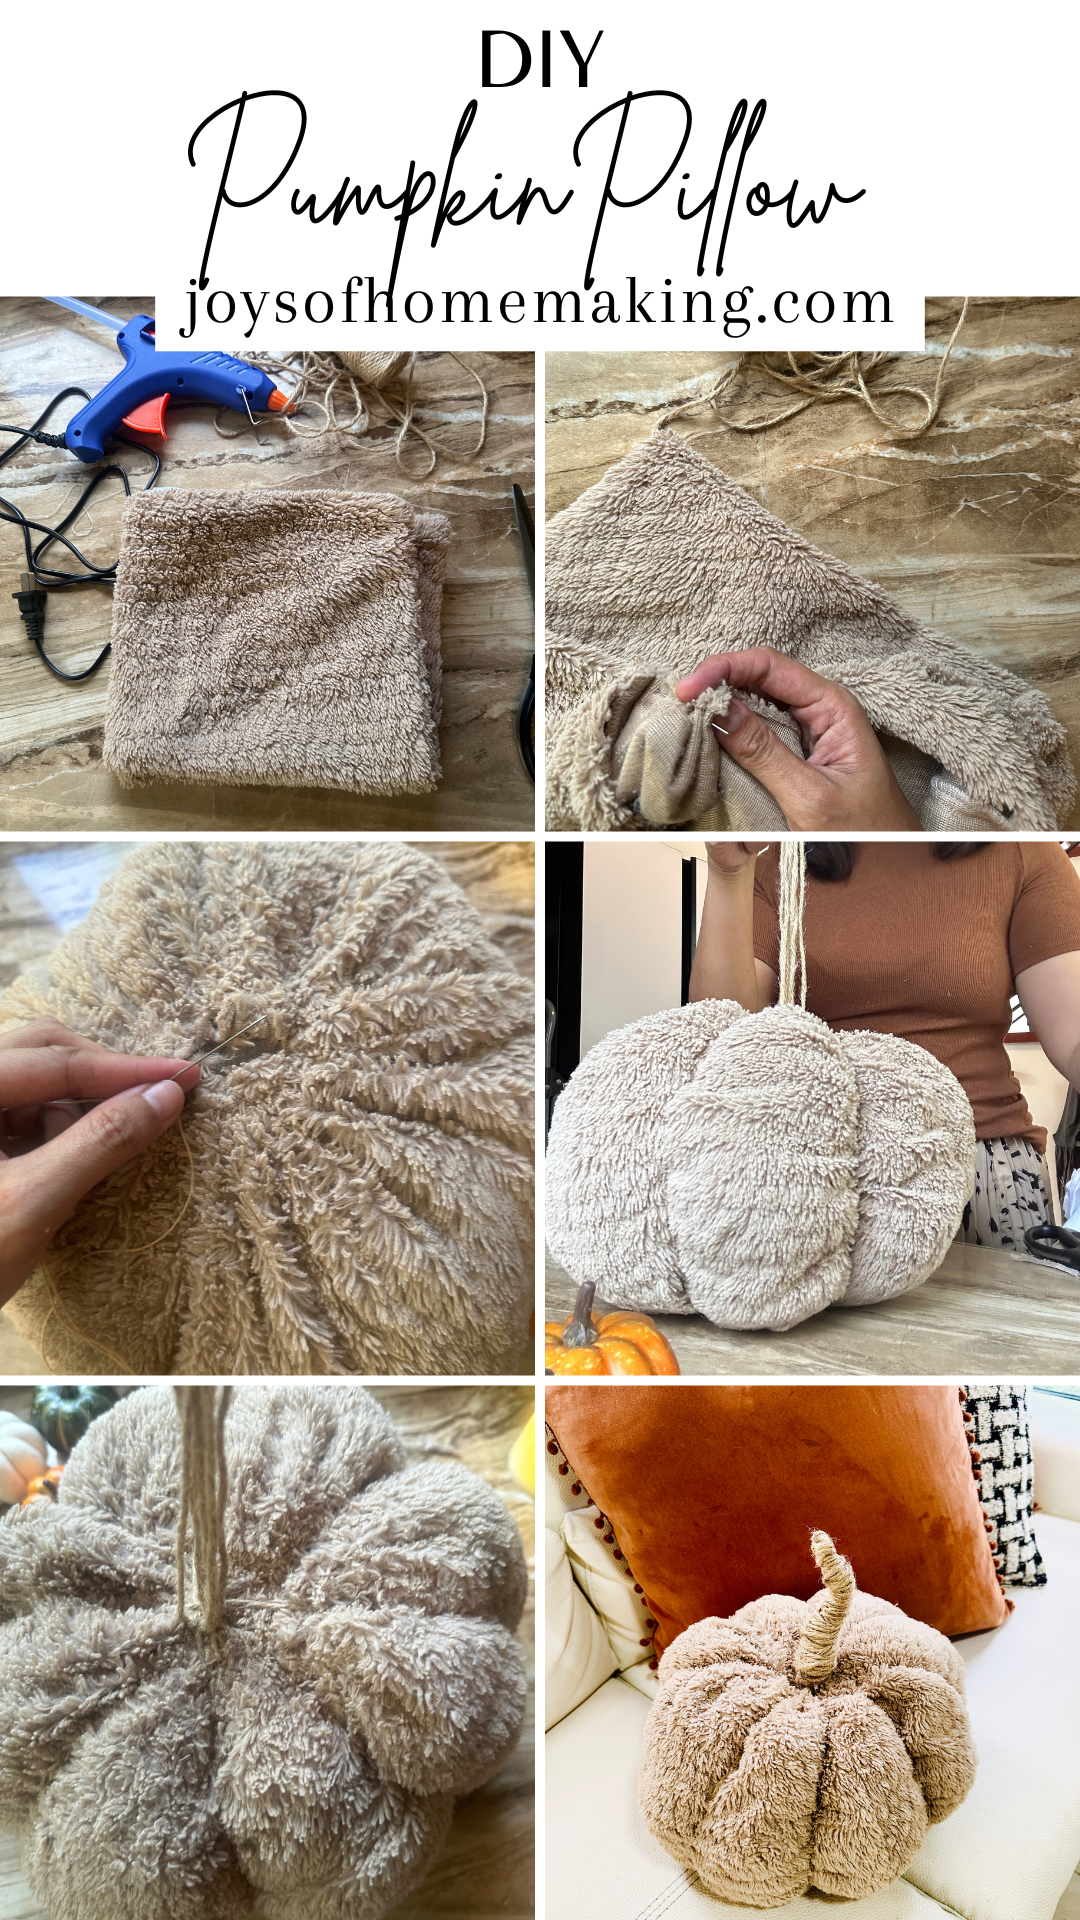
Start with a throw pillow cover you no longer use. I had a neutral beige one that gave the perfect rustic autumn look. To begin, cut open both ends of the cover (including the zipper side), remove the zipper, and sew one end closed using a needle and yarn. Once that side is secure, slip in your pillow insert or stuffing until it feels nice and plump. Finally, sew the other end shut to complete the base of your pumpkin pillow.
💡 Tip: Rounder pillows will look more like pumpkins, but you can also use a square pillow and still get a fun effect.
Step 2: Create Pumpkin Sections
I used a jute twine to create the pumpkin sections. Simply cut 4 pieces of jute twine, wrap each one around the pillow, starting at the center of the pillow's bottom. Wrap the twine over the pillow, pulling it tight and tying it on top to create a "pumpkin section. Repeat 4 times, spacing evenly until your pillow has those classic pumpkin ridges.
Don’t worry if it looks a little uneven—it just adds to the charm!
Step 3: Make the Stem
For the stem, I simply used the loose ends of the jute twine I had wrapped around the pillow to create the pumpkin ridges. Once the twine was secured on top of the pillow, I left the ends sticking out and wrapped them together with more jute twine to form a simple, rustic stem.
You can get creative:
- Roll up a scrap of brown fabric and glue it in place.
- Use a piece of felt cut into a small cylinder.
- Even a cinnamon stick makes a rustic, fragrant stem!
Glue the stem securely to the center top of your pillow.
Step 4: Add Finishing Touches
To complete the look, glue on felt leaves, artificial greenery, or even a few raffia ribbons. If you want a farmhouse vibe, go with neutral tones. For a more playful pumpkin, choose bright orange fabric and green leaves. I left mine a bit bare, though.
Styling Ideas
- Couch centerpiece: Place your pumpkin pillow alongside neutral throws for a cozy seasonal statement.
- Bedroom accent: Add it to your bed for a subtle autumn upgrade.
- Porch décor: If you have a covered porch, these pillows make a welcoming fall touch.
Final Thoughts
If you are looking to buy new fall decor, try making this DIY pumpkin pillow first. It's a simple little project that can bring the season's charm into your home. It's also an easy project you can whip up in less than an hour using the materials you already have in hand.
Have fun!