Simple, soulful, and handmade with love.
The truth is, I’ve grown tired of store-bought Christmas ornaments. I have been regretting lately why I bought all those fake, glittery stuff. While I still use them for the holidays, I find myself increasingly drawn to natural, homemade pieces — this year and, I’m sure, in the years to come. I might even replace them entirely with ornaments my family and I make together.
This year, I fell in love with air-dry clay ornaments. I adore how the clay feels—soft yet sturdy, simple yet full of creative possibilities. They’re beautifully rustic, perfectly imperfect, and incredibly easy to make. No kiln, no fancy tools—just your hands, a rolling pin, and a little imagination.
But more than anything, I feel like making our own Christmas ornaments is a grounding act—a quiet return to simplicity and the true heart of homemaking.
What started as a little craft project turned into one of my favorite holiday memories — just my kid and I at the kitchen table, rolling, shaping, and creating together.
Why I Love Using Air Dry Clay
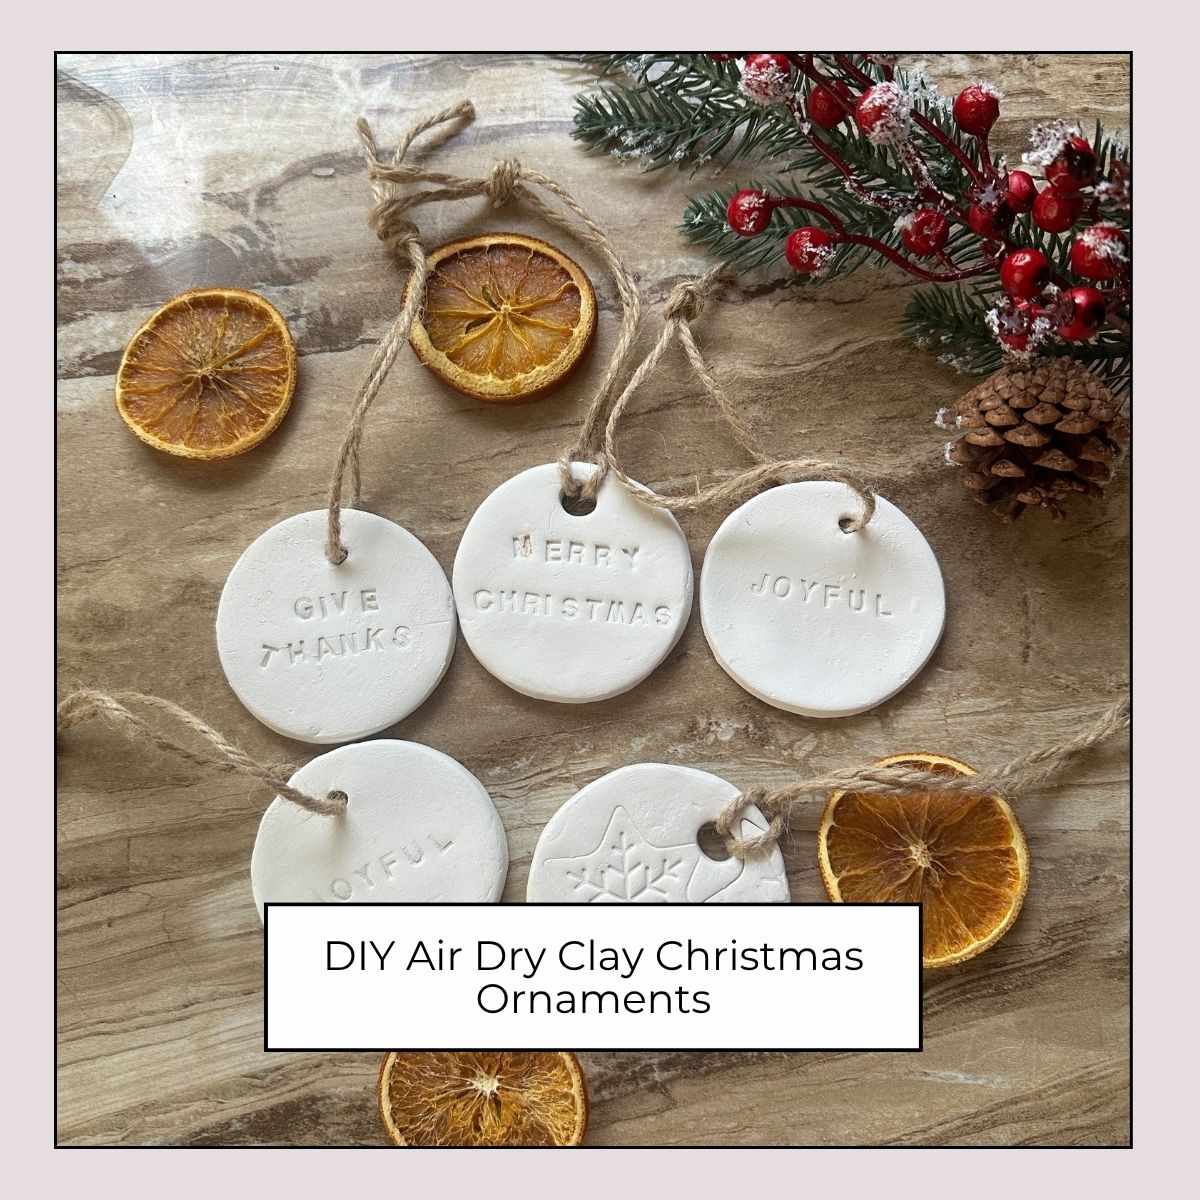
Air dry clay feels like the homesteader’s version of fine pottery. It’s natural, forgiving, and dries right on your kitchen counter. Once it hardens, you can leave it matte and organic or paint it with soft pastels, gold leaf, or even coffee stain for an antique look.
- No oven or kiln needed: It hardens naturally within a day or two.
- Safe for kids: No heat, no chemicals — just clean fun.
- Endlessly versatile: You can shape it, stamp it, paint it, and even add texture with leaves, lace, or cookie cutters.
What You’ll Need
You don’t need much to make these ornaments. Most of the materials are likely already in your kitchen or craft drawer.
Supplies:
- Air dry clay (white or natural)
- Rolling pin
- Cookie cutters (stars, hearts, trees, or circles)
- A straw or barbecue stick (for making holes)
- Baking paper or a smooth surface ( I used baking powder to keep it from sticking to the counter.
- String, twine, or ribbon
- Optional: stamps, dried herbs, lace, or paint
How to Make Air Dry Clay Ornaments
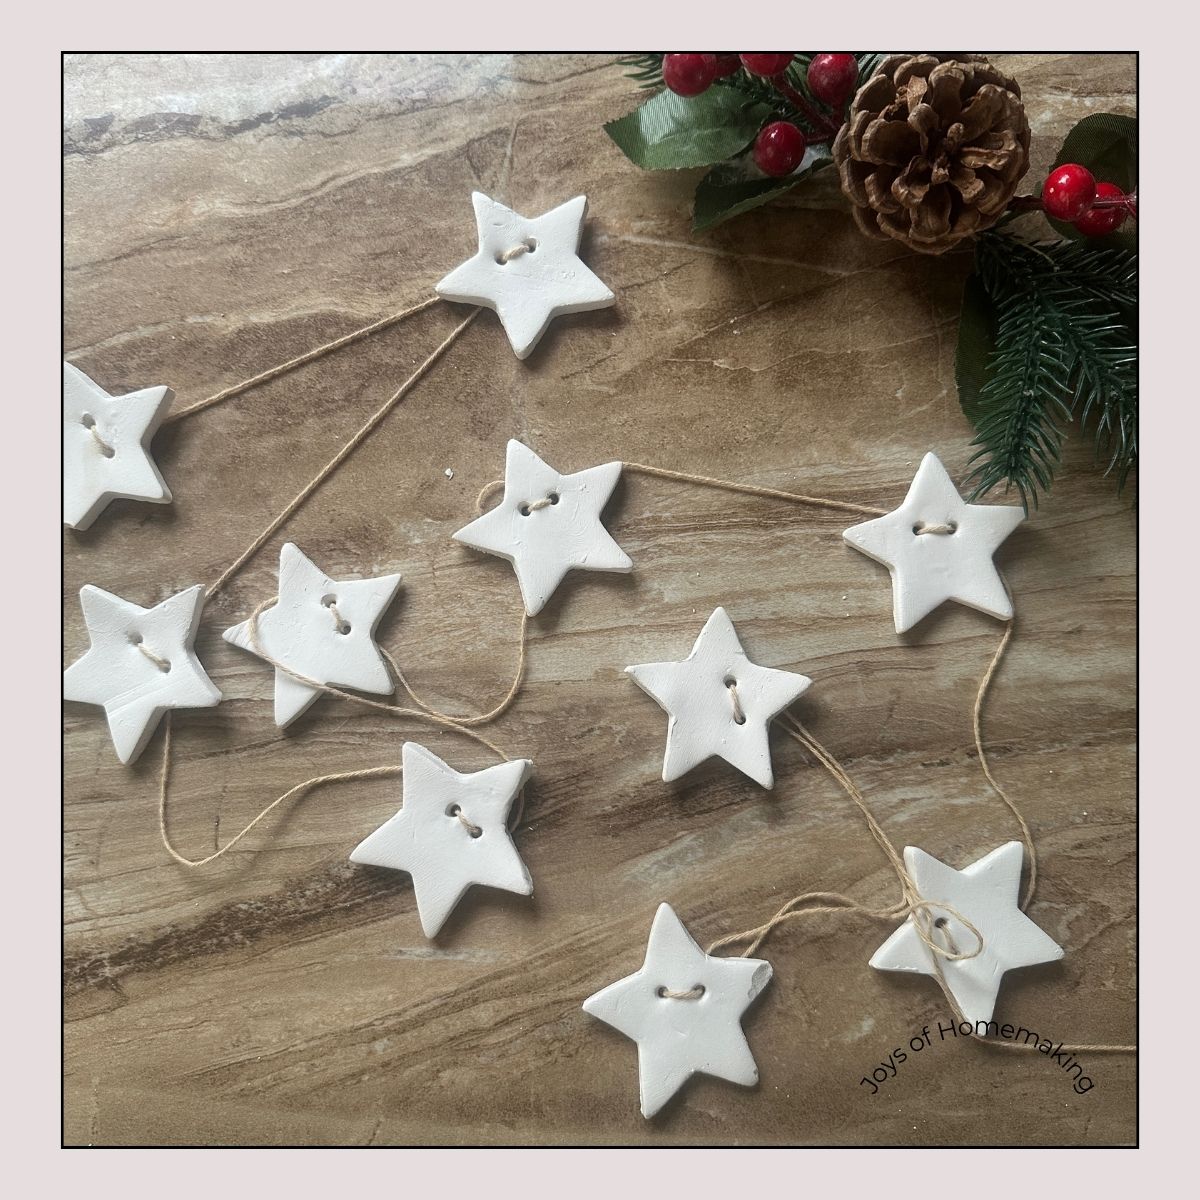
- Roll out the clay.
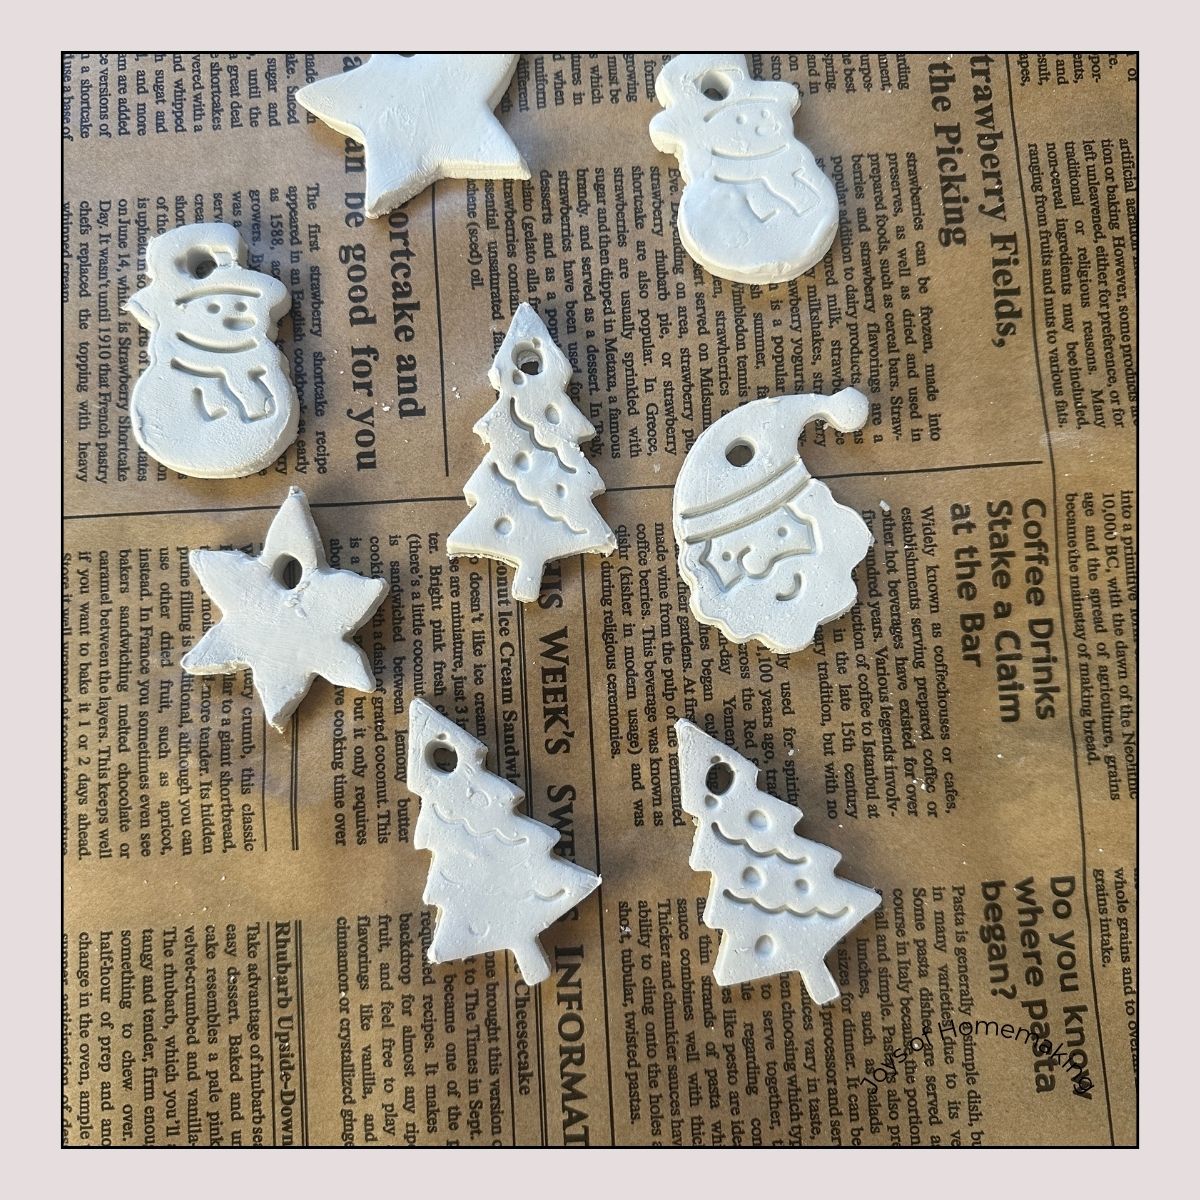
Place your clay on baking paper or a clean surface dusted with baking powder. Roll it out to about ¼ inch thick. You want it sturdy but not too heavy for hanging. - Cut out your shapes.
Use cookie cutters to make festive shapes — stars, trees, angels, or hearts. You can also use a cup or knife to make simple circles for a minimalist look. - Add texture or designs.
Press lace, leaves, or fabric gently into the clay to leave an imprint. You can also use rubber stamps or even write little messages using a toothpick. My son loved pressing pine sprigs into the clay — it left the prettiest natural pattern. - Make a hole.
Use a straw or skewer to make a small hole near the top for hanging. - Let it dry.
Lay the ornaments flat on parchment paper and let them dry for 24–48 hours, flipping halfway through. Don’t rush the drying — it helps prevent cracks. - Decorate (optional).
Once dry, you can leave them plain for a rustic, farmhouse look or paint them with acrylic paint and seal with a clear finish. I love the soft, matte look of unpainted clay with twine loops — simple and beautiful.
A Homesteader’s Touch
Homemaking, for me, has always been about more than just the things we make — it’s about how we make them. I just really love slowing down, putting the screens away, and creating something together with our hands.
The scent of cinnamon in the air, Christmas music playing softly, my son’s little hands rolling the clay beside mine — that’s the kind of memory that warms your heart long after the holidays are over.
And when we hang these ornaments on our tree, they remind me of that afternoon — not just as decorations, but as pieces of our story.
Ideas for Personalizing Your Ornaments
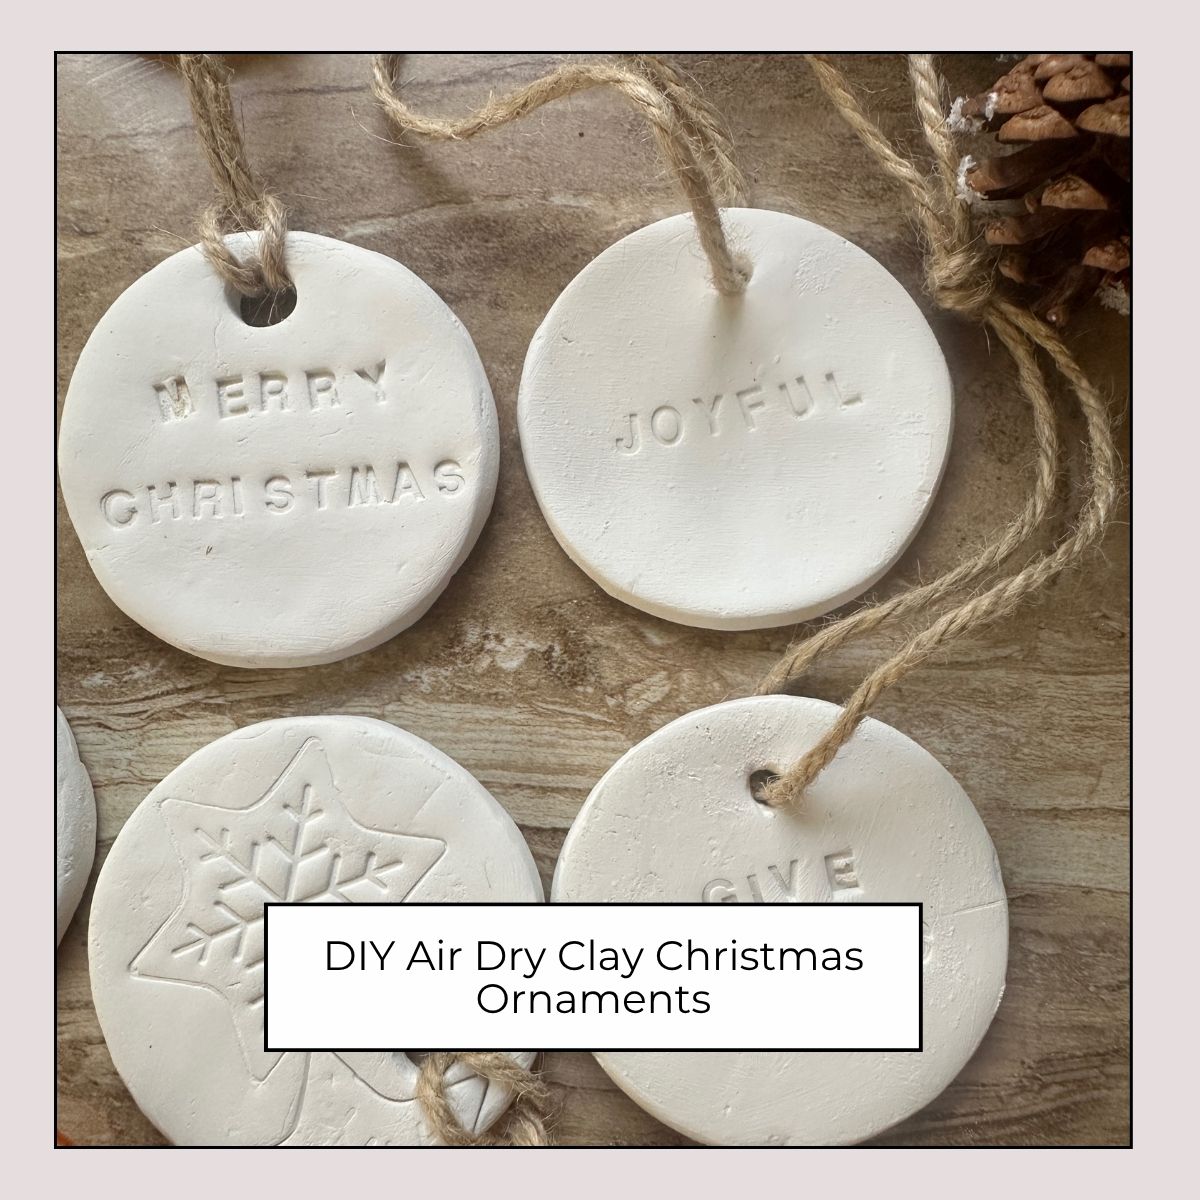
- Press your child’s handprint or fingerprints into the clay for a keepsake. It's a sweet tradition to repeat each year
- Use alphabet stamps to write words like Joy, Peace, or Love.
- Tie a sprig of rosemary or pine with your ribbon for a rustic touch.
- Make gift tags or napkin charms for your holiday table.
- Nature Impressions: Press small cedar branches, herbs, or flowers into the clay before drying. They’ll leave delicate fossil-like prints.
- Cinnamon Dust: Mix cinnamon or nutmeg into the clay for ornaments that smell like Christmas cookies.
The possibilities are endless — that’s the beauty of clay. It’s humble, yet it can hold so much meaning.
Final Thoughts
Creating your own Christmas ornaments is such a simple yet grounding way to reconnect with the heart of homemaking. All you need is a bit of air-dry clay to start shaping pieces that bring real meaning to your holiday decor.
Ready to start? Grab some clay, roll up your sleeves, and enjoy a cozy afternoon making ornaments that you’ll treasure year after year.